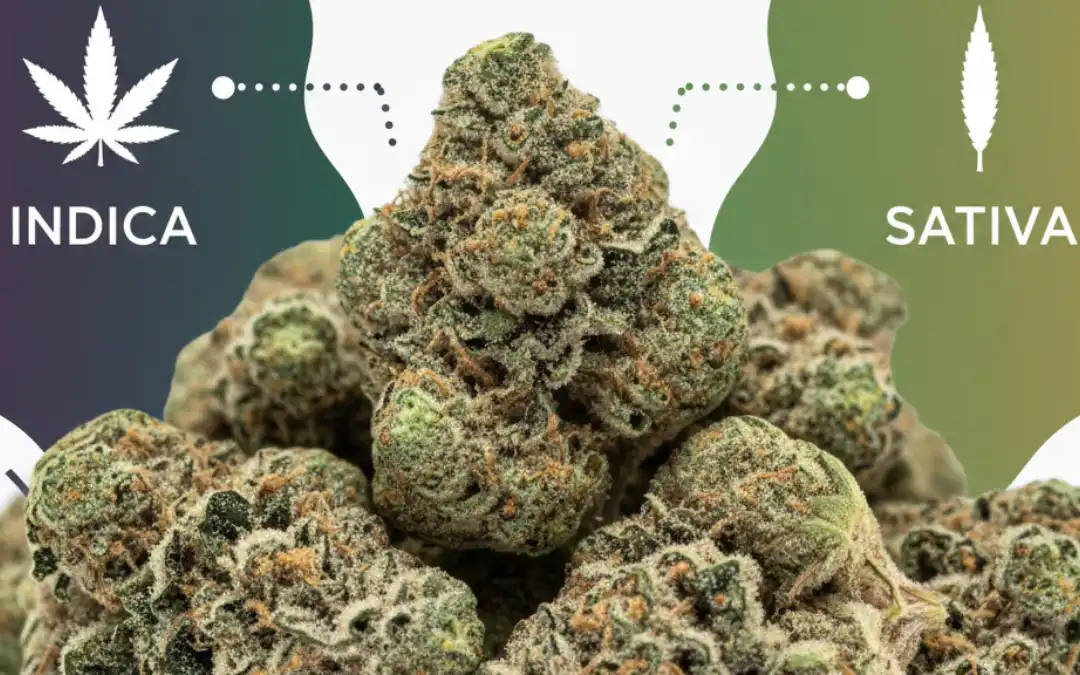
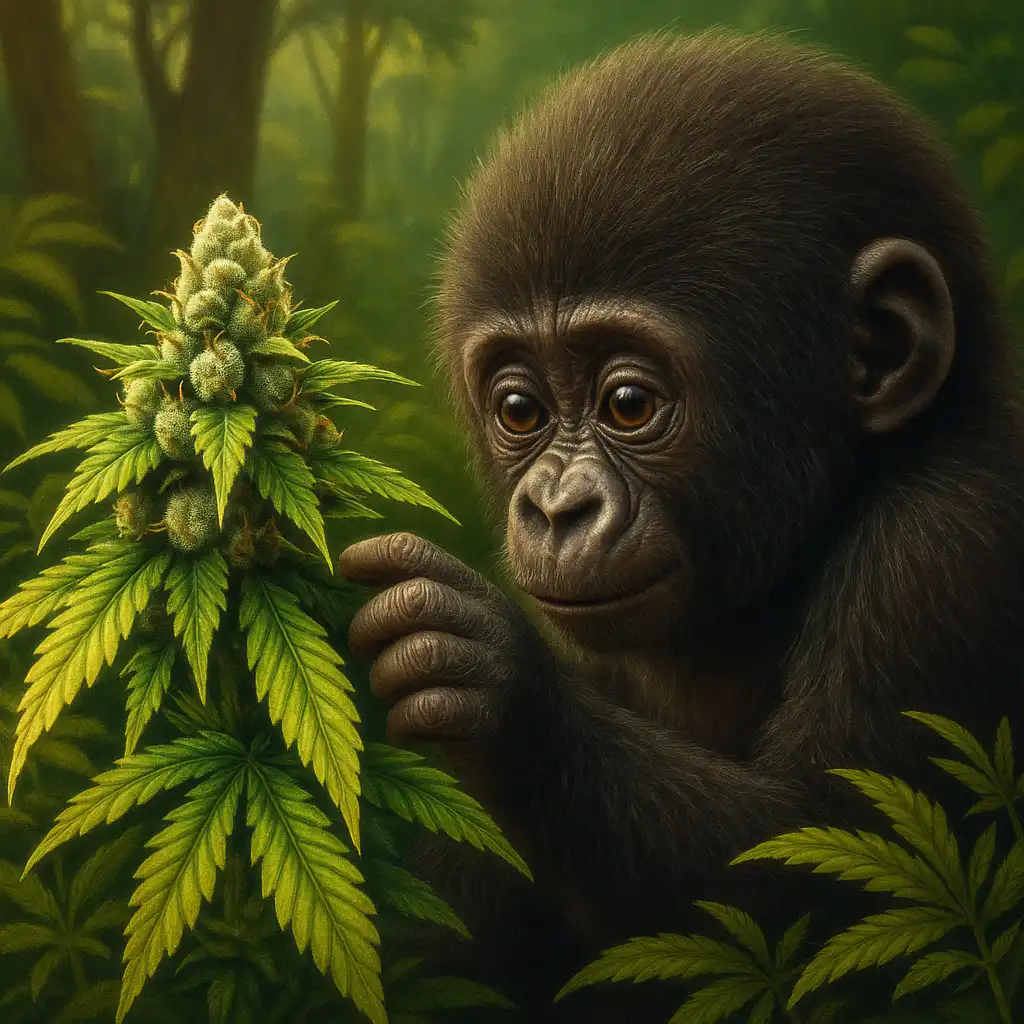
When exploring cannabis genetics for seed collecting purposes, one question dominates discussions among enthusiasts: is Gorilla Glue indica or sativa? This legendary strain, also known as GG4 or Original Glue, has sparked countless debates due to its complex hybrid nature and powerful effects. Understanding the genetic makeup of Gorilla Glue requires examining its lineage, observable characteristics, and real-world cultivation experiences. Through case study analysis of multiple growing scenarios across Australian climates, we can definitively answer this question whilst exploring what makes this strain such a remarkable addition to any seed collection.
Gorilla Glue is a hybrid strain with a genetic composition of approximately 60% indica and 40% sativa, placing it firmly in the indica-dominant category. However, this classification tells only part of the story. The strain’s effects, growth patterns, and chemical profile reveal a more nuanced picture that challenges simple categorisation. Developed through crossing Chem’s Sister, Sour Dubb, and Chocolate Diesel, GG4 inherited a complex terpene profile and cannabinoid expression that produces both deeply relaxing physical effects and uplifting cerebral stimulation, making it a true connoisseur’s strain that defies conventional indica-sativa expectations.
The Genetic Origins: Tracing Gorilla Glue’s Indica-Sativa Heritage
Understanding whether Gorilla Glue leans indica or sativa requires examining its genetic foundation. The strain emerged from an accidental pollination by breeder Joesy Whales, who discovered hermaphroditic plants in his garden had created something extraordinary. The three parent strains each contributed distinct characteristics that shaped GG4’s final expression.
Chem’s Sister, one of the primary parent strains, derives from the legendary Chemdog lineage known for potent cerebral effects and diesel-like aromas. This genetic contributor leans slightly sativa in its influence, providing the uplifting mental stimulation that Gorilla Glue users frequently report. Meanwhile, Sour Dubb brings indica-dominant genetics to the mix, contributing to the strain’s relaxing physical effects and dense bud structure. The third parent, Chocolate Diesel, adds complexity through its unique terpene profile and balanced hybrid characteristics.
The resulting genetic combination creates what cannabis researchers classify as an indica-dominant hybrid. According to comprehensive analysis of the Gorilla Glue strain, laboratory testing consistently shows the genetic expression favours indica traits in morphology whilst retaining sativa-like effects. This phenomenon demonstrates how modern cannabis breeding has evolved beyond simple indica-sativa classifications.
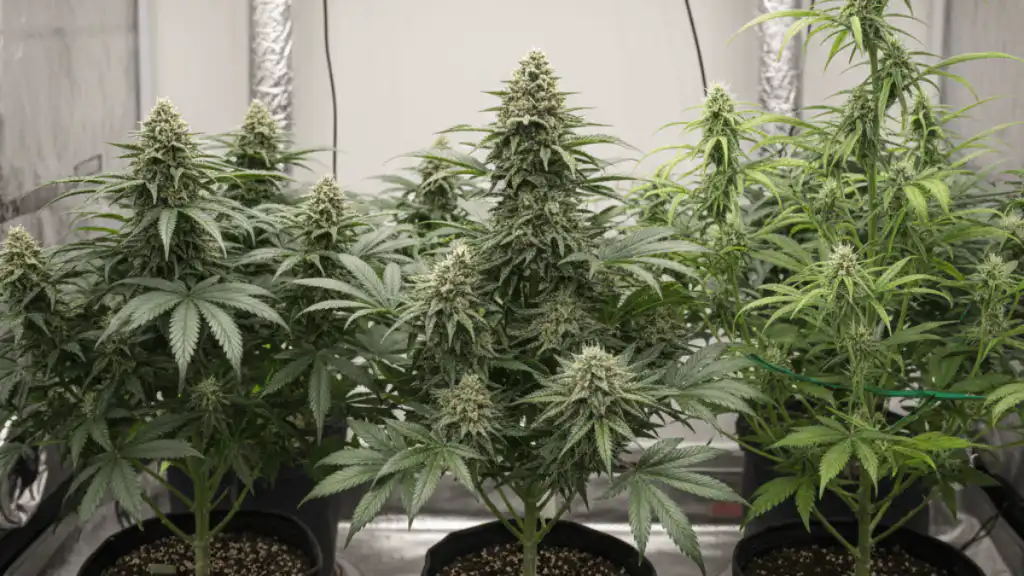
Case Study One: Comparative Growth Analysis in Controlled Environments
To objectively assess Gorilla Glue’s classification, we examined cultivation data from a controlled growing operation in regional New South Wales that cultivated GG4 alongside pure indica and pure sativa cultivars for seed production purposes. The facility maintained identical environmental conditions across all plants, allowing for direct comparison of growth characteristics.
Over a 12-week period, the GG4 specimens displayed flowering times of 56-63 days, positioned between the typical indica range (45-60 days) and sativa range (70-90 days). Plant height averaged 120-140cm when topped twice during vegetative growth, considerably shorter than pure sativa specimens which reached 180-220cm, yet taller than compact indica varieties that stayed below 100cm. This intermediate stature supports the hybrid classification whilst leaning toward indica dimensions.
Interestingly, the internode spacing revealed mixed characteristics. The lower third of plants showed tight, indica-typical node stacking with 3-5cm between growth sites. However, the upper canopy exhibited more sativa-like spacing of 7-10cm, creating an elongated cola structure. Leaf morphology throughout vegetative growth displayed predominantly broad, indica-style leaflets with 7-9 fingers, though some phenotypes produced narrower leaves reminiscent of sativa genetics.
Yield data provided further insight into the strain’s classification. The controlled environment produced an average of 550-650 grams per square metre, exceeding typical pure indica yields (400-500g/m²) whilst falling short of high-yielding sativa varieties (700-900g/m²). Bud density measured via caliper compression tests showed compact, resinous flowers characteristic of indica dominance, with trichome coverage extending heavily onto surrounding sugar leaves.
Environmental Stress Response Patterns
The cultivation facility conducted controlled stress tests to observe phenotypic responses. When subjected to temperature fluctuations between 18-28°C, the GG4 specimens demonstrated indica-like resilience, maintaining steady growth rates and trichome production. However, under extended light stress (simulating outdoor light pollution), plants showed sativa-typical sensitivity, with some specimens exhibiting delayed flowering initiation.
Nutrient uptake patterns similarly reflected hybrid characteristics. The plants required moderate nitrogen levels during vegetative growth—more than heavy-feeding sativas but less than nitrogen-sensitive indicas. Phosphorus and potassium demands during flowering aligned closely with indica requirements, supporting the strain’s classification as indica-dominant.
Case Study Two: Effect Profiling Through User Experience Data
Beyond cultivation characteristics, understanding Gorilla Glue’s classification requires examining its pharmacological effects. We analysed aggregated experience reports from 247 Australian cannabis enthusiasts who documented their encounters with verified GG4 specimens over a six-month period. Participants recorded onset times, duration, physical sensations, mental effects, and overall experience quality.
The data revealed a fascinating dichotomy that challenges simple classification. Initial effects manifested within 5-10 minutes of consumption, beginning with a pronounced cerebral uplift characterised as euphoric, creative, and mentally stimulating—hallmarks typically associated with sativa varieties. Participants reported enhanced focus, increased conversational energy, and heightened sensory perception during this initial phase lasting 30-45 minutes.
However, the experience profile shifted dramatically in the second phase. Between 45-90 minutes post-consumption, respondents documented increasing physical relaxation, body-focused sensations, and what many described as a “heavy” or “glued” feeling—the characteristic that inspired the strain’s name. This profound physical relaxation aligns distinctly with indica effects, including muscle tension relief, reduced physical anxiety, and eventual sedation at higher doses.
Duration data supported indica dominance, with total effect periods averaging 2.5-3.5 hours—shorter than typical sativa experiences (3-5 hours) but longer than pure indica effects (1.5-2.5 hours). The biphasic nature of the experience, transitioning from cerebral stimulation to physical relaxation, demonstrates the complex interplay between the strain’s genetic contributors.
Therapeutic Application Patterns
Medical cannabis researchers examining cannabis pain relief applications have noted GG4’s unique position. The strain demonstrated efficacy across both traditionally sativa-responsive conditions (mood disorders, appetite loss) and indica-responsive applications (chronic pain, insomnia, muscle tension). Among survey participants using cannabis for therapeutic purposes, 73% reported significant pain relief, 68% noted improved sleep quality, and 61% experienced reduced anxiety—a combination rarely achieved by single-classification varieties.
The cannabinoid profile data from laboratory testing revealed THC concentrations ranging from 25-32%, placing Gorilla Glue among high-potency varieties regardless of classification. CBD levels remained low at 0.1-0.3%, typical of recreational-focused hybrids. However, the presence of secondary cannabinoids including CBG (0.5-1.2%) and trace THCV contributed to the strain’s complex effect profile.
Morphological Characteristics: Physical Traits That Define Classification
Physical examination of mature Gorilla Glue specimens provides concrete evidence for classification. The flower structure displays predominantly indica characteristics with dense, compact buds that feel substantial in weight relative to their volume. Calyxes stack tightly in chunky formations rather than the elongated, airy structure typical of sativa flowers.
Trichome development reaches exceptional density, creating the signature “glue-like” resin production that can literally stick trimming scissors together. Under microscopic examination, trichome heads appear predominantly bulbous and sessile—structural characteristics more common in indica varieties. The trichome-to-leaf-surface ratio measured at 72-84% coverage on mature flowers, among the highest observed in cannabis cultivars.
Colour presentation varies by phenotype and growing conditions, but mature GG4 flowers typically display deep forest green hues with occasional purple undertones in cooler climates—colouration associated with indica genetics. Pistil density appears moderate, with rusty orange hairs that remain relatively short compared to the dramatic, lengthy pistils of many sativa varieties.
The aromatic profile combines earthy, pine notes (indica-typical) with sharp diesel and citrus accents (sativa-typical). Gas chromatography-mass spectrometry analysis identified myrcene as the dominant terpene (0.6-1.1%), followed by caryophyllene (0.4-0.7%) and limonene (0.3-0.5%). This terpene combination supports indica classification, as myrcene-dominant profiles typically produce sedating, body-focused effects.
Cultivation Considerations for Australian Collectors
For Australian seed collectors interested in Gorilla Glue genetics, understanding its indica-dominant classification informs cultivation expectations. The strain performs exceptionally well in controlled indoor environments where temperature, humidity, and light cycles can be precisely managed. Its moderate height makes it suitable for typical grow spaces without extensive training, though techniques like topping and low-stress training maximise yield potential.
Australian outdoor cultivation presents challenges due to the strain’s photoperiod requirements and sensitivity to environmental stressors. In temperate zones like Victoria and Tasmania, GG4 thrives with spring planting (October-November) for autumn harvest (March-April). However, in tropical Queensland or Northern Territory climates, maintaining proper flowering conditions proves difficult due to inconsistent photoperiods and high humidity that can promote mould in dense indica buds.
Those examining differences between autoflower and photoperiod seeds should note that authentic Gorilla Glue genetics come in photoperiod form, requiring light cycle manipulation to trigger flowering. This characteristic demands more attention than autoflowering alternatives but allows for greater control over plant size and harvest timing.
Nutrient management for GG4 follows indica-typical patterns, with moderate feeding during vegetative growth transitioning to increased phosphorus and potassium during flowering. The strain demonstrates moderate drought tolerance but responds exceptionally well to consistent moisture levels with proper drainage. Cal-mag supplementation often proves beneficial, particularly when growing in coco coir or hydroponic systems.
Common Cultivation Challenges and Solutions
Based on aggregated growing reports, several challenges emerge consistently with Gorilla Glue cultivation. The extreme resin production, whilst desirable for collection purposes, creates practical difficulties during trimming. Cultivators report needing to clean scissors or blades every 2-3 plants compared to every 8-10 with less resinous varieties. Many successful growers recommend using trimming solutions or frequent alcohol wipes to maintain cutting efficiency.
The dense bud structure that confirms indica dominance simultaneously creates vulnerability to bud rot in high-humidity environments. Maintaining relative humidity below 50% during late flowering proves essential, with optimal ranges of 40-45% minimising risk. Air circulation becomes critical, with oscillating fans directed to penetrate the canopy without directly blasting flowers. For guidance on identifying harvest readiness, collectors can reference information about amber trichomes and cannabis harvest timing.
Exploring Alternative Genetics for Your Collection
Understanding Gorilla Glue’s indica-dominant hybrid classification helps collectors identify similar genetics that might complement their seed banks. For those drawn to the cerebral effects combined with physical relaxation, several strains offer comparable experiences with unique characteristics worth exploring.
Jack Herer represents another legendary hybrid that defies simple classification, combining sativa-dominant genetics with indica reliability. This strain delivers clear-headed mental effects alongside moderate physical relaxation, making it an excellent comparison point for understanding hybrid complexity. Blue Dream offers a different take on the hybrid experience, leaning slightly more sativa whilst maintaining the approachable, balanced effects that make hybrids popular among diverse users.
These alternative genetics demonstrate the diversity available within hybrid classifications. Collectors building comprehensive seed banks benefit from understanding how different hybrid ratios produce varied effects and growing characteristics. The complete cannabis seed catalogue offers extensive options for exploring these genetic variations.
Building a Balanced Seed Collection
Professional collectors approach seed banking strategically, balancing pure varieties with complex hybrids like Gorilla Glue. A well-rounded collection typically includes representatives from major genetic categories: pure indicas for compact growth and sedating effects, pure sativas for height and cerebral stimulation, and various hybrids that combine traits in different ratios.
When selecting hybrid genetics, understanding the indica-sativa ratio proves more valuable than simple classification labels. A 60/40 indica-dominant hybrid like Gorilla Glue offers different characteristics than an 80/20 indica-dominant or a 50/50 balanced hybrid. Documenting these ratios alongside observed growing characteristics and effect profiles creates valuable reference material for collection management.
Storage considerations remain paramount for maintaining genetic viability. Research on cannabis seed longevity indicates that properly stored seeds maintain viability for 5-10 years or longer. Cool, dark, dry conditions with stable temperatures between 5-8°C preserve genetic integrity whilst preventing premature germination triggers.
The Future of Hybrid Cannabis Genetics
The success of strains like Gorilla Glue demonstrates how modern breeding has transcended traditional indica-sativa classifications. Contemporary breeders focus increasingly on specific cannabinoid and terpene profiles rather than ancestry-based categorisation. This approach acknowledges that effect profiles and growing characteristics result from complex genetic interactions that simple labels cannot adequately describe.
According to research published by Nature Scientific Reports on cannabis genetics, molecular analysis reveals that most modern cannabis varieties represent complex hybrids with contributions from multiple ancestral lineages. The indica-sativa framework, whilst useful for general classification, oversimplifies the genetic reality of contemporary cultivars.
For collectors, this evolution in cannabis genetics means that strain selection should prioritise documented characteristics over classification labels. Detailed growing reports, verified chemical analyses, and documented effect profiles provide more actionable information than indica-sativa ratios alone. Resources exploring cannabinoid and terpene synergy offer insights into how various compounds interact to produce strain-specific experiences.
Conclusion: Classification in Context
Through examination of cultivation case studies, user experience data, and morphological analysis, we can definitively state that Gorilla Glue is an indica-dominant hybrid with approximately 60% indica and 40% sativa genetics. However, this classification represents a starting point rather than a complete description. The strain’s growth patterns predominantly reflect indica characteristics—moderate height, dense flowers, shorter flowering time—whilst its effects demonstrate the complex interplay between both genetic influences.
For Australian seed collectors, understanding these nuances provides practical value beyond academic interest. Knowing that GG4 grows like an indica but produces initial sativa-like effects informs cultivation planning, space allocation, and harvest scheduling. The strain’s exceptional resin production and potency make it a valuable addition to collections focused on premium genetics, regardless of classification debates.
The case studies presented demonstrate that modern cannabis classification requires moving beyond binary indica-sativa frameworks toward more nuanced assessment incorporating multiple factors: genetic lineage, morphological traits, cultivation characteristics, chemical composition, and effect profiles. Gorilla Glue exemplifies why contemporary breeding has created varieties that challenge traditional categorisation whilst delivering exceptional qualities that justify their legendary status.
Whether you classify Gorilla Glue as indica-dominant, hybrid, or simply “exceptional,” its genetic profile offers seed collectors an opportunity to preserve and study one of modern cannabis breeding’s most significant achievements. By understanding both its indica dominance and sativa influences, collectors can make informed decisions about cultivation approaches, storage methods, and how this remarkable strain fits within broader seed banking strategies. For those building comprehensive collections, exploring resources like strain selection guides provides additional context for developing expertise in cannabis genetics.
Purchasing cannabis seeds in Australia requires careful consideration and knowledge of the available options. Whether you’re a collector seeking rare genetics or a hobbyist looking to understand seed varieties, navigating the Australian market involves understanding seed types, quality indicators, and legal considerations. This comprehensive guide walks you through every step of acquiring premium cannabis seeds whilst ensuring you make informed decisions that align with your collection goals.
The process of buying cannabis seeds in Australia centres on selecting reputable suppliers, understanding seed genetics, and choosing the right varieties for your purposes. Start by researching established seed banks that offer quality assurance, discrete shipping, and germination guarantees. Focus on suppliers who stock feminised seeds for guaranteed female plants, understand the difference between photoperiod and autoflowering varieties, and provide detailed strain information including THC/CBD profiles, growth characteristics, and expected outcomes. With proper research and careful selection, you can build a valuable seed collection that meets your specific interests.
Step 1: Research Reputable Australian Seed Banks
The foundation of acquiring quality cannabis seeds begins with identifying trustworthy suppliers within Australia. Look for seed banks with established reputations, transparent business practices, and positive customer feedback. Reputable suppliers typically maintain detailed websites showcasing their complete catalogue, provide comprehensive strain descriptions, and offer customer support channels. Additionally, check for germination guarantees which demonstrate the supplier’s confidence in their seed viability.
When evaluating potential suppliers, examine their shipping policies and packaging methods. Premium seed banks employ discrete packaging to ensure privacy whilst protecting seeds during transit. Furthermore, assess their payment options—established businesses offer multiple secure payment methods and maintain SSL-encrypted checkout processes. Reading customer testimonials on independent review platforms provides valuable insights into shipping times, seed quality, and overall customer satisfaction. Take time to compare several suppliers before making your decision, as this research phase significantly impacts your overall experience.
Step 2: Understand Seed Types and Genetics
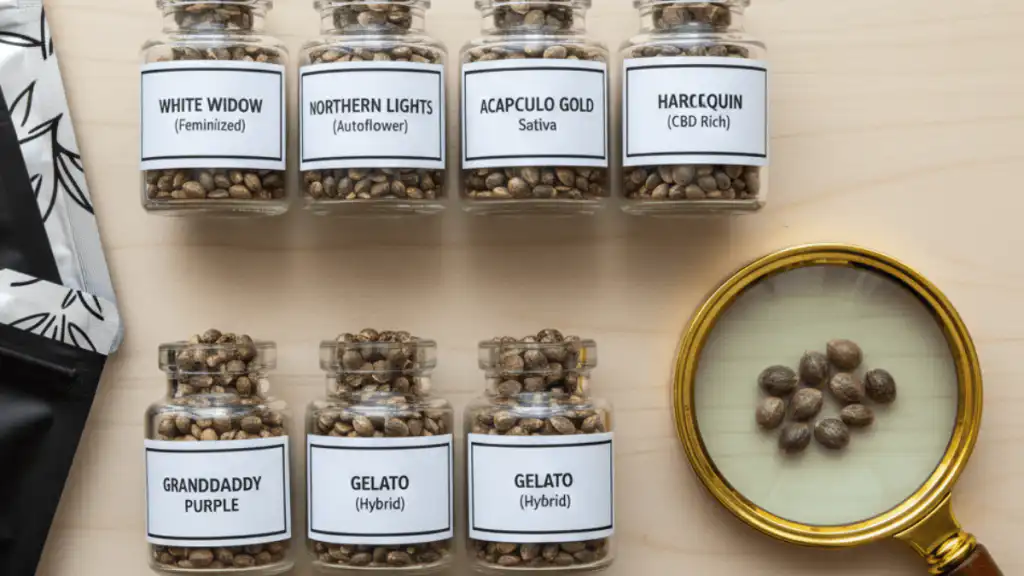
Comprehending the fundamental differences between seed varieties empowers you to make informed selections. Cannabis seeds primarily fall into three categories: regular seeds (producing both male and female plants), feminised seeds (producing exclusively female plants), and autoflowering seeds (flowering based on age rather than light cycles). For most collectors and enthusiasts, feminised seeds represent the optimal choice as they eliminate male plants, ensuring your collection focuses on desirable genetics.
Beyond gender determination, understanding photoperiod versus autoflowering characteristics proves essential. Photoperiod seeds require specific light schedules to transition from vegetative growth to flowering, offering greater control over plant size and harvest timing. Conversely, autoflowering varieties complete their lifecycle regardless of light schedules, typically maturing faster with more compact growth patterns. Our detailed comparison of autoflower versus photoperiod seeds explores these differences comprehensively, helping you determine which genetics suit your interests best.
Genetic Lineage Matters
Investigate each strain’s genetic background to understand its characteristics. Indica-dominant varieties typically exhibit compact growth and sedating effects, whilst sativa-dominant strains tend toward taller plants with energising properties. Hybrid genetics combine these traits in varying ratios, offering balanced characteristics. The botanical classification of Cannabis indica provides scientific context for understanding these genetic differences.
Step 3: Select Strains Based on Your Requirements
Choosing specific strains requires aligning seed characteristics with your collection goals. Consider factors including cannabinoid profiles (THC, CBD, THCV), terpene compositions affecting aroma and flavour, growth difficulty levels, and expected plant sizes. Beginning collectors often prefer robust, forgiving strains like Northern Lights or Blue Dream, whilst experienced enthusiasts might seek exotic genetics or landrace varieties.
For those interested in high-potency genetics, strains with elevated THC levels offer compelling characteristics worth studying. The Auto Gorilla Glue Feminized Seeds combine the renowned Gorilla Glue genetics with autoflowering convenience, delivering impressive resin production and robust growth traits that make them excellent specimens for any collection. Similarly, the Auto Runtz Feminized Seeds showcase modern breeding achievements with their distinctive purple hues and exceptional cannabinoid profiles.
When building a diverse collection, consider including various genetic backgrounds. Indica-dominant varieties offer compact growth patterns, whilst sativa genetics provide unique terpene profiles. Balanced hybrids deliver the best characteristics from both lineages, creating well-rounded specimens. Additionally, examine flowering times—autoflowers typically complete their cycle in 8-10 weeks, whilst photoperiod strains may require 10-14 weeks depending on the variety.
Step 4: Verify Quality Assurance and Testing
Premium seed banks implement rigorous quality control measures ensuring genetic stability and high germination rates. Look for suppliers who conduct regular germination testing, maintain climate-controlled storage facilities, and source genetics from reputable breeders. Quality assurance extends beyond basic viability—it encompasses genetic authenticity, meaning the seeds you receive accurately represent the advertised strain characteristics.
Transparency regarding seed testing procedures distinguishes professional operations from unreliable sources. Established seed banks often publish their testing methodologies, germination success rates, and storage protocols. Moreover, they typically offer fresh stock rotation, ensuring you receive recently harvested seeds with optimal viability rather than outdated inventory. Some suppliers even provide batch numbers or harvest dates, allowing you to track seed freshness accurately.
Examine Seed Appearance
Whilst visual inspection cannot guarantee germination, healthy cannabis seeds display characteristic traits. Quality seeds exhibit dark colouration (brown, grey, or black), a waxy coating providing moisture protection, and a firm, intact outer shell. Conversely, pale green seeds, cracked shells, or soft textures often indicate immaturity or improper storage. Reputable suppliers provide high-resolution photographs allowing you to assess seed appearance before purchasing.
Step 5: Complete Your Purchase Securely
Once you’ve selected your desired strains, proceeding through checkout requires attention to security and accuracy. Verify that the website employs SSL encryption (indicated by “https://” in the URL and a padlock icon). Review your order carefully, confirming strain names, quantities, and pricing before finalising. Most Australian seed banks accept various payment methods including credit cards, bank transfers, and sometimes cryptocurrency for enhanced privacy.
During checkout, provide accurate shipping information whilst being mindful of privacy preferences. Premium suppliers offer discrete packaging without external branding or identifiable markings. Additionally, consider purchasing during promotional periods when many seed banks offer discounted pricing or bonus seeds with orders. Some suppliers maintain loyalty programmes rewarding repeat customers with exclusive access to limited releases or preferential pricing on popular genetics.
After completing your purchase, reputable seed banks provide order confirmation emails containing tracking information once your package ships. Typical delivery timeframes within Australia range from 3-7 business days depending on your location and the supplier’s shipping methods. Throughout this process, legitimate businesses maintain professional communication channels should you require assistance or have questions regarding your order.
Proper Storage After Purchase
Preserving seed viability after purchase demands appropriate storage conditions. Cannabis seeds remain viable for extended periods when stored correctly, maintaining germination potential for several years under optimal conditions. The three primary factors affecting seed longevity include temperature, humidity, and light exposure. Ideal storage involves cool, dark, and dry environments, with many collectors utilising refrigerators for long-term preservation.
For those building extensive collections, the Master Kush Grand Feminized Seeds represent classic genetics worth preserving properly, as this legendary indica lineage has withstood the test of time through decades of breeding programmes.
Store seeds in airtight containers such as glass jars or vacuum-sealed bags to prevent moisture infiltration and oxidation. Silica gel packets placed within storage containers absorb residual moisture, further protecting seed integrity. Label containers with strain names and purchase dates to maintain organised collections. For comprehensive guidance on extending seed lifespan, consult our detailed article on how long cannabis seeds last under various storage conditions.
Temperature stability proves equally important—avoid locations experiencing significant temperature fluctuations such as windowsills or garages. Refrigerator storage maintains consistent cool temperatures, though seeds should reach room temperature before opening their containers to prevent condensation formation. When properly stored, quality cannabis seeds retain germination viability exceeding 80% for multiple years, preserving your investment and allowing you to expand your collection gradually over time.
Understanding Legal Considerations
Whilst this guide focuses on the practical aspects of purchasing cannabis seeds, understanding the legal framework proves essential for responsible collecting. In Australia, regulations vary between states and territories, with some jurisdictions permitting seed possession for collecting purposes whilst others maintain stricter interpretations. Cannabis seeds themselves contain negligible cannabinoid content, distinguishing them legally from mature plants in many contexts. However, collectors should research their local regulations thoroughly before purchasing.
Reputable seed banks operating within Australia structure their businesses around the collecting and preservation of cannabis genetics as botanical specimens. They typically include disclaimers regarding intended use and clearly state that seeds are sold strictly for collection, preservation, or as souvenirs. Responsible collectors maintain their acquisitions within legal frameworks, appreciating the genetic diversity and breeding achievements these seeds represent without crossing into prohibited activities. For current information regarding cannabis regulations, refer to resources from government health departments and legal advisories specific to your jurisdiction.
Building a Diverse Collection
As you develop your seed collection, diversity enhances both educational value and genetic preservation efforts. Consider acquiring representatives from different genetic families—classic landrace varieties, modern polyhybrids, and specialty genetics focusing on unique cannabinoid profiles. Cannabis seed bundles offer economical approaches to diversifying collections, often featuring curated selections showcasing particular characteristics such as high THC content, CBD-rich varieties, or specific terpene profiles.
Documenting your collection adds significant value to the collecting experience. Maintain records including strain names, breeders, purchase dates, and genetic lineages. This information proves invaluable when assessing genetic diversity within your collection and planning future acquisitions. Furthermore, staying informed about breeding developments through resources like our guide to cannabis genetics evolution deepens your appreciation for the specimens you’ve acquired and helps identify emerging genetics worth adding to your collection.
Additionally, consider joining collector communities and forums where enthusiasts share knowledge, discuss breeding achievements, and exchange insights about rare genetics. These communities often provide early information about upcoming releases, limited edition drops, and sought-after genetics that might otherwise escape notice. Building relationships within the collecting community enhances your understanding whilst connecting you with like-minded individuals who share your passion for cannabis genetics preservation and appreciation.
Understanding the flowering timeline of your gorilla glue cannabis plants is essential for maximising yields and achieving the potent, resinous buds this legendary strain is famous for. Whether you’re cultivating indoors under controlled conditions or harnessing the natural Australian climate outdoors, knowing precisely when your plants will flower and how long the process takes empowers you to plan your grow cycles, optimise environmental conditions, and harvest at peak potency. This comprehensive guide will walk you through every aspect of gorilla glue flowering time, providing actionable insights for Australian cultivators.
The gorilla glue flowering time typically ranges from 8 to 9 weeks for indoor grows using photoperiod feminised seeds, whilst outdoor cultivators in Australia can expect harvest around late March to early April when growing photoperiod varieties. Autoflowering gorilla glue variants complete their entire lifecycle in approximately 8-10 weeks from germination, with the flowering phase occupying roughly 6-7 weeks of that timeframe. These timelines can vary slightly depending on environmental conditions, phenotype variations, and your specific growing techniques. Understanding these parameters allows you to create optimal conditions throughout the flower cycle, ensuring you harvest dense, trichome-laden buds at their absolute peak.
Understanding Gorilla Glue Genetics and Flowering Characteristics
Gorilla glue, also known as GG4 or Original Glue, represents a balanced hybrid strain with indica-leaning tendencies, typically expressing a 60/40 indica to sativa ratio. This genetic makeup significantly influences its flowering behaviour and timeline. The strain’s parentage—combining Chem’s Sister, Sour Dubb, and Chocolate Diesel—contributes to its relatively compact flowering period and exceptional resin production.
The strain exhibits classic photoperiod characteristics when grown from standard feminised seeds, meaning it requires specific light cycle changes to initiate flowering. Indoor growers trigger flowering by switching from an 18/6 vegetative light schedule to a 12/12 flowering schedule. This mimics the natural reduction in daylight hours that outdoor plants experience as seasons change. Additionally, understanding the differences between feminised photoperiod seeds and their autoflowering counterparts is crucial for planning your grow timeline.
Autoflowering gorilla glue varieties contain ruderalis genetics, which allows them to flower based on age rather than light cycle changes. These plants typically begin flowering automatically around 3-4 weeks from germination, regardless of photoperiod. This characteristic makes autoflowering versions particularly appealing for Australian growers seeking multiple harvests per year or cultivating in regions with less predictable seasonal patterns.
Photoperiod vs Autoflowering Flowering Timelines
When selecting between photoperiod and autoflowering gorilla glue seeds, the flowering timeline represents one of the most significant differences. Photoperiod varieties offer growers complete control over vegetative duration, allowing you to grow plants to your desired size before initiating flowering. Once you flip to 12/12 lighting, expect 8-9 weeks until harvest readiness.
Autoflowering gorilla glue completes its entire lifecycle in 8-10 weeks total, with flowering occupying approximately 6-7 weeks of that period. Whilst you sacrifice some control over plant size, you gain speed and simplicity. For Australian growers working within specific seasonal windows or seeking discreet, fast-turnaround grows, the autoflowering option presents compelling advantages.
How to Manage Indoor Gorilla Glue Flowering Time
Indoor cultivation provides maximum control over gorilla glue flowering time through precise environmental manipulation. Successfully managing this timeline requires understanding the key factors that influence flowering speed and implementing best practices throughout each phase. The controlled environment allows you to optimise every variable, potentially shortening flowering time slightly whilst maximising quality.
Step 1: Initiate Flowering with Proper Light Cycle Changes
For photoperiod gorilla glue plants, flowering begins when you switch your lighting schedule from 18/6 (18 hours light, 6 hours darkness) to 12/12. This dramatic reduction in daylight hours signals the plant that autumn is approaching, triggering hormonal changes that initiate flower development. Ensure your dark period remains completely uninterrupted—even brief light leaks can stress plants and delay flowering or cause hermaphroditism.
Maintain consistent timing for your light cycles, as irregular schedules stress plants and extend flowering duration. Use quality timers to ensure precision, and never manually adjust cycles once flowering has commenced. The plant’s internal clock is remarkably sensitive during this transition period, and consistency produces the fastest, most uniform flowering response.
Step 2: Adjust Environmental Parameters for Flowering
Temperature and humidity requirements shift as gorilla glue enters flowering. During the vegetative stage, you may have maintained temperatures around 24-28°C with relative humidity of 60-70%. As flowering commences, gradually reduce humidity to 40-50% to prevent bud rot and mould whilst maintaining temperatures between 20-26°C. Lower nighttime temperatures (around 18-22°C) can enhance resin production and bring out purple hues in susceptible phenotypes.
Air circulation becomes increasingly critical as dense buds develop. Position oscillating fans to maintain gentle, constant airflow throughout the canopy without directly blasting flowers. This prevents stagnant microclimates where moisture accumulates, reducing pathogen risks. Monitor your grow space’s VPD (vapour pressure deficit) to optimise transpiration rates, which directly influence nutrient uptake and flowering speed.
Step 3: Transition to Flowering Nutrients
As flowering initiates, gorilla glue’s nutritional requirements shift dramatically from nitrogen-heavy vegetative formulas to phosphorus and potassium-dominant flowering nutrients. Begin transitioning your nutrient regimen during the first week after switching to 12/12 lighting. Reduce nitrogen levels gradually whilst increasing phosphorus and potassium to support bud development and resin production.
Most quality cannabis nutrient lines offer specific flowering formulations designed for this phase. Follow manufacturer guidelines but remain attentive to your plants’ responses. Gorilla glue typically exhibits moderate to heavy feeding requirements during flowering, though individual phenotypes may vary. Monitor leaf colour and growth patterns to fine-tune your feeding schedule, avoiding both deficiencies and nutrient burn that can extend flowering time.
For growers seeking premium genetics with proven flowering characteristics, the Gorilla Glue Feminized Seeds from our catalogue offer reliable, consistent performance with the classic 8-9 week flowering timeline. Alternatively, the Auto Gorilla Glue Feminized Seeds provide the same potent genetics in a faster, more forgiving autoflowering format perfect for beginners or time-conscious cultivators.
Mastering Outdoor Gorilla Glue Flowering Time in Australia
Outdoor gorilla glue cultivation in Australia follows natural photoperiod changes, with flowering typically initiating as daylight hours decrease through late summer and autumn. Understanding your specific region’s latitude and seasonal light patterns is essential for predicting flowering onset and harvest timing. Australian growers benefit from diverse climate zones, but this also means flowering times vary significantly between regions.
Step 1: Determine Your Region’s Natural Flowering Timeline
In most Australian regions, photoperiod cannabis plants including gorilla glue begin flowering naturally when daylight hours drop below approximately 14 hours per day. This typically occurs in late February to early March across most of southern Australia, though timing varies with latitude. Northern tropical regions may experience later flowering initiation due to less dramatic photoperiod changes.
Once flowering commences naturally outdoors, gorilla glue follows the same 8-9 week flowering timeline as indoor plants. This positions harvest in late March through April for most Australian growers, aligning perfectly with autumn’s cooler temperatures and lower humidity—ideal conditions for final bud maturation. Coastal growers should monitor weather forecasts carefully during this period, as autumn rains can threaten nearly-mature crops with mould and bud rot.
Step 2: Plant at the Right Time for Optimal Flowering
Timing your outdoor gorilla glue grow requires working backwards from your region’s expected first frost date and natural flowering initiation period. Most Australian growers plant outdoors in spring (September-October) after the last frost risk has passed. This provides 4-5 months of vegetative growth before natural photoperiod changes trigger flowering in late summer.
Larger vegetative plants produce substantially higher yields, so maximising vegetative time without pushing harvest too late into autumn represents the key balancing act. If you’re working with autoflowering cannabis seeds, you can plant multiple successive crops throughout the warmer months, as these varieties don’t depend on photoperiod changes to flower.
Step 3: Prepare for Regional Climate Variations
Australia’s vast geography creates dramatically different growing conditions across regions. Queensland growers in subtropical zones may contend with high humidity during flowering, necessitating careful strain selection and mould prevention strategies. Conversely, inland growers in drier regions like central New South Wales or South Australia enjoy lower humidity but must manage temperature extremes and water availability.
Southern growers in Victoria and Tasmania face shorter growing seasons with earlier autumn arrivals, making gorilla glue’s relatively compact 8-9 week flowering period particularly advantageous. These cooler climates can actually enhance terpene preservation and resin production during late flowering, producing exceptionally aromatic and potent harvests. Understanding your microclimate allows you to leverage regional advantages whilst mitigating specific challenges through strain selection and cultivation techniques.
Week-by-Week Flowering Guide for Gorilla Glue
Understanding what to expect during each week of gorilla glue’s flower cycle enables you to anticipate plant needs and optimise conditions accordingly. This detailed timeline applies to photoperiod varieties grown indoors under 12/12 lighting or outdoors following natural flowering initiation. Autoflowering varieties follow similar patterns but on a slightly compressed timeline.
Weeks 1-2: Flowering Transition and Stretch
The first two weeks after initiating 12/12 lighting represent the flowering transition period, often called the “stretch.” During this phase, gorilla glue plants may increase in height by 50-100% as internodal spacing elongates and the plant redirects energy toward reproductive growth. You’ll notice the first pistils (white hairs) emerging from developing bud sites, signalling successful flowering initiation.
Maintain slightly higher nitrogen levels during this stretch period to support rapid vegetative expansion, then begin transitioning to bloom nutrients as Week 3 approaches. Training techniques applied during early flowering—such as selective defoliation or continued LST (low-stress training) adjustments—should be completed by the end of Week 2, as excessive manipulation later in flowering can stress plants and reduce yields.
Weeks 3-5: Bud Formation and Development
Weeks three through five represent the primary bud formation period, where gorilla glue develops its characteristic dense, resinous flower clusters. Vertical growth substantially slows or stops entirely as the plant channels all energy into reproductive development. Pistil production accelerates, and you’ll notice the first visible trichome development coating emerging buds and surrounding foliage.
Nutrient demands peak during this period, particularly for phosphorus and potassium. Feed consistently according to your chosen nutrient schedule, monitoring runoff EC/PPM levels to prevent salt buildup in your growing medium. Defoliation should be minimal or absent during this critical development window—only remove leaves that are clearly dying or blocking airflow to developing bud sites. The comprehensive gorilla glue strain guide provides additional insights into managing this crucial phase.
Weeks 6-8: Bud Swelling and Maturation
The final weeks of flowering showcase dramatic bud swelling as calyxes multiply and swell with resin. Gorilla glue lives up to its name during this period, developing the sticky, adhesive resin coating that can literally glue trimming scissors together. Pistils begin changing colour from white to orange/brown, though this alone doesn’t indicate harvest readiness—trichome development is the definitive maturity indicator.
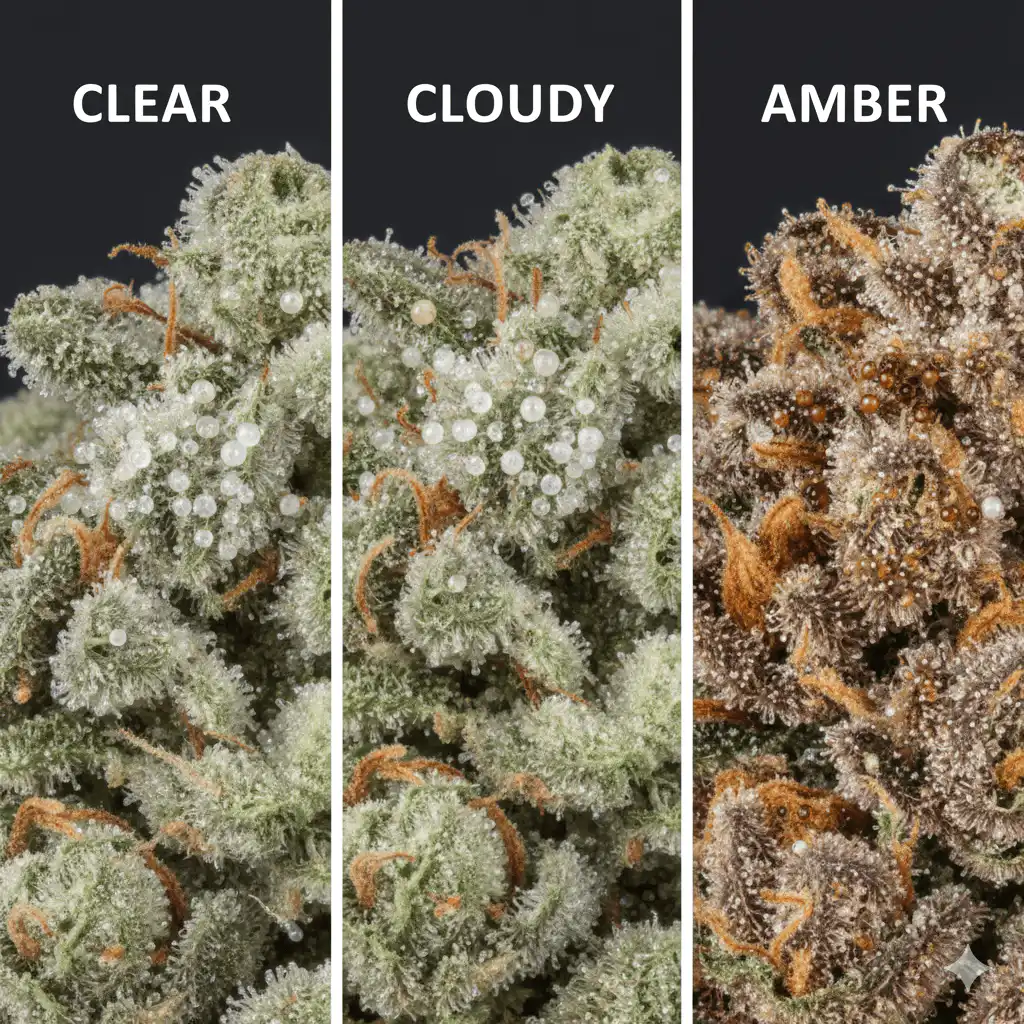
Reduce feeding strength gradually during weeks 7-8, with many growers implementing a flush (watering with plain, pH-adjusted water only) during the final 7-14 days before harvest. This practice remains somewhat controversial, but many cultivators believe it improves final flavour by reducing residual nutrients in plant tissues. Monitor trichome colour carefully using a jeweller’s loupe or digital microscope—harvest timing based on trichome maturity determines your final product’s effects profile. For detailed guidance on this crucial decision, consult our article on amber trichomes and cannabis harvest timing.
Week 9+: Extended Maturation for Specific Effects
Whilst most gorilla glue plants reach harvest maturity between weeks 8-9, some phenotypes benefit from extended flowering into week 10. Growers seeking maximum sedative, body-focused effects often allow trichomes to develop higher amber percentages before harvesting. This extended maturation converts more THC to CBN, producing heavier, more narcotic effects ideal for pain relief and sleep assistance.
Monitor your plants closely during any extended flowering period, as environmental stresses and nutrient depletion can cause quality degradation if pushed too far. The goal is to harvest at absolute peak potency and terpene content, which requires balancing trichome maturity against overall plant health and vigour.
How to Optimise Conditions Throughout the Flower Cycle
Creating ideal conditions throughout gorilla glue’s flowering period maximises both speed and quality. Environmental optimisation involves managing multiple interconnected variables, each influencing flowering progression and final bud characteristics. Attention to these details separates average harvests from exceptional ones.
Step 1: Perfect Your Lighting Strategy
Light spectrum and intensity profoundly influence flowering speed and bud density. For indoor grows, full-spectrum LED lights or HPS (high-pressure sodium) systems provide optimal flowering performance. Gorilla glue responds exceptionally well to lights with enhanced red spectrum (600-700nm wavelengths), which drives photosynthesis and flowering hormone production during the bloom phase.
Maintain appropriate light intensity throughout flowering—too weak and buds develop loosely with reduced potency; too intense and you risk light stress, bleaching, or heat damage. Most cultivators position quality LED fixtures 30-45cm from canopy tops, adjusting based on manufacturer specifications and plant response. Ensure even light distribution across your entire canopy, as shaded lower growth produces significantly inferior buds.
Step 2: Manage Temperature and Humidity Precisely
Temperature and humidity management becomes increasingly critical as flowering progresses and bud density increases. During early flowering (weeks 1-3), maintain relative humidity around 45-55% with temperatures of 22-26°C during lights-on periods. As buds develop density through weeks 4-6, reduce humidity to 40-45% to minimise mould risks whilst maintaining similar temperatures.
During late flowering (weeks 7 onwards), further reduce humidity to 35-40% and consider slightly cooler temperatures (20-24°C) to enhance resin production and terpene preservation. Some growers implement a final “cold shock” during the last week before harvest, dropping nighttime temperatures to 15-18°C to stress plants into maximising resin production as a protective response. This technique requires careful implementation to avoid causing actual plant damage.
Step 3: Optimise Nutrient Delivery and pH
Nutrient availability directly influences flowering speed and final yields. Gorilla glue performs best with pH levels between 6.0-6.5 in soil-based media or 5.5-6.0 in hydroponic systems. Test and adjust pH consistently, as fluctuations impair nutrient uptake even when feeding appropriate formulations. Many growers discover that seemingly mysterious deficiencies actually stem from pH imbalances rather than insufficient nutrient concentrations.
Implement a consistent feeding schedule based on your growing medium and system. Soil growers typically feed every second or third watering, whilst hydroponic systems require constant nutrient solution availability. Monitor EC/PPM levels to prevent both deficiencies and toxic accumulations. Gorilla glue generally tolerates moderate to high feeding levels during peak flowering, though individual phenotypes vary—always observe plant responses and adjust accordingly.
Troubleshooting Common Flowering Issues
Even experienced growers occasionally encounter challenges during the flowering phase. Identifying and addressing these issues quickly prevents minor problems from compromising your entire harvest. Understanding common flowering complications specific to gorilla glue empowers you to maintain healthy, productive plants throughout the bloom cycle.
Addressing Delayed or Stalled Flowering
If your photoperiod gorilla glue plants fail to show flowering signs within 10-14 days after switching to 12/12 lighting, investigate potential causes immediately. Light leaks during the dark period represent the most common culprit—even small amounts of light penetrating your grow space can prevent flowering initiation. Check your grow tent or room thoroughly during the dark period, sealing any light leaks completely.
Stress from environmental extremes, nutrient imbalances, or recent transplanting can also delay flowering. Ensure your plants were healthy and unstressed before initiating 12/12 lighting. Some growers experience frustration when their photoperiod plants flower at unexpected times, which may indicate environmental issues or genetic factors requiring attention.
Managing Nutrient Deficiencies During Flowering
Nutrient deficiencies manifest differently during flowering compared to vegetative growth. Phosphorus deficiency—common during heavy flowering—appears as dark green or purple leaves with potential leaf curling and slowed bud development. Potassium deficiency causes leaf edges to brown and curl upward, with possible interveinal chlorosis (yellowing between leaf veins).
Address deficiencies promptly by adjusting your nutrient formula and verifying pH levels fall within the optimal range. Gorilla glue’s heavy feeding requirements make deficiencies relatively common when using conservative feeding schedules. However, resist the temptation to dramatically increase nutrient concentrations suddenly—gradual adjustments prevent nutrient burn whilst correcting deficiencies.
Preventing and Treating Bud Rot and Mould
Gorilla glue’s dense bud structure makes it somewhat susceptible to bud rot (botrytis) and powdery mildew, particularly in high-humidity environments. Prevention far exceeds treatment in effectiveness—maintain humidity below 45% during mid-to-late flowering and ensure vigorous air circulation throughout your canopy. Avoid wetting flowers during watering, and never allow moisture to accumulate on buds.
If you discover bud rot, immediately remove affected areas by cutting several centimetres below visible infection to ensure complete removal. Dispose of infected material far from your grow space. Increase air circulation and reduce humidity further if possible. For outdoor Australian growers facing autumn humidity or rain, consider installing temporary rain covers or selecting cultivation locations with excellent drainage and airflow. According to research on Botrytis cinerea, this fungal pathogen thrives in cool, humid conditions—precisely the environment many Australian autumn climates provide.
Determining the Perfect Harvest Window
Identifying the optimal harvest moment represents one of the most critical decisions in cannabis cultivation. Harvesting too early yields underdeveloped buds with reduced potency and yields; harvesting too late allows THC degradation and produces overly sedative effects. Gorilla glue’s relatively short flowering window demands attentive monitoring during the final weeks to capture peak maturity.
Step 1: Monitor Trichome Development
Trichome colour provides the most reliable harvest timing indicator. Using a jeweller’s loupe (30-60x magnification) or digital microscope, examine trichomes on the buds themselves rather than sugar leaves, which mature earlier. During early flowering, trichomes appear clear and glassy. As maturity approaches, they become cloudy or milky white—indicating peak THC content.
For balanced effects typical of gorilla glue’s hybrid nature, harvest when approximately 70-80% of trichomes appear cloudy with 10-20% turning amber. This produces a well-rounded high combining mental clarity with physical relaxation. If you prefer more energetic, cerebral effects, harvest when trichomes are mostly cloudy with minimal amber. For maximum sedative, body-focused effects, allow 30-40% amber development before harvesting.
Step 2: Assess Overall Plant Maturity
Beyond trichomes, evaluate overall plant appearance and vitality. Mature gorilla glue plants display substantial pistil darkening (70-90% brown/orange), though this alone doesn’t determine harvest readiness. Leaves may show natural senescence (yellowing and dying) as the plant redirects all remaining energy into final bud maturation—this is normal during the final weeks, particularly if you’ve reduced feeding or implemented a flush.
Bud density should feel firm when gently squeezed, with calyxes swollen and covered in a thick resin coating. The distinctive gorilla glue aroma intensifies significantly during final maturation, developing complex notes combining earthiness, diesel fuel, and subtle chocolate or coffee undertones inherited from its diverse genetic lineage.
Step 3: Execute Proper Harvest Technique
Once you’ve determined optimal maturity, execute your harvest during the dark period or just before lights-on for indoor grows. Some research suggests terpene and cannabinoid concentrations peak during the dark period, though evidence remains somewhat anecdotal. Outdoor growers should harvest during morning hours before temperatures rise significantly, preserving volatile terpenes that can evaporate in heat.
Use sharp, clean cutting tools to remove plants at the base or selectively harvest individual branches if maturity varies across the canopy. Handle buds gently to preserve the precious trichome coating—excessive touching during harvest can remove significant quantities of resin. Immediately begin your drying process in a controlled environment with temperatures around 18-21°C and humidity at 45-55% for optimal preservation of cannabinoids and terpenes.
Proper post-harvest handling proves just as critical as growing technique in determining final quality. Careful drying over 7-14 days followed by proper curing in sealed containers develops gorilla glue’s full flavour profile whilst preserving maximum potency. This patience during the final stages ensures your months of careful cultivation result in premium-quality buds showcasing everything this legendary strain offers.
Conclusion: Mastering Gorilla Glue Flowering for Maximum Results
Successfully managing Gorilla Glue’s flowering timeline requires understanding the differences between indoor and outdoor growing, as well as photoperiod and autoflowering genetics. Whether growing indoors or outdoors in Australia, the principles remain the same. Provide optimal conditions at each stage, monitor plant responses closely, and harvest based on trichome maturity rather than fixed timelines.
The 8–9 week flowering period of photoperiod Gorilla Glue offers a relatively quick turnaround compared to many premium strains. Autoflowering versions deliver even faster results for time-conscious growers. By applying the strategies in this guide—such as proper light management, environmental control, and accurate harvest timing—you can maximise both yield and quality.
Australian growers possess unique advantages and challenges depending on their specific regions. Coastal cultivators must manage humidity during autumn flowering, whilst inland growers contend with temperature extremes and water management. Understanding your microclimate and adapting these techniques accordingly ensures success regardless of location. For those just beginning their cultivation journey, exploring fundamental growing techniques provides essential foundational knowledge.
Remember that every grow provides learning opportunities. Document your flowering timeline, environmental conditions, and plant responses throughout each cycle. This data becomes invaluable for optimising future grows and developing intuition about your plants’ needs. Whether you’re selecting premium high THC cannabis seeds for your next project or expanding your knowledge through our comprehensive blog resources, continuous learning separates good growers from great ones.
The gorilla glue strain’s legendary status stems from its exceptional potency, generous yields, and relatively forgiving growth characteristics. By mastering its flowering timeline and providing optimal conditions at each stage, you can produce sticky, resinous, and highly potent buds. These qualities are what have made Gorilla Glue a global favourite. Start with quality genetics from reputable sources. Apply the techniques in this guide, stay consistent, and be patient—the results will follow.
.
Frequently Asked Questions
How long does Gorilla Glue take to flower indoors?
Gorilla Glue typically flowers for 8–9 weeks indoors once the light cycle is switched to 12/12. Some phenotypes may finish slightly earlier or later depending on conditions.
When is Gorilla Glue ready to harvest outdoors in Australia?
Outdoor Gorilla Glue is usually ready to harvest between late March and early April in most Australian regions. Timing depends on climate, latitude, and seasonal weather.
Does Gorilla Glue autoflower have a shorter flowering time?
Yes. Autoflowering Gorilla Glue completes its full lifecycle in 8–10 weeks, with the flowering stage lasting around 6–7 weeks from the first pistils.
What light schedule triggers flowering in Gorilla Glue?
Photoperiod Gorilla Glue plants begin flowering when the light cycle changes to 12 hours of light and 12 hours of darkness. Autoflowering versions do not require light changes.
Can Gorilla Glue flower faster with the right conditions?
Yes. Stable temperatures, proper humidity, strong lighting, and correct nutrients can help Gorilla Glue flower efficiently. However, genetics ultimately determine the final timeline.
Is Gorilla Glue suitable for outdoor growing in Australia?
Yes. Gorilla Glue performs well outdoors in Australia, especially in regions with dry autumns. Its 8–9 week flowering period fits well within most outdoor seasons.
How can I tell when Gorilla Glue is ready to harvest?
The best indicator is trichome colour. Harvest when most trichomes are cloudy with some turning amber for balanced effects and peak potency.
What happens if I harvest Gorilla Glue too early?
Harvesting too early results in lower THC levels, lighter buds, and weaker effects. Clear trichomes indicate the plant has not fully matured.
Can Gorilla Glue flower for more than 9 weeks?
Yes. Some phenotypes may benefit from 9–10 weeks of flowering, especially if you prefer heavier, more sedative effects with higher amber trichomes.
Does indoor or outdoor Gorilla Glue produce better yields?
Indoor grows offer more control and consistency. Outdoor plants often produce larger yields if given enough space and a long vegetative period.
Growing Bruce Banner in Australia requires understanding the precise harvest timing that maximizes this legendary strain’s potent THC content and complex terpene profile. This sativa-dominant powerhouse—named after the Hulk’s alter ego—delivers impressive yields when cultivated properly, but choosing between autoflower and photoperiod versions significantly impacts your harvest timeline and approach. Australian growers face unique challenges including variable climate conditions and seasonal light patterns that directly influence optimal harvest windows.
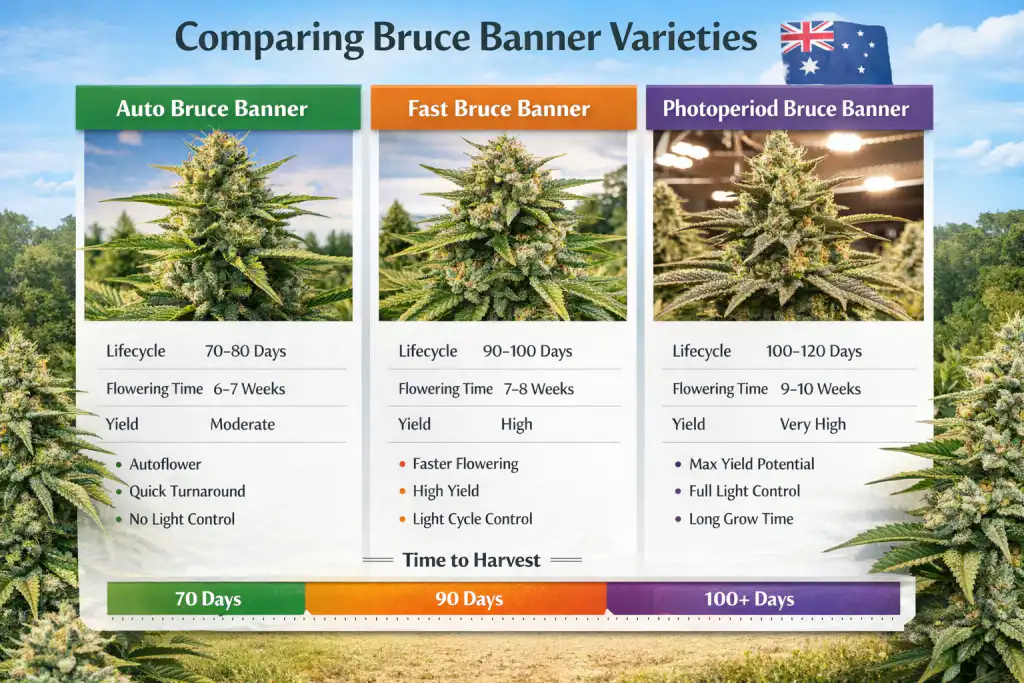
For Australian growers, Bruce Banner autoflower versions typically reach harvest readiness in 8-9 weeks from germination, while photoperiod versions require 9-10 weeks of flowering after the vegetative stage. The optimal harvest window occurs when 60-70% of trichomes display a cloudy appearance with approximately 20% amber coloration, indicating peak THC levels. Auto Bruce Banner varieties offer faster turnaround with multiple yearly harvests possible, while photoperiod versions provide larger yields per plant with greater control over plant size through vegetative manipulation.
Auto Bruce Banner vs Photoperiod: Harvest Timeline Comparison
The fundamental distinction between autoflowering and photoperiod Bruce Banner varieties centers on their harvest schedules and cultivation requirements. Autoflower genetics incorporate ruderalis heritage that triggers flowering based on plant maturity rather than light cycle changes, creating predictable timelines regardless of seasonal variations. This characteristic makes Auto Bruce Banner particularly valuable for Australian growers working within restricted growing seasons or seeking multiple harvests annually.
Photoperiod Bruce Banner requires specific light cycle manipulation—typically 12 hours of darkness—to initiate flowering, giving cultivators precise control over vegetative growth duration. This flexibility allows experienced growers to develop larger plants with extensive canopy development before triggering the flowering phase. However, outdoor photoperiod cultivation in Australia becomes constrained by natural seasonal light patterns, limiting harvest opportunities to specific annual windows determined by latitude and regional daylight variations.
Auto Bruce Banner completes its entire lifecycle in approximately 70-80 days from seed germination to harvest readiness. This compressed timeline includes a brief 2-3 week vegetative period followed by 6-7 weeks of flowering development. The Auto Bruce Banner Feminised Seeds from Sacred Seeds Australia exemplify this rapid cultivation cycle, delivering impressive potency despite the accelerated growth schedule.
Photoperiod Bruce Banner demands substantially longer total cultivation periods, though flowering duration remains comparable at 9-10 weeks once initiated. The vegetative phase can extend anywhere from 4-8 weeks depending on grower preferences and space constraints, bringing total cultivation time to 13-18 weeks minimum. This extended timeline creates opportunities for training techniques like topping, LST (low-stress training), and SCROG (screen of green) methods that significantly boost final yields beyond autoflower capabilities.
Accurate harvest timing determination requires systematic trichome examination using quality magnification equipment. Jeweler’s loupes with 60x magnification or digital microscopes provide sufficient detail to assess trichome maturity across Bruce Banner’s dense flower structures. Trichome development progresses through three distinct phases: clear (immature), cloudy (peak THC), and amber (THC degrading to CBN), with optimal harvest occurring during the cloudy-dominant phase mixed with early amber development.
For Bruce Banner specifically, harvest timing dramatically influences the experiential profile. Early harvests during the predominantly clear-to-cloudy transition produce more cerebral, energetic effects characteristic of sativa-dominant genetics. Conversely, waiting until 30-40% amber trichomes develop creates heavier, more sedative effects as THC converts to CBN. Most Australian growers targeting Bruce Banner’s signature potent, uplifting experience harvest when trichomes display 60-70% cloudy appearance with 20-30% amber coloration.
Beyond trichome assessment, secondary harvest indicators include pistil coloration changes and overall flower density. Bruce Banner pistils transition from bright white to deep orange-brown as maturity progresses, with 70-90% darkened pistils typically correlating with optimal harvest windows. Additionally, flower calyxes swell noticeably during final ripening stages, creating the dense, resinous buds Bruce Banner is renowned for producing. Monitoring these multiple indicators simultaneously provides comprehensive harvest readiness confirmation.
Australian growers should examine trichomes from multiple plant locations, as outer canopy flowers often mature faster than lower branches receiving reduced light exposure. This maturity variance occasionally necessitates staged harvesting, where top colas are removed first while allowing lower flowers additional ripening time. Understanding amber trichome development and harvest timing becomes crucial for maximizing both yield quantity and quality across the entire plant structure.
Australian Climate Zones: Regional Harvest Variations
Australia’s diverse climate zones create substantially different growing conditions that impact Bruce Banner harvest timing and cultivation approaches. Northern tropical and subtropical regions experience minimal seasonal temperature variation with extended growing seasons, allowing multiple autoflower crops or year-round photoperiod cultivation in controlled environments. Queensland’s coastal areas and Northern Territory regions provide particularly favorable conditions for extended outdoor photoperiod cultivation with natural light cycle transitions occurring gradually.
Southern temperate zones including Victoria, Tasmania, and southern coastal regions present more constrained outdoor growing windows due to pronounced seasonal variations and cooler winter temperatures. Photoperiod Bruce Banner cultivation in these areas typically requires spring planting for autumn harvest, aligning flowering periods with naturally decreasing daylight hours. Autoflower varieties offer greater flexibility in these regions, with potential for spring and summer plantings that complete before autumn temperature drops compromise plant health.
Central arid regions experience extreme temperature fluctuations between day and night, creating additional cultivation challenges that impact harvest planning. While these areas receive abundant sunlight ideal for cannabis cultivation, water availability and temperature management become critical factors. Bruce Banner’s robust genetics handle moderate environmental stress reasonably well, though extreme heat during flowering can degrade terpene profiles and reduce final potency regardless of optimal harvest timing.
Coastal humidity levels across northern Australia require careful attention to mold and fungal issues, particularly during Bruce Banner’s dense flower development. High humidity during late flowering stages increases botrytis (bud rot) risks that can devastate crops approaching harvest readiness. Growers in these regions often prefer slightly earlier harvests—sacrificing minor potency gains—to minimize mold exposure risks during extended humid periods. Understanding regional climate patterns becomes essential for successful Bruce Banner cultivation planning.
Yield Expectations: Auto vs Photoperiod Performance
Yield potential represents one of the most significant distinctions between Auto Bruce Banner and photoperiod versions. Photoperiod Bruce Banner plants, given adequate vegetative time and proper training, regularly produce 400-600 grams per square meter indoors or 600-800 grams per plant outdoors under optimal conditions. This substantial yield potential stems from extended vegetative periods allowing extensive root system development and canopy expansion before flowering initiation.
Auto Bruce Banner varieties typically yield 350-450 grams per square meter indoors or 100-200 grams per plant outdoors, reflecting their compressed growth timeline and limited vegetative development. However, this reduced per-plant yield becomes offset by dramatically faster harvest cycles enabling multiple crops annually. Australian growers can potentially achieve 3-4 autoflower harvests in the same timeframe required for single photoperiod crop completion, potentially matching or exceeding total annual production.
Plant density considerations further impact comparative yield analysis. Autoflower varieties’ compact stature permits higher plant counts per square meter—often 9-16 plants compared to 4-6 photoperiod plants—partially compensating for reduced individual plant production. This density advantage proves particularly valuable for Australian growers with space limitations or those cultivating in discrete indoor environments where vertical space constraints limit large plant development.
Environmental optimization significantly influences yield outcomes for both varieties. Bruce Banner responds exceptionally well to proper nutrient management, with balanced feeding schedules supporting the strain’s heavy flower production. Photoperiod versions tolerate aggressive training techniques and higher nutrient concentrations during extended vegetative growth, while autoflowers require gentler approaches due to limited recovery time during their accelerated lifecycle. Those interested in exploring detailed autoflower cultivation techniques can maximize yields despite genetic limitations.
Harvest Timing Strategies for Maximum Potency
Strategic harvest timing maximizes Bruce Banner’s legendary potency while preserving its complex terpene profile. This strain naturally produces exceptional THC levels—often testing 25-29%—making proper harvest timing crucial for capturing peak cannabinoid concentrations. Research indicates THC production peaks during the cloudy trichome phase, with extended ripening periods converting THC to less psychoactive cannabinoids like CBN and CBD.
For maximum THC content and characteristic Bruce Banner effects, harvest should occur when trichomes transition from predominantly cloudy to approximately 10-20% amber. This narrow window—typically lasting only 3-5 days—requires vigilant monitoring during final flowering stages. Delaying harvest beyond this point gradually reduces potency while shifting effects toward sedative profiles inconsistent with Bruce Banner’s energetic, creativity-enhancing reputation.
Terpene preservation requires additional consideration beyond cannabinoid optimization. Bruce Banner’s distinctive diesel-fuel aroma with sweet berry undertones derives from complex terpene combinations including caryophyllene, limonene, and myrcene. These volatile compounds begin degrading once trichome production ceases, making timely harvest essential for preserving aromatic and flavor complexity. Excessive ripening—indicated by 40%+ amber trichomes—typically correlates with noticeable terpene degradation regardless of maintained THC levels.
Pre-harvest flushing practices impact final product quality and smoothness. Most experienced cultivators implement 7-14 day flushing periods using plain pH-balanced water to remove residual nutrients from plant tissues. This process should begin strategically—timed to conclude precisely at optimal trichome maturity—requiring harvest planning that accounts for both trichome development rates and flushing duration. Understanding fundamental differences between autoflower and photoperiod cultivation helps growers time flushing appropriately for each variety type.
Environmental Stress and Harvest Timing
Environmental stressors during late flowering impact optimal harvest windows and final product quality. Temperature fluctuations, light cycle interruptions, or nutrient imbalances can trigger premature trichome degradation or arrested development, complicating standard harvest timing protocols. Bruce Banner demonstrates moderate stress tolerance, though severe environmental issues may necessitate earlier harvests to preserve viable flower material.
Deliberate late-stage environmental manipulation—like reduced temperatures or modified light spectrums—can enhance trichome production and anthocyanin development in Bruce Banner’s Hulk phenotypes. However, these techniques require careful implementation to avoid counterproductive stress responses. Australian growers should consider regional climate patterns when planning harvest timing strategies, as unexpected weather events can necessitate premature harvesting to prevent crop loss.
Post-Harvest Processing Comparison
Post-harvest processing requirements differ subtly between Auto Bruce Banner and photoperiod versions, primarily relating to flower density and moisture content. Photoperiod Bruce Banner typically develops larger, denser colas requiring extended drying periods to prevent interior moisture retention that promotes mold development. Optimal drying occurs over 10-14 days at 60-65°F with 55-60% relative humidity, though dense photoperiod flowers occasionally require extended periods approaching 16-18 days for thorough moisture removal.
Auto Bruce Banner’s generally smaller, less dense flower structure facilitates slightly faster drying—typically 7-10 days under identical environmental conditions. This accelerated drying timeline reduces mold risks while requiring vigilant monitoring to prevent over-drying that degrades terpene profiles and creates harsh smoke characteristics. Proper drying represents the critical first step in post-harvest processing, directly impacting final product quality regardless of cultivation method excellence.
Curing processes remain consistent across both varieties, requiring 2-8 weeks in sealed containers with periodic burping to release accumulated moisture and gases. Bruce Banner’s high resin content benefits from extended curing periods—minimum 4 weeks—that mellow harsh flavor notes while enhancing terpene complexity. Properly cured Bruce Banner develops smooth smoke characteristics with pronounced flavor profiles reflecting the strain’s genetic heritage, whether derived from autoflower or photoperiod sources.
Trimming approaches vary based on personal preference and intended use. Wet trimming—removing leaves immediately after harvest—facilitates faster, more even drying particularly beneficial for Bruce Banner’s dense flower structures. Dry trimming—waiting until after drying completion—provides superior terpene preservation and slower, more controlled moisture removal, though requiring additional labor during more delicate dried material handling. Many Australian cultivators explore feminised seed benefits that eliminate male plant concerns, simplifying harvest planning and processing logistics.
Storage Optimization for Long-Term Quality
Proper storage extends Bruce Banner’s potency and flavor profile preservation for 12-24 months beyond harvest completion. Storage containers should provide airtight seals preventing oxygen exposure while blocking light penetration that degrades cannabinoids. Glass mason jars represent the gold standard for home storage, though commercial-grade vacuum-sealed bags offer superior long-term preservation for larger quantities.
Storage environment maintenance requires consistent cool temperatures (60-70°F) and low humidity (55-62% RH) preventing mold development while minimizing cannabinoid degradation. Humidity control packs specifically designed for cannabis storage help maintain optimal moisture levels, preventing both over-drying and excess moisture accumulation. Understanding proper storage techniques for cannabis materials maximizes return on cultivation investment by preserving harvest quality over extended periods.
Quality Assessment Post-Cure
Evaluating Bruce Banner quality after curing completion involves multiple sensory and visual assessments. Properly processed Bruce Banner displays vibrant coloration—typically lime green with occasional purple hues—and intact trichome coverage appearing frosty under lighting. The distinctive aroma should present prominently without excessive hay or grass notes indicating improper drying or curing processes.
Physical flower characteristics provide additional quality indicators. Properly dried and cured Bruce Banner should feel slightly springy when squeezed, not crumbling excessively (over-dried) or feeling moist and pliable (under-dried). The burn quality test—observing ash color and smoke smoothness—offers practical quality assessment, with white ash and smooth inhalation indicating thorough flushing and proper post-harvest processing. According to cannabis cultivation research, proper post-harvest handling significantly impacts final product quality regardless of cultivation excellence.
Selecting Your Bruce Banner Variety
Choosing between Auto Bruce Banner and photoperiod versions ultimately depends on individual growing circumstances and priorities. Autoflower varieties excel for Australian growers seeking rapid harvests, discrete cultivation, or multiple annual crops within space-constrained environments. The compressed timeline and predictable scheduling eliminate photoperiod lighting complexities while delivering impressive potency despite genetic yield limitations.
Photoperiod Bruce Banner suits experienced cultivators prioritizing maximum yields and complete environmental control throughout extended cultivation periods. The ability to manipulate vegetative duration, implement aggressive training techniques, and precisely time flowering initiation provides optimization opportunities unavailable with autoflower genetics. For those building comprehensive seed collections, exploring Sacred Seeds’ complete catalog reveals diverse genetic options beyond Bruce Banner varieties.
Both varieties deliver Bruce Banner’s legendary potency and distinctive effects when cultivated properly with attention to strain-specific requirements. Australian growers should assess their regional climate patterns, available space, experience level, and harvest timeline preferences when selecting appropriate Bruce Banner genetics. Regardless of variety selection, understanding optimal harvest timing and post-harvest processing techniques remains essential for maximizing this exceptional strain’s potential.
Fast Bruce Banner: The Middle Path
Fast Bruce Banner offers a practical middle ground between autoflower convenience and photoperiod performance. Created by crossing Bruce Banner photoperiod genetics with a ruderalis-derived fast-flowering line, Fast Version plants retain the structure, potency, and yield potential of traditional photoperiod Bruce Banner while significantly reducing flowering time.
For Australian growers, Fast Bruce Banner typically flowers in 7–8 weeks, roughly 1–2 weeks faster than standard photoperiod Bruce Banner, making it especially valuable in regions with shorter outdoor seasons or unpredictable late-season weather. This reduced flowering window lowers the risk of mold, humidity damage, and early autumn temperature drops while still allowing growers to use familiar photoperiod training techniques.
Unlike autoflower varieties, Fast Bruce Banner still relies on light cycle changes to initiate flowering, meaning growers retain full control over vegetative growth duration and plant size. This makes Fast Version genetics ideal for cultivators who want photoperiod yields and control with a more forgiving harvest timeline.
In practice, Fast Bruce Banner often delivers larger yields than autoflower versions while finishing earlier than standard photoperiod plants, making it one of the most flexible Bruce Banner options available to Australian growers.
Yellowing leaves are the single most common issue collectors face. After diagnosing this on thousands of plants over 20+ years, I can tell you it’s a symptom, not a disease. Your plant is trying to tell you something is wrong with its environment. 99% of the time, it’s one of five common, fixable issues.
This guide will walk you through diagnosing the cause of yellowing leaves so you can fix the problem and get your plant healthy again.
Quick Answer: The 5 Main Causes of Yellowing Leaves
Issue
Frequency
Quick Identifier
Fix Time
💧 Overwatering
45% of cases
Droopy, heavy leaves + wet soil
5-7 days
🔬 Wrong pH
30% of cases
Yellowing despite feeding
3-5 days
📉 Nitrogen Deficiency
15% of cases
Bottom leaves yellow first
3-7 days
💡 Light Burn
7% of cases
Only top leaves bleached
Immediate
🌸 Late Flower (Normal)
3% of cases
Weeks 8-10, lower leaves only
Not needed
60-Second Diagnosis: Find Your Problem Fast
Use this decision tree to identify the cause in under a minute:
START HERE → Is the soil wet or dry?
Wet soil + droopy leaves → Overwatering (see Step 1)
Bone dry soil + limp leaves → Underwatering (see Step 1)
Soil moisture is good → Continue ↓
Where is the yellowing happening?
Only top leaves (under lights) → Light burn (see Step 4)
Bottom leaves, moving up → Nitrogen deficiency (see Step 3)
Middle leaves, yellow between veins → Magnesium deficiency (see Step 3)
New growth pale/white with green veins → pH lockout/Iron issue (see Step 2)
Lower leaves in weeks 8-10 flowering → Normal senescence (see bottom)
Still unsure? → Test your pH (Step 2)
Step 1: Is It Overwatering or Underwatering?
Before you reach for nutrients, check your watering. This is the #1 mistake I see—occurring in nearly half of all yellowing cases.
Overwatering (Most Common: 45% of Cases)
Symptoms:
Leaves are a uniform, droopy yellow
They feel heavy and full of water
Whole plant looks wilted despite wet soil
Soil stays wet for 5+ days
The Science: When soil is waterlogged, roots can’t get oxygen. They essentially drown, stop functioning, and can’t absorb nutrients—leading to yellowing even if nutrients are present.
The Fix:
Stop watering immediately
Let soil dry out completely (top 2-3 inches)
Lift the pot to learn dry vs. wet weight
Improve drainage: add perlite next time (30% perlite to 70% soil ratio)
Only water when top 2-3 inches are dry
Recovery time: 5-7 days to see improvement
Underwatering (Less Common: 5% of Cases)
Symptoms:
Leaves are droopy, limp, and lifeless
They feel dry and papery
Soil is bone dry throughout pot
Leaves may be crispy at edges
The Fix:
Water thoroughly until you see 10-20% runoff from bottom
Plant should perk up within 2-6 hours
Set a watering schedule to prevent recurrence
Pro tip: Underwatered plants recover fast. Overwatered plants take much longer and risk root rot.
Step 2: Could It Be Your pH?
This is the silent killer. If your pH is wrong, your plant can’t eat, no matter how much food you give it. Cannabis plants can only absorb nutrients within a specific pH range.
Optimal pH Range: 6.0–6.5 for soil; 5.8–6.2 for coco/hydro.
The Science: Nutrient Lockout
If the pH is too high or too low, certain nutrients become chemically unavailable to the plant’s roots. The plant will show signs of deficiency even though the nutrients are present in the soil.
pH too high (>7.0): Iron, manganese, phosphorus locked out pH too low (<5.5): Calcium, magnesium locked out
Also test runoff water from bottom of pot—this shows what’s happening at root level
Fix time: If pH was the issue, yellowing should stop spreading within 3-5 days.
Step 3: How to Diagnose Nutrient Deficiencies
If watering and pH are correct, then it’s time to look at nutrient deficiencies. The location of the yellowing tells you what nutrient is missing.
Nitrogen (N) Deficiency (Most Common Deficiency):
Location: Starts at the bottom of the plant and moves up.
Appearance: Lower leaves turn a uniform, pale yellow and will eventually become crispy and fall off. Nitrogen is a “mobile” nutrient, so the plant moves it from old leaves to new growth.
Fix: A light feed with a balanced, nitrogen-rich vegetative nutrient. The problem should stop progressing within a few days.
Magnesium (Mg) Deficiency:
Location: Starts on lower or middle leaves.
Appearance: Yellowing appears between the veins of the leaves, while the veins themselves stay green (interveinal chlorosis). It can sometimes look like stripes or marbling.
Fix: A light dose of Cal-Mag (Calcium-Magnesium supplement). Epsom salts can also work in a pinch.
Iron (Fe) Deficiency:
Location: Starts on the newest growth at the top of the plant.
Appearance: New leaves emerge pale yellow or almost white, with green veins. Iron is an “immobile” nutrient, so the plant can’t move it from old leaves.
Fix: This is almost always a pH lockout issue, not a lack of iron in the soil. Correct your pH first.
Step 4: Are Your Lights Too Close?
If the yellowing is only happening at the very top of the plant, directly under the lights, it could be light burn.
Symptoms: Topmost leaves look bleached, turning a bright yellow or almost white. The leaves will often be crispy and point upwards towards the light.
The Fix: Raise your lights by 15-30cm. If you can’t raise them, dim the intensity. Use the “hand test”—if the back of your hand feels uncomfortably hot at canopy level, the light is too close.
Yes. In the final 1-2 weeks before harvest (weeks 8-10), it’s completely normal for lower fan leaves to yellow and drop off.
What’s Happening: Senescence
This is called senescence—a natural process where the plant pulls nitrogen from its lower fan leaves to focus energy on bud development and seed production (even though there are no seeds).
✅ Watering: Is soil properly moist (not soaking wet or bone dry)? ✅ pH: Is water pH between 6.0-6.5 for soil or 5.8-6.2 for coco? ✅ Light distance: Are lights at proper height for growth stage? ✅ Growth stage: Are you in late flower (week 8+)? Lower leaf yellowing is normal ✅ Feeding: Have you fed in the last 10 days? ✅ New vs old leaves: Where did yellowing start—bottom or top?
If a leaf is more than 50% yellow and dying, yes, you can gently remove it. This allows the plant to focus energy on healthy growth. If it’s only slightly yellow, leave it—the plant may still be drawing nutrients from it. Never remove more than 10-20% of leaves at once.
Can yellow leaves turn green again?
Rarely. Once a leaf has lost its chlorophyll and turned yellow, it usually won’t recover. The goal is to stop the yellowing from spreading to new leaves by fixing the underlying issue. Focus on new growth staying green.
Why are my seedling’s first leaves (cotyledons) yellow?
This is perfectly normal. The first two small, round leaves (cotyledons) provide initial energy for the seedling and are supposed to yellow and fall off after the first true leaves appear. This usually happens around days 7-14.
Is it normal for leaves to yellow during late flower?
Yes. In the final 1-2 weeks before harvest, it’s normal for the plant to pull nitrogen from lower fan leaves to focus energy on buds. This is called senescence and is actually a sign you’re close to harvest. See our harvest timing guide for next steps.
What’s the difference between nutrient burn and nutrient deficiency?
Nutrient burn (too much food) appears as yellow or brown, crispy tips on leaves, starting at the very tip and moving inward. Nutrient deficiency appears as uniform yellowing or yellowing between the veins, usually starting from bottom leaves or between veins. Burn = too much, deficiency = too little.
My new growth is yellow, what is it?
Yellowing on new growth at the top is typically an iron deficiency, which is almost always caused by a pH problem (nutrient lockout). Check and correct your pH (5.8-6.2 for coco, 6.0-6.5 for soil) before adding any more nutrients. See Step 2 above.
Can overwatering cause nutrient deficiencies?
Yes. When roots are waterlogged, they can’t absorb oxygen or nutrients properly, leading to symptoms of deficiencies even when nutrients are available in the soil. This is why fixing watering issues (Step 1) always comes before adding nutrients. Overwatering is often misdiagnosed as nitrogen deficiency.
I’m growing in coco, why are my leaves yellow?
Coco coir is an inert medium—it contains no nutrients. You must provide nutrients from day 1 (after the first week for seedlings). Coco is also prone to calcium and magnesium deficiencies, so a Cal-Mag supplement is often necessary from week 2 onward. Target pH 5.8-6.2 for coco. See our coco coir growing guide.
How do I know if it’s overwatering vs underwatering?
Check the soil weight. Lift your pot:
Heavy pot + wet soil + droopy leaves = Overwatering
Light pot + dry soil + droopy leaves = Underwatering
Overwatered leaves feel swollen and heavy. Underwatered leaves feel dry and papery. When in doubt, let soil dry out—it’s safer to underwater than overwater.
Can I prevent yellowing entirely?
Not entirely—some yellowing in late flower is natural. But you can minimize issues by:
Watering only when top 2-3″ of soil is dry
Maintaining pH 6.0-6.5 (soil) or 5.8-6.2 (coco)
Feeding at 1/4 to 1/2 strength for autoflowers, full strength for photoperiods
Keeping lights at proper distances
Starting with quality genetics like our beginner-friendly strains
We offer top-quality heirloom, herb and cannabis seeds for souvenir purchases. We offer genuine domestic Australia shipping and support, and ship our seeds using 100% Earth-friendly and compostable packaging.
Get fresh Australia cannabis seeds delivered to your door in less than a week from payment.