10 Best Beginner Strains for Australian Growers

10 Best Beginner Strains for Australian Growers

The best cannabis strains for beginners in Australia aren’t the ones marketed as foolproof — they’re the ones with enough genetic resilience to survive the mistakes every first-time grower makes. Every grower overfeeds, overwaters, or manages temperature badly at some point in their first grow. The question isn’t whether mistakes will happen — it’s whether the genetics can handle them while you learn what you’re doing.

This guide covers the strains Jess recommends to first-time growers — the same strains she points people toward when they come through the strain finder quiz not quite knowing where to start. The honest framing is this: these strains are forgiving, not foolproof. They’ll tolerate more variation in feeding, watering, and environment than more demanding genetics. That tolerance gives you room to learn. It doesn’t eliminate the need to learn.

Please note: this guide is written for growers in the ACT where personal cultivation is permitted, and for growers in legal jurisdictions overseas. Seeds sold by Sacred Seeds Australia are sold strictly as souvenir and collectable items in accordance with Australian law.

What Makes a Strain Forgiving for First-Time Growers

Indica-dominant genetics Generally more compact, faster flowering, and more tolerant of environmental variation than sativa-dominant genetics
Established genetic stability Strains with decades of breeding history produce more consistent phenotypes — less variation between plants from the same batch
Autoflowering format Fixed timeline removes light schedule management — one fewer variable to get wrong on a first grow
Mould resistance Particularly relevant in Australian coastal climates where autumn humidity creates bud rot risk
Shorter flowering time 7–9 week flowers give fewer opportunities for late-grow mistakes than 10–12 week genetics
Avoid for first grows Pure sativa landraces, experimental genetics, OG Kush cuts, anything described as “demanding” or “for experienced growers”

Best beginner cannabis strains for Australian growers shown in an easy indoor grow setup with compact healthy plants under LED lights

Autoflower or Photoperiod — Which to Start With

The most significant decision a first-time grower makes is format — autoflower or photoperiod. It’s worth getting this right before choosing a specific strain.

Photoperiod cannabis requires a change in light cycle to trigger flowering — 18 hours of light in vegetative growth, 12 hours to initiate and maintain flower. This gives growers control over when the plant flowers and how large it gets before flowering begins, but it introduces a failure point that doesn’t exist for autoflowers: get the light schedule wrong and the plant either won’t flower or will re-veg. For indoor growers, light leaks during the dark period can cause the same problem. Managing light schedules correctly is a learned skill.

Autoflowers flower on a fixed timeline from germination regardless of light cycle. They remove the light schedule variable entirely. The trade-off is that you can’t extend the vegetative phase to compensate for a slow start — the clock runs from germination and doesn’t stop. Early mistakes can’t be recovered by holding the plant in veg longer.

🌿 Jess — Auto or Photoperiod First?

For a first indoor grow, I’d lean toward autoflowers — not because they’re easier in any absolute sense, but because managing a 12/12 light schedule correctly while also learning feeding, watering, training, and environment is a lot to handle at once. Removing the light schedule variable lets you focus on the fundamentals first. Once you’ve got one grow behind you and understand what the plant actually needs, photoperiods give you significantly more control and yield potential. Start simple, then build from there. For outdoor first grows in most Australian states, the natural day length handles the photoperiod question automatically — plant at the right time of year and the season does the work for you.

Indoor vs Outdoor for First-Time Growers in Australia

Indoor vs Outdoor — Honest Assessment

Indoor advantages: Complete control over light, temperature, and humidity. Year-round growing regardless of season. Learning the fundamentals without weather variables. The controlled environment means fewer unexpected problems — what goes wrong indoors is almost always something the grower controlled.

Indoor disadvantages: Upfront equipment cost — a basic tent, LED light, and fan is a meaningful investment. Temperature management in Australian summer can be challenging without air conditioning. Running costs for electricity.

Outdoor advantages: Free sunlight eliminates the biggest indoor running cost. Plants can get significantly larger with more root volume, producing more per plant. The growing experience is closer to what cannabis evolved to do.

Outdoor disadvantages: Seasonal constraints — you can’t plant whenever you want. Weather events outside your control. In Australia specifically, autumn rain risk on the east coast creates bud rot pressure in the final weeks of flower for most strains. Pest management without a controlled environment requires more attention.

For most Australian first-time growers, the recommendation depends on the situation. If you have the budget for a basic indoor setup and want to learn in a controlled environment — start indoors. If you’re in a suitable climate with outdoor space and want to start without equipment investment — outdoor autoflowers planted in the right seasonal window are a practical first grow. The Australian climate strain guide covers regional timing and strain selection in detail.

Indica vs sativa cannabis plant comparison showing compact beginner-friendly growth versus tall difficult sativa structure

Jess’s Strain Recommendations for First-Time Growers

These strains share a common characteristic: established genetics with proven resilience across a range of growing conditions. None of them are foolproof — every strain can fail in a badly managed environment. What they offer is a wider tolerance band than more demanding genetics, which gives first-time growers more room to make the inevitable early mistakes and still produce a result worth harvesting.

1. Northern Lights — Afghani Indica Backbone

Northern Lights is the strain Jess most consistently points first-time growers toward — not because it’s foolproof, but because the Afghani indica genetics give it a structural and environmental resilience that most modern hybrids don’t match. The compact bushy structure manages itself without aggressive training. The 7–9 week flower is fast enough that problems don’t have time to compound. The myrcene-dominant terpene profile produces a consistent, predictable effect that’s genuinely rewarding to harvest.

The key limitation to understand: Northern Lights rewards attentive growing significantly more than it forgives neglect. A well-grown Northern Lights is exceptional. A neglected one will survive but won’t produce at its potential. The genetics are forgiving — that doesn’t mean the plant doesn’t benefit from care.

Available as Northern Lights Feminised and Auto Northern Lights. For a first indoor grow the auto version removes the light schedule variable. For outdoor grows in most Australian states, the photoperiod version triggered by natural autumn day length is a viable and rewarding first-season option


2. Blue Dream — Jess’s Go-To, Genuinely Versatile

Blue Dream is Jess’s second favourite strain — and the one she’d most readily recommend to someone on their first grow. The Blueberry × Haze cross produces a plant with exceptional hybrid vigour: fast growth, good recovery from stress, and a structural resilience that makes it one of the more forgiving sativa-dominant genetics in the catalogue. It’s not an easy strain in any absolute sense — the significant stretch in early flower requires height management, and the dense buds need humidity attention from week four of flower — but within those requirements it’s more tolerant of variation than most.

The practical advantage of Blue Dream as a first strain is that it produces a large, rewarding harvest with a balanced effect profile that suits a wide range of users. That combination makes the first grow feel genuinely worthwhile rather than just educational. Available as Blue Dream Feminised and Auto Blue Dream.

Blue Dream Feminised

3. Girl Scout Cookies — Compact and Reliable

GSC sits in a useful position for first-time growers: compact enough to manage in limited indoor space, indica-dominant enough to flower relatively quickly, and with a terpene profile — caryophyllene, limonene, linalool — that produces a complex, rewarding result worth all the effort of a first grow. The Cookie Fam genetics have been extensively stabilised across decades of breeding, which means the phenotype expression is more consistent than newer, less established genetics.

The one caveat: GSC carries the nutrient sensitivity of its OG Kush lineage. Overfeeding in the first three weeks is the most common way first-time growers damage this strain — start at quarter strength and build slowly. Both GSC Feminised and Auto GSC are in the catalogue.

Auto Girl Scout Cookies feminised cannabis seeds Australia

Auto Girl Scout Cookies Feminised Seeds

From $75.00

4. Gorilla Glue — Vigorous Genetics, Needs Humidity Attention

GG4 is Jason’s Friday afternoon strain, and Jess is happy to recommend it to a first-time grower with one caveat stated clearly: the extraordinary resin production that makes GG4 exceptional also creates dense, heavy buds that are more susceptible to botrytis in high-humidity conditions than less resinous genetics. In Australian coastal summer conditions that’s a meaningful consideration. In drier climates or with adequate airflow and humidity management, GG4 is one of the most vigorous and rewarding genetics in the catalogue.

What makes GG4 relatively tolerant for a first grow is the hybrid vigour from the Chem’s Sister × Sour Dubb × Chocolate Diesel cross — the plant grows with real energy and recovers from feeding and watering errors faster than more sensitive genetics. The auto version is the more practical first-grow format given the fixed 70–75 day timeline. Available as Gorilla Glue Feminised and Auto Gorilla Glue.

Auto Gorilla Glue feminised cannabis seeds Australia

Auto Gorilla Glue Feminised Seeds

From $75.00

5. White Widow — Dutch Classic, Earned Reputation

White Widow won the Cannabis Cup in 1995 and has been in continuous production since. That longevity is the most reliable indicator of genuine genetic quality — a strain that remains in demand for three decades is doing something right. The Brazilian sativa and South Indian indica cross produces a balanced hybrid with exceptional trichome production, good resistance to temperature variation, and a relatively compact structure that manages itself without aggressive training.

White Widow is not the most exciting recommendation, but it’s one of the most honest. The genetics are well understood, the phenotype expression is consistent, and the result — heavy resin coverage, balanced effect, familiar profile — is rewarding for a first grow. Available as Auto White Widow.

Auto White Widow feminised cannabis seeds Australia

Auto White Widow Feminised Seeds

From $75.00

6. Purple Kush — Compact, Fast, Hindu Kush Resilience

Purple Kush brings Hindu Kush × Purple Afghani genetics — a near-pure indica with the structural and environmental resilience that Afghani landrace genetics encode. It stays compact at 60–90 cm, flowers in 7–9 weeks, and the cool-night purple phenotype expression gives first-time growers a visually rewarding harvest that’s distinctly different from green-only genetics. The myrcene-dominant terpene profile produces deep body relaxation — a genuinely good evening indica from straightforward, well-understood genetics.

Particularly well-suited to Australian growers in cooler climates where the temperature differential in autumn encourages the purple expression and the shorter season suits the faster finishing genetics. Available as Auto Purple Kush.

Auto Purple Kush feminised cannabis seeds Australia

Auto Purple Kush Feminised Seeds

From $75.00

7. Granddaddy Purple — Myrcene and Linalool, Good Outdoor Option

Granddaddy Purple — Purple Urkle × Big Bud — adds linalool to the myrcene foundation, producing one of the more pronounced anxiolytic and sedative terpene combinations in the indica catalogue. The purple phenotype expression is reliable across growing conditions rather than requiring specific temperature triggers, the bud structure is dense and resinous, and the Big Bud parentage contributes yield potential that exceeds what the compact plant size suggests.

For Australian outdoor growers GDP is a practical choice — it handles the autumn harvest window well and the coloration develops noticeably as night temperatures drop in March and April. Available as Auto Granddaddy Purple.

Auto Granddaddy Purple feminised cannabis seeds Australia

Auto Granddaddy Purple Feminised Seeds

From $75.00

8. Super Skunk — Old-School Genetics, Genuine Outdoor Resilience

Super Skunk is Skunk #1 × Afghani — old-school genetics bred at a time when resilience and outdoor performance were the primary breeding objectives rather than THC maximisation or flavour complexity. The Afghani indica backbone gives it genuine structural robustness: it handles temperature variation, pest pressure, and feeding inconsistency better than most modern genetics precisely because it was bred for exactly those conditions. It doesn’t produce the most sophisticated effect profile or the most complex terpene expression — but it produces reliably, finishes fast, and gives first-time outdoor growers a result they can be satisfied with. Available as Auto Super Skunk.

Auto Super Skunk feminised cannabis seeds Australia

Auto Super Skunk Feminised Seeds

From $75.00

Successful beginner cannabis grow with small indoor setup showing healthy plants ready for harvest in a simple grow environment

Strains to Avoid on Your First Grow

The strains worth avoiding on a first grow share a common characteristic: they require consistent precision that first-time growers are still developing. That’s not a criticism of the strains — it’s an honest assessment of the match between strain requirements and first-grow skill levels.

Pure sativa landraces — Durban Poison, pure Thai genetics, pure Haze — have flowering periods of 12–14 weeks and significant height that demands active management. More time in flower means more opportunities for late-grow mistakes to compound. The longer you’re managing a plant the more that can go wrong, and a first-time grower managing a 14-week flower for the first time is carrying a lot of risk into harvest.

OG Kush cuts and nutrient-sensitive genetics — many OG Kush phenotypes and some Cookies variants require precise feeding at lower EC ranges than robust indica genetics. First-time growers consistently overfeed, and OG-lineage genetics show stress from overfeeding faster than most. Godfather OG, for example, is an exceptional strain — but it’s not the place to learn feeding discipline.

Experimental or recently released genetics with less than five years of widespread growing history have less documented phenotype variation and fewer community-tested growing parameters. Established genetics with decades of growing data behind them are more predictable because more is known about how they behave across a range of conditions.

Any strain described as “demanding,” “for experienced growers,” or “requires precise conditions” in its description — believe it. Those descriptors exist for a reason.

Common First-Grow Mistakes — Which Genetics Handle Them Better

Overwatering is the most common first-grow mistake — new growers water too frequently and keep the root zone saturated rather than allowing the wet-dry cycle that drives healthy root development. Northern Lights, Purple Kush, and Super Skunk handle overwatering better than most because the Afghani indica genetics are adapted to soil conditions that vary considerably. GSC and OG-lineage genetics are more sensitive. The fix is simple once understood: water when the top 2–3 cm of medium is dry, not on a schedule.

Overfeeding is the second most common mistake — nutrient manufacturers recommend doses designed to sell nutrients, not to produce healthy plants. First-time growers following bottle recommendations consistently produce nutrient-burned plants. Start at quarter strength of whatever the manufacturer recommends and build from there based on what the plant shows you. Blue Dream, White Widow, and Super Skunk handle overfeeding better than GSC or OG-lineage genetics.

Temperature fluctuation — particularly relevant in Australia where the difference between day and night temperatures can be significant, and where summer indoor grows can push ambient temperatures above 30°C. Blue Dream and White Widow handle temperature variation better than most. Purple strains and some Cookies genetics are more sensitive to heat. If your grow space gets above 28°C in summer, choose genetics that tolerate heat or manage the timing to avoid growing through the hottest months.

Light schedule errors on photoperiod grows — light leaks, inconsistent timing, or accidental re-vegging are problems that don’t exist with autoflowers. For indoor first grows where light schedule management hasn’t been tested, autoflowers remove this failure point entirely.

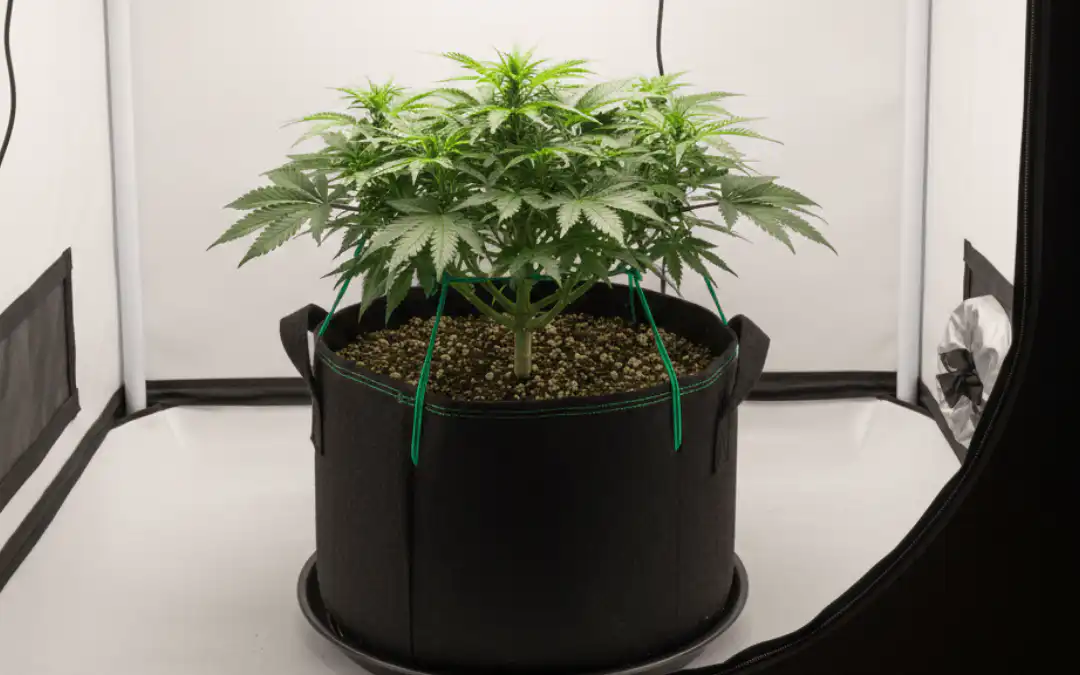
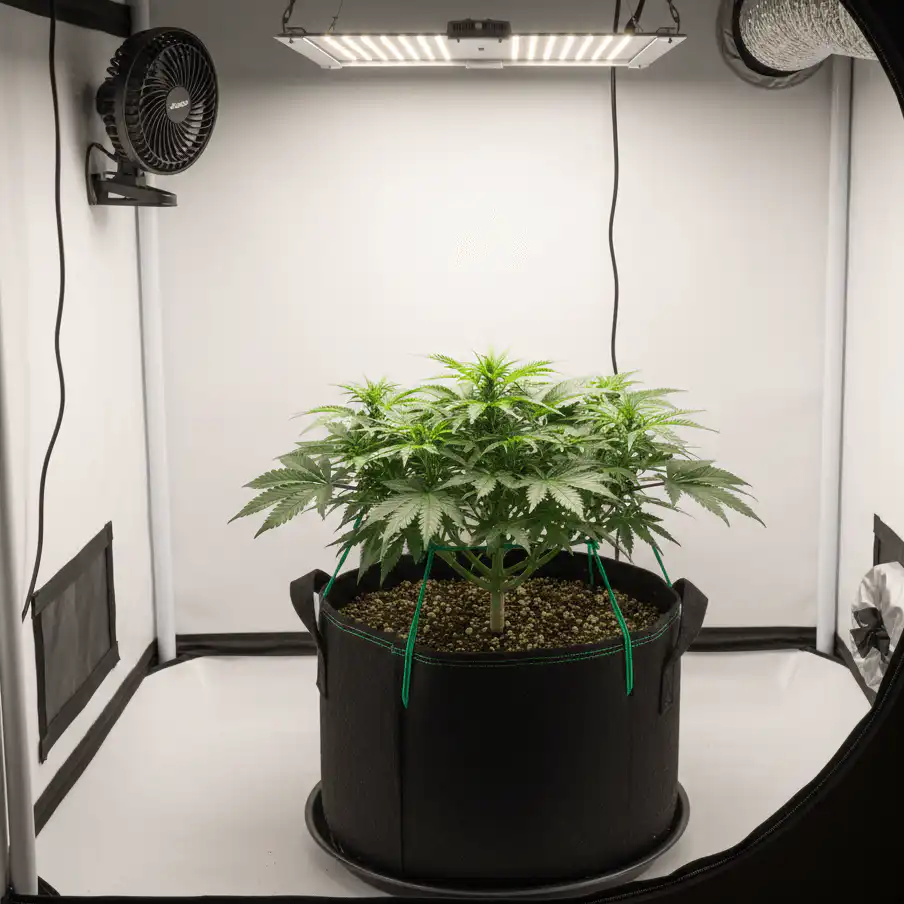
Basic Setup for a First Indoor Grow

The equipment required for a first indoor grow is less than most beginners assume. A basic functional setup covers everything you need to produce a first harvest successfully.

What you need: A grow tent or dedicated space with light control. An LED grow light — 100–150W is adequate for one to two plants in a small tent. A fan for airflow — critical for stem strength and humidity management. A quality potting mix or coco coir. Fabric pots — minimum 11 L, better at 20 L. A pH test kit — cheap ones work for a first grow. Basic nutrients are optional if using quality potting soil for the first four weeks.

What you don’t need on a first grow: Hydroponic systems. CO2 supplementation. Complex multi-part nutrient lines. Multiple fans and environmental controllers. These things add value as skill increases — they add complexity that doesn’t improve outcomes at the first-grow stage.

Budget realistically: A functional basic indoor setup in Australia runs $300–500 AUD. You can spend more and it will improve results somewhat — but the genetics and the grower’s attentiveness to the plant’s needs matter more than equipment beyond the basics.

Not sure which strain suits your first grow?

Answer six questions and Jess will match you to three strains based on your setup, experience, and goals.

Find Your Strain →

Key Takeaways — Best Cannabis Strains for First-Time Growers

Forgiving genetics are not foolproof genetics — they tolerate more variation in feeding, watering, and environment than demanding strains, which gives first-time growers room to learn without losing the plant. Autoflowers are the practical recommendation for most indoor first grows — removing the light schedule variable lets you focus on the fundamentals. Indica-dominant genetics with established breeding history — Northern Lights, Purple Kush, White Widow, Super Skunk — are more tolerant of first-grow conditions than pure sativas, OG Kush cuts, or experimental genetics. Overwatering and overfeeding are the two mistakes that end most first grows — water when the top 2–3 cm is dry, start nutrients at quarter strength. Keep the first grow simple: one or two plants, straightforward genetics, basic equipment. Complexity can come later. The strain finder quiz matches you to specific genetics based on your setup, climate zone, and experience level.

First-Time Cannabis Grower — Frequently Asked Questions

Should I start with an autoflower or a photoperiod seed?

For a first indoor grow, autoflowers are the more practical starting point — they remove light schedule management as a variable while you focus on learning feeding, watering, and environment. For outdoor first grows in most Australian states, the natural day length handles the photoperiod question automatically — plant at the right time of year and the seasonal light cycle triggers flowering without any intervention. Once you have one grow completed and understand what the plant actually needs, photoperiods give you more control over plant size and timing.

How many plants should I grow on my first grow?

One to two plants. Managing one plant attentively produces better results than managing four plants poorly. The temptation to maximise the first grow is understandable but misplaced — the first grow is about learning what the plant needs, not maximising yield. One successful harvest teaches you more than a complicated multi-plant setup that goes partially wrong.

Is it better to start indoors or outdoors?

Indoors gives complete control over the environment, which makes learning more systematic — when something goes wrong you can identify the cause because you control all the variables. Outdoor growing is lower cost and produces larger plants, but introduces weather, pest, and seasonal variables that are harder to manage while simultaneously learning the fundamentals. Both work — the right choice depends on your situation, budget, and what’s legal in your state.

What is the most common mistake first-time growers make?

Overwatering and overfeeding — usually both simultaneously. New growers consistently water too frequently, keeping the root zone saturated rather than allowing the wet-dry cycle that drives root development. And nutrient manufacturers’ recommended doses are calibrated to sell nutrients, not to produce healthy plants — first-time growers following bottle recommendations consistently overfeed. Start nutrients at quarter strength and water only when the top 2–3 cm of medium is dry.

Do I need expensive equipment for a first grow?

No. A functional basic indoor setup — grow tent, LED light at 100–150W, fan, quality potting mix, fabric pots, pH kit — runs $300–500 AUD and covers everything needed for a first harvest. Hydroponic systems, CO2 supplementation, and complex nutrient lines add value as skill increases. They don’t improve outcomes at the first-grow stage and add complexity that makes it harder to identify what’s causing problems when things go wrong.

What’s the best germination method for a first-time grower?

The paper towel method — seeds between damp paper towels, kept at 22–25°C in a warm dark location, checked every 12–24 hours. Most viable seeds show a taproot within 48–72 hours. The visibility advantage is valuable for first-time growers — you can confirm germination has happened before the seed contacts soil. The full step-by-step is in the paper towel germination guide.

Are feminised seeds worth it for a first grow?

Yes — feminised seeds guarantee female plants that produce the harvest you’re growing for. Regular seeds produce roughly half male plants that need to be identified and removed before they pollinate the females. Managing male identification correctly while learning everything else about growing is an unnecessary complication for a first grow. All the strains recommended in this guide are feminised or auto-feminised.

What should I do if my first grow fails?

Identify what went wrong — overwatering and overfeeding are responsible for the majority of first-grow failures — and try again with that specific knowledge. Most experienced growers have had failed first grows. The failure is valuable precisely because it teaches you something concrete about what the plant needs. Try again with simpler genetics, better water quality, and a more restrained feeding and watering schedule.

When should I harvest?

Check trichomes rather than relying on the flowering time listed on the seed packet — those are guides, not guarantees. Harvest when trichomes are mostly milky white with 10–20% amber. A jeweller’s loupe or USB microscope is the tool for this — without one you’re guessing. The trichome harvest timing guide covers the full process.

Best cannabis strains for Australian conditions — regional strain selection and seasonal timing across all Australian climate zones.

Autoflower vs photoperiod seeds — the full format comparison to help decide which suits your first grow setup.

How to germinate cannabis seeds — the complete germination guide for first-time growers.

Cannabis seedling care in Australia — the first two weeks after germination covered in full.

When to harvest cannabis — reading trichomes to identify the right harvest window.

Browse all cannabis seeds — feminised, autoflower, and photoperiod strains shipped from Australia.

Seeds are sold strictly as novelty collector’s items. They contain no THC or CBD. This page does not constitute medical or legal advice. By purchasing you agree to our terms and conditions. Always check local laws before germinating or cultivating cannabis.

The Complete Guide to Drying Cannabis: Avoiding the #1 Mistake Australian Growers Make

The Complete Guide to Drying Cannabis: Avoiding the #1 Mistake Australian Growers Make

Drying is where months of careful growing either pays off or gets quietly ruined. You’ve harvested your cannabis — now the question is whether the terpenes, the flavour, and the potency you’ve spent that time building will make it through to the jar. Get the drying right and they will. Rush it, and the best genetics in the world won’t save the result.

This guide covers everything you need: the right environment, the three drying methods and when to use each, a step-by-step process, how to handle the specific challenges Australian conditions throw at you, and what to do when things go wrong. Slow is the theme throughout.

Cannabis buds hanging upside down to dry in a dark, temperature-controlled drying room with proper airflow.

Why Drying Matters More Than Most Growers Realise

When Jason and I started Sacred Seeds, one of the first things we noticed was how many growers would do everything right during the grow — proper nutrition, good training, knowing when to harvest — and then lose the quality in the dry. It broke our hearts, because we knew how much work they’d put in. The buds looked fine. They just smelled like grass clippings and tasted harsh. Between us, we did more harvesting and drying in California in our younger days than we’d care to count — enough to last three lifetimes, as Jason likes to say. We learned what a bad dry costs the hard way, long before we brought those lessons back to Australia.

The terpenes responsible for a strain’s aroma and flavour are volatile compounds. They evaporate readily under heat and dry out quickly without adequate humidity. Dry too fast and they’re gone — permanently. Dry too slow and mould takes over. The window is real and it rewards patience and attention, not speed.

The other thing happening during a slow dry is chlorophyll breakdown. Fresh-cut cannabis contains high levels of chlorophyll that contribute to the harsh, green taste of uncured material. A 10–14 day dry at the right temperature and humidity allows those compounds to break down naturally. Rush to 4–5 days and they don’t. The cure can help but it can’t fully fix what a bad dry destroys.

The Biggest Mistake: Drying Too Fast

If there’s one thing I’d change about how most Australian growers approach the dry, it’s the timeline. The excitement of harvest, the anxiety about mould, the lack of a dedicated space — all of it pushes people toward a 4–5 day dry in a warm room. The result is always the same: buds that smell like hay, smoke that catches in the throat, and a flavour profile that doesn’t come close to what the genetics can produce.

A 3–5 day dry produces buds where terpenes have largely evaporated, chlorophyll hasn’t broken down, the outer surface feels crispy while moisture is still trapped in the centre — a false dry that causes problems when the jar goes on — and the characteristic hay smell that no amount of curing will fully reverse. The terpenes that left during a fast dry do not come back.

The fix is straightforward: aim for 10–14 days. It requires patience and some environment management, but the difference in the final product is not subtle. Strains bred for complex terpene expression in Australian conditions particularly reward a slow dry — the full profile only comes through if the dry preserves what the plant produced.

The Ideal Drying Environment

The standard reference point is 15°C and 60% RH — the so-called 60/60 rule. In practice, achieving 15°C in an Australian summer is difficult without air conditioning, and coastal humidity can push well above 60% without intervention. The table below gives the ideal targets alongside what’s acceptable and what starts causing problems.

Factor Ideal Acceptable Danger Zone
Temperature 15–18°C 13–21°C Below 10°C or above 24°C
Humidity 55–60% RH 50–65% RH Below 45% or above 70%
Airflow Gentle, indirect circulation Light movement, not directly on buds No airflow or direct fan on buds
Light Complete darkness Minimal ambient light Direct sunlight or bright light

Temperature: Cooler preserves terpenes. Every 10°C increase roughly doubles the rate of terpene evaporation. If 15°C isn’t achievable, aim for 18–20°C. Above 24°C the losses accelerate quickly.

Humidity: This is the harder variable to manage in Australia. Summer humidity on the coast can sit at 70%+ RH; inland areas in winter can drop to 30% RH. Both extremes require intervention — a dehumidifier for high humidity, a humidifier or wet towels in an enclosed space for low humidity. A $15 digital hygrometer placed at bud height is the most useful piece of equipment you can add to a drying setup.

Airflow: The goal is gentle circulation — air moving through the space, not wind across the buds. Point a small oscillating fan at the wall or ceiling, not at the branches. This prevents stagnant pockets where mould develops without accelerating the dry unevenly.

Light: Complete darkness. Light degrades THC and terpenes during drying. Cover windows with blackout curtains or cardboard if your drying space has natural light.

Comparison between over-dried cannabis buds and properly dried buds showing quality differences

Drying Methods — Whole Plant, Branch Hang, Wet Trim

There are three main approaches and the right one depends on your space, your climate, and your priorities.

Whole Plant Hang

Cut the entire plant at the base and hang it upside down intact. This is the slowest method — 12–16 days — and produces the best terpene preservation because moisture moves gradually from the thick stems through to the buds rather than evaporating directly from bud surfaces. Minimal handling means minimal trichome damage. The downside is the space requirement — you need significant vertical clearance and horizontal spread. In high humidity environments, the slower dry also increases mould risk. This is the method to use when you have the space, can control the environment, and want maximum quality.

Branch Hang

Cut the plant into individual branches and hang each one separately. Moderate dry time — 10–14 days — with more flexibility than the whole plant method. Easier to check individual branches for readiness and remove them as they finish rather than waiting for the entire plant. Slightly more handling means marginally more trichome exposure, but in practice the difference is minor. This is the practical default for most home growers — the balance between quality and manageability is right.

Wet Trim and Hang

Trim all leaves immediately after harvest, then hang individual buds or small sections. Faster dry — 7–10 days — because the moisture-holding leaf material is removed upfront. Trimming is easier when the plant is fresh. The trade-off is more terpene loss from the faster dry and significantly more handling. In high-humidity coastal environments where the slower whole-plant and branch methods raise mould risk, wet trimming is often the right call despite the quality trade-off. Mould on finished buds is worse than some terpene loss.

Jess: My default is branch hang when conditions allow. If I’m harvesting in coastal Queensland in February and the humidity is sitting at 75% RH, I wet trim — the mould risk isn’t worth the terpene difference. For autumn harvests in more controlled conditions, branch hang every time.

Step-by-Step: How to Dry Cannabis

Step 1 — Prepare the Drying Space Before Harvest

Have the space ready before you cut anything. Setting up after harvest while holding freshly cut plants is avoidable stress. You need: a dark room or closet, string or wire for hanging, a thermometer and hygrometer at bud height, a small oscillating fan, and a dehumidifier or humidifier depending on your ambient conditions. Run the setup for 24 hours before harvest to confirm you can hold your target temperature and humidity range.

Step 2 — Harvest and Initial Prep

Harvest in the early morning before heat and light exposure — terpene content is at its highest then. If you’re unsure whether your plants are ready, the trichome harvest guide covers exactly what to look for. Cut and remove large fan leaves immediately; they hold moisture and slow drying without adding value. Leave sugar leaves on for now — they protect trichomes during the dry and are easier to trim once the plant has dried. Inspect everything for mould or pest damage and discard affected material before it goes into the drying space. Handle gently throughout — trichomes break off with rough treatment.

Step 3 — Hang and Monitor

Hang branches upside down with space between them — branches touching each other restricts airflow and creates mould conditions. Check temperature and humidity twice daily for the first week. Smell the space each time: fresh cannabis throughout is correct; hay smell means drying too fast; musty smell means humidity is too high. Rotate branches if some areas of the room are drying faster than others. Resist the urge to handle buds more than necessary.

Step 4 — The Stem Snap Test

From day seven onwards, check readiness daily using the stem snap test. Small stems — pencil thickness or less — should snap with a clean crisp sound when bent. Larger stems will bend but start to crack rather than flex smoothly. If stems bend without resistance and feel rubbery, keep drying. If all stems snap easily and buds feel brittle and crumbly, you’ve gone slightly too far — but this is recoverable in the cure with humidity packs.

Additional readiness indicators: buds feel dry on the outside with slight give when gently squeezed; smaller buds are fully dry while larger ones retain slight moisture; aroma is strong and characteristic of the strain, not hay-like. When in doubt, err slightly moist — jars can continue the process, but you can’t reverse over-drying.

Step 5 — Trim and Move to Cure

Once the stem snap test is positive, trim remaining sugar leaves — save them for edibles or hash — and move buds to glass jars filled 70–80% full with a small hygrometer if you have one. If you’ve been running a flush in the final week (which makes a noticeable difference to flavour — the nutrients guide covers flush timing in detail), your buds should be clean and ready for the jar. Seal and begin curing. Jason covers the curing process in detail in his complete guide to curing cannabis.

Home cannabis drying setup with hanging branches, hygrometer, and proper airflow

Drying in Australian Conditions — Common Challenges

High humidity — coastal areas and summer

70–80% RH slows drying and raises mould risk significantly. A dehumidifier is the effective solution — desiccant packs around the space help but won’t manage coastal summer humidity on their own. Increase airflow, consider wet trimming to remove moisture-holding leaf material, check buds twice daily for mould, and dry in smaller batches to reduce the moisture load in the space.

Low humidity — inland areas and winter

30–40% RH causes a 5–7 day dry that destroys terpenes. Use a humidifier to bring RH up to 55–60%. Reduce airflow to the minimum needed for circulation. Dry whole plant rather than branches to slow the process. Wet towels in an enclosed space provide a low-cost humidity boost — bowls of water help but require close monitoring.

High temperature — summer heat

Above 24°C terpene loss accelerates. Dry in the coolest room available — interior rooms and bathrooms tend to be cooler than rooms with external walls. Air conditioning is worth running for the 10–14 day dry if it’s available. Avoid drying in sheds, garages, or any outdoor structure in summer. If no air conditioning: dry at night when temperatures drop and keep the space closed during the warmest part of the day.

Limited space

A wardrobe or closet works well — hang clothes elsewhere temporarily and set up string for branches. A 60×60 cm grow tent is a practical dedicated drying space for small to medium harvests with full environment control. Drying racks are more space-efficient than hanging for very limited spaces. Dry in batches if necessary rather than crowding the space and restricting airflow.

Common Drying Mistakes

Pointing the fan directly at buds. Causes uneven drying — buds closest to the fan over-dry while others are still moist. Point the fan at the wall or ceiling for indirect circulation.

Drying in light. Light degrades THC and terpenes during the dry. Complete darkness is the target. Cover windows, use a dark room or tent.

Handling buds too often. Every time you open the drying space you disrupt temperature and humidity. Every time you touch buds you knock off trichomes. Check once in the morning and once in the evening — no more.

Using the feel test instead of the stem snap test. Buds feel dry on the outside after 5–7 days but moisture is still in the stems and centre. The stem snap test is the reliable indicator, not surface texture. Jarring too early redistributes internal moisture back to the outer bud and creates mould conditions.

Ignoring the smell. Your nose is the most useful early warning system in the drying space. Hay smell means drying too fast — increase humidity, lower temperature, reduce airflow. Musty smell means mould is developing — increase airflow, decrease humidity, inspect all buds immediately.

When Things Go Wrong

Dried too fast — hay smell

The terpenes that evaporated during a fast dry are gone and won’t return. The situation is partially recoverable: place buds in jars with 62% Boveda or Integra humidity packs, seal for 24 hours to rehydrate slightly, then proceed with a long cure of six to eight weeks minimum. The hay smell will fade somewhat and the smoke will smooth out, but the full terpene profile the genetics were capable of is not coming back. The cure is the best tool available at this point — use it thoroughly.

Mould found during drying

Remove affected buds immediately and discard them — don’t try to salvage mouldy material. Inspect all remaining buds carefully under bright light, checking inside dense colas where mould typically starts. If mould is isolated to one or two buds the rest can usually be saved. Immediately increase airflow, decrease humidity, and space out remaining branches. Consider wet trimming remaining buds to remove the moisture-holding leaf material that contributed to the problem. Monitor twice daily until dry.

Over-dried — crispy buds

Partially recoverable. Place buds in jars with 62% Boveda packs, seal for 48–72 hours. Buds will reabsorb moisture from the pack and become less brittle. Proceed with normal curing. The texture improves and the smoke becomes less harsh, but terpenes lost to over-drying don’t return. The cure will still improve what’s there — don’t skip it.

Planning your next grow?

Answer six questions and Jess will match you to three strains based on your setup, experience, and goals.

Find Your Strain →

Cannabis Drying — Frequently Asked Questions

Can I speed up drying with a dehydrator or oven?

No. Heat destroys terpenes and degrades THC — you’ll end up with harsh, flat-tasting buds regardless of how good the genetics were. If you need a quick sample, the paper bag method (a small bud in a paper bag for 3–4 days) is the least-damaging fast option. For your main harvest, the 10–14 day dry is not optional if quality matters to you.

Should I trim before or after drying?

Both methods work and the right choice depends on your conditions. Wet trimming before drying is easier — leaves are pliable and the work is faster — but it speeds up the dry and reduces terpene preservation. Dry trimming after drying is more tedious because leaves are brittle, but it slows the dry and preserves terpenes better. In high humidity where mould risk is real, wet trimming is often the safer call despite the quality trade-off.

How do I know if my buds have mould?

Mould appears as white, grey, or black fuzzy growth, usually starting inside dense colas where moisture is trapped. The smell is musty or like mildew — distinctly different from cannabis. If you suspect mould, break open the densest buds and check inside under bright light. Any fuzzy growth means discard that bud immediately and inspect everything else.

Can I dry in a cardboard box?

It works for a small harvest in a pinch — punch holes for airflow, place in a cool dark space, and monitor closely. The limitation is environment control: you’re at the mercy of ambient conditions. A dedicated closet or small tent is significantly better, but a cardboard box beats drying in a warm bright room.

What if I don’t have a hygrometer?

A digital hygrometer costs $10–15 and is the most useful piece of kit for drying and curing — worth getting. Without one, rely on the stem snap test and your nose. Stems should snap cleanly, buds should feel dry on the outside but not crumbly, and the smell should be strong and pleasant throughout the dry. It’s less precise but experienced growers managed without hygrometers for decades.

How long can I leave buds hanging before they over-dry?

In ideal conditions (15–18°C, 55–60% RH), you can safely dry for 14–16 days. In drier conditions (50% RH or lower), over-drying can happen by day 10–12. Check daily from day seven using the stem snap test. Once smaller stems snap cleanly, move to jars.

Can I dry different strains together?

Yes, but different strains — and different plants of the same strain — dry at different rates. Denser buds take longer than airy ones. Check each branch individually and remove as they finish rather than waiting for everything to be done at the same time. Label branches if you’re drying multiple strains.

What should I do with trim and sugar leaves?

Keep them. Sugar leaves covered in trichomes are valuable for edibles, cannabutter, hash, or concentrates. Dry them alongside your buds and store separately. Even fan leaves can go into low-potency edibles or compost — nothing from a good harvest needs to go in the bin.

Is it normal for buds to smell different during drying?

Yes. Fresh-cut plants have a strong green smell. From days 3–5 the smell may soften or develop a mild hay note — this is normal if it’s mild and temporary. By days 7–10 the characteristic strain aroma should reassert itself and strengthen. A persistent strong hay smell or any musty note indicates a problem that needs to be addressed.

Can I dry in a grow tent?

A grow tent is an ideal drying space — remove lights, set up hanging lines, add a small fan and hygrometer, and you have a controllable dark environment. Clean the tent before use to remove any pests or mould spores from the growing cycle. Many growers use the same tent for both growing and drying, cycling between them.

What if buds feel dry outside but stems won’t snap?

Keep drying. Moisture is still in the stems and the centre of the buds — the outer material dries first. Jarring now will redistribute that internal moisture back to the bud surface, which leads to mould in the jar. The stem snap test is the correct indicator, not surface feel.

Should I remove stems before curing?

Remove large stems and cure buds on smaller stems — they fit better in jars and are easier to handle. Some growers cure with all stems intact, which slightly slows moisture loss during the cure. Either approach works as long as the dry is complete before anything goes in the jar. Never jar wet stems.

Can I use a non-oscillating fan?

Yes — point it at the wall or ceiling rather than at the buds. The goal is air movement through the space, not airflow across bud surfaces. A stationary fan aimed at the wall keeps air circulating and prevents the stagnant pockets where mould develops.

A proper dry takes 10–14 days and rewards patience with buds that smell, taste, and smoke the way the genetics are capable of. The environment management isn’t complicated — temperature, humidity, darkness, and gentle airflow — but it does require daily attention. Get those conditions right and hold them, and the cure that follows has something worth working with.

Jason covers the curing process in the next guide — how to dial in the cure for maximum quality, the science behind what’s happening in the jar, and why most growers stop the cure too early.

— Jess

When to harvest cannabis in Australia — reading trichomes, regional timing, and harvest indicators beyond pistil colour.

Autoflowering cannabis seeds — if you’re planning your next grow, the auto range suits multiple harvests per season.

How to grow autoflowers week by week — the full grow guide from seed to harvest, covering everything before the dry.

Browse all cannabis seeds — over 50 feminised, autoflower, and photoperiod strains shipped from Australia.

Seeds are sold strictly as novelty collector’s items. They contain no THC or CBD. This page does not constitute medical or legal advice. By purchasing you agree to our terms and conditions. Always check local laws before germinating or cultivating cannabis.

Growing Cannabis in Small Spaces: A Complete Guide

Growing Cannabis in Small Spaces: A Complete Guide

One of the biggest myths in cannabis cultivation is that you need a huge amount of space to get a great result. As someone who started experimenting on a tiny apartment balcony, I can tell you that’s absolutely not true! With the right genetics and techniques, you can achieve amazing results in a space as small as a computer tower.

This guide will walk you through everything you need to know to succeed with a small-space grow.

Quick Answer: Small Space Growing Essentials


      • 🌱 Choose Compact Strains: Indica-dominant and autoflower strains are your best friends.

      • 🪴 Use Small Pots: 5-10 litre fabric pots are ideal to control plant size.

      • ✂️ Train Your Plants: Techniques like LST (Low Stress Training) are essential to create a flat, even canopy.

      • 💡 Use Efficient Lighting: Modern LED lights run cool and are perfect for small, enclosed spaces.

      • 💨 Manage Airflow: Good ventilation is critical to prevent heat buildup and mould.

    Growing cannabis in small spaces using compact strains, LST training, and LED lighting

    Step 1: Choosing the Right Strain for Your Small Space

    This is the most important decision you’ll make. You can’t fight genetics. Trying to grow a giant Sativa in a small tent is a recipe for frustration. You need strains that are naturally compact and manageable.

    Best Strain Types for Small Spaces:


        • Autoflowers: This is my #1 recommendation. They are genetically programmed to stay small (typically under 1 metre) and finish fast (10-12 weeks). Their compact size is perfect for small tents or stealth grows. Check out our Autoflower vs Photoperiod guide for more info.

        • Indica-Dominant Strains: Indicas are naturally short, bushy, and compact, unlike their tall, stretchy Sativa cousins. Strains with Afghani or Kush genetics are famously small and dense. Northern Lights is a classic example.

      Strains to Avoid for Small Spaces:


          • Pure Sativas: Strains like Amnesia Haze or Kali Mist can stretch to over 2 metres tall. They are not suitable for small indoor setups.


        Step 2: The Perfect Pot Size

        The pot size directly controls the final size of your plant. A bigger pot means a bigger root system and a bigger plant. For small spaces, we want to intentionally limit the root zone.


            • Ideal Pot Size: 5-10 litres (1-2.5 gallons). This is the sweet spot for a healthy but compact plant.

            • Pot Type: Fabric pots are fantastic for small spaces. They promote a healthier root system through “air-pruning” and make it much harder to overwater.

          Step 3: Training Your Plant to Stay Low and Wide

          Training is not optional in a small space—it’s essential. The goal is to break the plant’s natural tendency to grow straight up (apical dominance) and instead create a flat, wide canopy where all bud sites get equal light.

          Low Stress Training (LST) – Your Best Friend:

          LST is the perfect technique for beginners and small spaces. It involves gently bending and tying down the main stem and side branches to create an even canopy.


              • How it works: Start when the plant has 4-5 sets of leaves. Gently bend the main stem over so it’s parallel to the soil and secure it with a soft plant tie. As side branches grow upwards towards the light, continue to tie them down and away from the centre.

              • The Result: Instead of one main cola, you get multiple, evenly-sized colas, all at the same height, maximizing your light exposure and yield in a small footprint.

            Topping (for Photoperiods Only):

            Topping involves cutting off the very top of the main stem. This encourages the plant to grow two new main stems, making it bushier. It’s a great technique but should only be done on photoperiod plants during the vegetative stage. Do not top autoflowers, as they don’t have time to recover from the stress.

            Step 4: Lighting and Ventilation

            In a small, enclosed space, heat management is critical.


                • Lighting: Modern full-spectrum LED lights are the only way to go. They produce very little heat compared to older HPS lights, allowing you to place them closer to your plants without causing light burn. A quality 100-150 watt LED is more than enough for a small tent.

                • Ventilation: You need at least one small clip-on fan for internal air circulation and a small exhaust fan to pull hot air out and bring fresh air in. This is non-negotiable for preventing heat stress and mould.

              → Ready to start your small-space collection? Browse our full range of compact autoflower and indica seeds.

              ❓ Frequently Asked Questions

              What is the smallest space I can realistically grow in?

              You can get great results in a space as small as 40x40x120cm. People have even converted computer towers and small cabinets (“space buckets”) for micro-grows.

              How much can I yield in a small space?

              With good technique and genetics, it’s realistic to aim for 30-60 grams (1-2 ounces) from a single, well-trained plant in a small tent.

              Is it better to grow one trained plant or multiple small plants?

              For beginners in a small space, I recommend starting with one plant and training it well (LST). This is easier to manage than multiple plants competing for light and resources.

              What is a “Sea of Green” (SOG) setup?

              SOG involves growing many small plants in small pots with very little to no vegetative time. The goal is to create a “sea” of single colas. It’s an advanced technique that can be effective in small spaces but requires more plants.

              How do I control the smell in a small space?

              A carbon filter attached to your exhaust fan is essential. It will scrub the air of any odours before it’s vented out of your space.

              Can I use a regular desk lamp to grow?

              No. Regular light bulbs do not provide the correct light spectrum or intensity for cannabis plants to photosynthesise properly. You need a dedicated full-spectrum LED grow light.

              My tent is short, what should I do if my plant gets too tall?

              If your plant is stretching too much, you can try “super-cropping.” This involves carefully pinching and bending the stem 90 degrees to reduce its height. It’s a high-stress technique, so only use it as a last resort on healthy plants.

              Are autoflowers always the best choice for small spaces?

              99% of the time, yes. Their compact size and fast lifecycle are perfect. However, a well-trained Indica photoperiod can also work if you have slightly more height and want more control over the vegetative phase.

              Do Cannabis Plants Need Amber Trichomes Before Harvest?

              Do Cannabis Plants Need Amber Trichomes Before Harvest?

              Quick Answer: What You Need to Know

              🔍 You do NOT need amber trichomes to harvest.

              Milky/cloudy trichomes indicate peak THC — the strongest, clearest expression.

              🌡️ High heat prevents amber development more than genetics.

              Many grows above 28–30°C never show amber at all.

              📊 Harvest timing should be based on multiple indicators, not trichome colour alone.

              🌸 Stopped pistil production + swollen calyxes + mostly milky trichomes = ready

              Even if amber is minimal or nonexistent.

              ✨ Milky trichomes = uplifting, clear-headed effect

              🟤 Amber trichomes = heavier, more sedative effect (THC → CBN)

              If you’re learning harvest timing, start by browsing our full cannabis seed range for strain-specific flowering windows.

              Close-up macro photo of cannabis trichomes showing milky white color under magnification

              🌿 The Amber Trichome Myth

              One of the most persistent grow myths is this idea that you must wait for amber trichomes before harvesting your plants. It’s simply untrue — and it causes collectors to:

              • harvest too late
              • degrade THC
              • chase amber that may never appear
              • stress unnecessarily

              Amber trichomes do not indicate “fully mature” plants — they indicate THC breakdown.

              🔬 Understanding Trichome Colours (and What They Actually Mean)

              Cannabis trichomes change colour as cannabinoids develop and degrade. Under magnification (ideally 40–60x), they appear like tiny mushroom-shaped glands.

              Here’s what each stage really represents:

              🔹 Clear / Transparent Trichomes

              THC is still forming

              Plant not ready

              Effects would be racy, thin, or underdeveloped

              ⚪ Milky / Cloudy Trichomes

              Peak THC production

              Cannabinoids at maximum concentration

              Effects: clear, strong, uplifting

              This is the ideal harvest window for most collectors

              🟤 Amber Trichomes

              THC oxidising into CBN (more sedative)

              Not “more mature” — simply more degraded

              Strong body effects, heavier sedation, less psychoactivity

              📘 Milky vs Amber: Quick Harvest Table

              Mostly Clear

              Too early — THC still forming

              70–90% Milky

              Peak THC, strongest/uplifting effect

              Milky with 10–20% Amber

              Balanced effect, slightly heavier

              30%+ Amber

              More sedative; THC degrading into CBN

              🌼 When to Harvest — WITHOUT Amber Trichomes

              If the following signs are present, your plant is ready — even with zero amber:

              ✅ 1. Pistil production has stopped

              New white pistils have ceased, and older pistils have darkened and curled in.

              ✅ 2. Calyxes are swollen

              Full, bulbous tear-drop shapes = physiological maturity.

              ✅ 3. Trichomes are mostly milky

              70–90% cloudy = peak potency.

              ✅ 4. Plant has reached (or exceeded) breeder flowering timeline

              If you’re past the stated window, trust the physical indicators.

              ✔ Real-world example from a Sacred Seeds collector:

              “My White Widow, Moby Dick, and Jack Herer autos were well past their time. Pistils had stopped and calyxes were swollen, but no amber. Jess confirmed I was actually at risk of going too late — the milky trichomes were spot on.”

              Sativa-dominant strains (e.g., Jack Herer, Amnesia Haze) especially tend to stay milky longer. This is normal.

              🔥 Why Aren’t My Trichomes Turning Amber?

              Amber may never appear, especially in warm climates (hello, Australia). Here’s why:

              🌡️ 1. Heat Stress (Most Common)

              Above 28–30°C, trichomes often go:

              milky → browned/degraded

              without ever turning amber

              🧬 2. Genetics

              Sativas and some hybrids rarely produce much amber.

              💨 3. Direct airflow on buds

              Strong fan airflow can dry or damage trichome heads prematurely.

              ☀️ 4. High light intensity

              Light too close can bleach or prematurely oxidise resin glands.

              ⏰ 5. You’re checking too early

              Amber develops slowly — but again, you don’t need amber.

              Heat is the #1 culprit in Australia. This is why many indoor and greenhouse growers never see amber, even on fully ripe flowers.

              🌙 Harvest Timing Based on Desired Effects

              🌅 Earlier Harvest (70% Milky, 30% Clear)

              Effect: energetic, uplifting, cerebral

              Good for: daytime use, creativity

              ☀️ Peak Harvest (90% Milky, 10% Clear/Amber)

              Effect: balanced, strong, clear

              Good for: most collectors

              This is maximum THC.

              🌙 Later Harvest (70% Milky, 30% Amber)

              Effect: sedative, relaxing, sleepy

              Good for: pain, insomnia

              Trade-off: lower THC, higher CBN

              Milky trichomes = not too early — they are the peak.

              💬 Jess’ Recommendation After Helping Thousands of Collectors

              Stop chasing amber trichomes.

              Instead, use the 4-point maturity test:

              1️⃣ Pistils stopped growing

              2️⃣ Calyxes swollen

              3️⃣ Trichomes mostly milky (not clear)

              4️⃣ Plant is at/near its expected timeline

              If ALL FOUR are true → Harvest.

              Regardless of amber.

              Especially if your grow space hits 28°C+ — amber may never appear.

              🌱 Browse Our Full Cannabis Seed Range

              Looking for strains with clearer flowering timelines and predictable harvest windows?

              Explore our full cannabis seed range at Sacred Seeds Australia.

              ❓ Frequently Asked Questions

              What percentage of amber trichomes should I harvest at?

              There’s no universal number. Harvest based on desired effects.

              Clear-headed effects → 80–90% milky

              Sedative effects → 20–30% amber

              Many Australian growers harvest successfully with zero amber.

              Can I harvest with no amber trichomes at all?

              Absolutely. If pistils have stopped, calyxes are swollen, and trichomes are milky, your plant is ready.

              Why aren’t my trichomes turning amber?

              Heat stress, genetics, direct airflow, or high light intensity. Very common in Australian conditions.

              Do amber trichomes mean higher potency?

              No — amber means lower THC and higher CBN.

              Peak potency occurs at milky/cloudy.

              How long does it take for trichomes to turn amber?

              From milky stage, amber may take 5–14 days — or may never appear in hot conditions.

              Should I harvest when pistils stop growing?

              It’s a key sign, but confirm swollen calyxes + milky trichomes.

              What do milky trichomes look like?

              Opaque, white, and mushroom-shaped under 40–60x magnification.

              Can heat stress ruin trichomes?

              Yes. Sustained heat can dry, collapse, or degrade trichomes early.

              It doesn’t ruin the flower — just adjust your harvest timing.

              The Best Purple Weed Seeds for Colorful Cannabis Cultivation

              The Best Purple Weed Seeds for Colorful Cannabis Cultivation

              💜 Purple Weed Seeds Explained

              Most people just see a pretty colour.
              But experienced growers know that the deep purple in a cannabis bud is a signal.
              It’s a clue about the plant’s unique genetics, its potential flavour, and the relaxing effects to come.


              🌿 Purple Weed Seeds Explained in Simple Terms

              Let’s get one thing straight — the colour of your weed doesn’t make it stronger.

              But there’s no denying that a bag full of deep purple buds just hits different.
              The bag appeal is off the charts. It looks special because, a lot of the time, it is.

              The reason it’s special isn’t the colour itself — the colour is just a signpost.
              It’s a clue pointing to the unique genetics and the specific, often fruity and relaxing, experience that comes with purple weed.

              It’s what we look for when we’re choosing strains for the collection at Sacred Seeds Australia; we’re chasing the quality genetics that the colour points to — like in the classic Granddaddy Purple.


              🧠 Key Takeaways

              😌 Most Purple Strains Are Relaxing

              Many of the most popular purple strains are Indica-dominant, making them a go-to choice for users seeking relaxation, stress relief, and better sleep.


              🧬 Genetics Are the Most Important Factor

              A plant will only express purple colours if it has the genetic code to do so.
              You cannot force a green strain to turn purple.


              ❄️ Cooler Temperatures Act as a Trigger

              Exposing a genetically predisposed plant to cooler temperatures late in its flowering stage can enhance and deepen its purple hues.

              purple weed seeds sacred seeds australia

              🍇 Most Purple Strains Have Relaxing Effects and Fruity Flavours

              While the stunning appearance is a huge draw, purple weed seeds produce plants that are highly valued for their effects and aromas.

              Because many of the most famous purple strains have a strong Indica-dominant heritage, they are often associated with powerful, full-body relaxation. Many people use these strains to help manage anxiety, stress, and chronic pain.

              The terpene profiles in the strains also play a big role.
              According to an analysis by Dutch Passion, purple strains frequently have a rich terpene blend that creates sweet, fruity, and earthy aromas.
              Notes of grape and sweet berry are very common — making the taste and smell just as appealing as the vibrant colour.


              💜 Granddaddy Purple and Purple Kush Are Some of the Finest Options in This Category

              Granddaddy Purple is arguably the most famous.

              Created in 2003 by breeder Ken Estes, Granddaddy Purple was a genetic milestone. By crossing Purple Urkle with Big Bud, he created a high-yielding Indica-dominant hybrid with a powerful body high and an unmistakable “grape Kool-Aid” aroma.

              Before GDP, purple buds were a rarity — after, they became an icon.

              Purple Kush is another West Coast classic.
              It’s a pure Indica strain born from crossing Hindu Kush with a Purple Afghani.
              It’s famous for its deeply relaxing, sedative effects, which make it a top choice for people dealing with chronic pain or insomnia.
              Its earthy, sweet kush flavour is as legendary as its potent high.

              Mimosa is another, one of the most delicious and stunning balanced hybrids.  Sometimes referred to as Purple Mimosa, she is a powerhouse strain created by crossing the zesty Clementine with the fruity, indica-leaning Purple Punch. This fusion delivers one of the most vibrant citrus-forward strains in existence, combining high THC levels with balanced effects and eye-catching bag appeal. Thanks to its purple heritage, Mimosa plants may express rich violet tones in cooler grow conditions.


              🌈 Natural Pigments Called Anthocyanins Create the Purple Colour

              That striking purple colour is completely natural — produced by pigments called anthocyanins.

              In a normal green cannabis plant, chlorophyll is so dominant that it masks the underlying colours.
              But in purple cannabis strains, the genetics are different. As the plant matures and approaches harvest, it produces less chlorophyll, allowing the purple pigments that were always present to show through.

              The process turns the leaves, flowers, and buds into beautiful violet shades.


              ❄️ Cooler Night Temperatures Will Bring Out the Deepest Purples

              While a plant’s ability to turn purple is locked in its genetics, growers can use a few tricks to enhance the colour.

              The most common method is to introduce cooler night temperatures.
              Late in the flowering stage, letting the temperature drop a few degrees when lights are off mimics natural autumn conditions.

              This signal slows chlorophyll production, allowing the vibrant purple hues to come through more strongly.
              You don’t want to freeze your plants, but a gentle temperature drop makes a huge difference in final visual appeal.


              🧬 Indica vs. Sativa: All Purple Effects Aren’t the Same

              It’s a common mistake to think all purple weed will put you to sleep.
              While many purple strains like Granddaddy Purple are Indica-dominant and deeply relaxing, that’s not the whole story — there are also sativa-dominant purple strains.

              The legendary Purple Haze is the best example.
              A cross of Haze and Purple Thai, it’s known for producing an energetic, creative, and almost psychedelic high.

              It just goes to show — you’ll find a purple strain for every mood.


              🌱 You Won’t Get Purple Buds Without the Right Genetics

              You cannot force a plant to turn purple if it doesn’t have the right DNA.
              All the tricks in the world won’t make a green strain show purple buds.

              That’s why sourcing authentic seeds is so important when growing purple varieties.
              At Sacred Seeds Australia, we work with top breeders to provide genuine genetics for legendary strains.

              Our collection of feminised purple cannabis seeds and autoflower purple cannabis seeds is carefully selected.
              With us, you’re definitely starting with the real deal.

              purple kush sacred seeds australia

              💬 Frequently Asked Questions (FAQs)

              🌿 Are all purple strains Indicas?

              No, but many of the most famous ones are Indica-dominant.
              The relaxing effects are part of the classic purple weed profile.

              However, there are also famous balanced purple strains, like Mimosa, which is known for its creative and euphoric effects.


              🍇 Does the purple colour affect the taste of the buds?

              Yes, in a way.
              The anthocyanin pigments that cause the purple colouration are related to flavonoids, which contribute to the overall flavour profile.

              This is why so many purple strains share a characteristic sweet berry or grape taste.


              🔥 What is the THC content of most purple strains?

              The THC levels depend on the strain.
              Some, like Purple #1, are more moderate — around 10–15% THC.

              Others are very potent.
              For example, Cannabis Training University notes that Purple Kush typically contains 18–21% THC.


              The list is always growing.
              Strains like Purple Punch and Purple Lemonade have become very popular recently.

              Purple Punch is an Indica-dominant cross known for its knockout effects, while Purple Lemonade Auto is a fast-finishing autoflower with a zesty citrus and sweet flavour.


              🌾 Do purple strains give good yields?

              Yes, many are high-yielding varieties.
              Breeders know that growers want both good looks and heavy harvests.

              Strains like Granddaddy Purple were bred with Big Bud, a famous high-yielding strain, specifically to produce large yields of dense, resinous purple buds.


              The rules are the same for all cannabis seeds.
              In Australia, it is illegal to germinate or grow cannabis plants unless you are in the ACT or have a specific medical license.

              All seeds — including purple weed seeds — are sold as adult souvenirs.
              Always be aware of your local laws.


              🧑‍🎓 Need helping choosing what to buy? Have a read of this strain guide.

              🧑‍🎓 Learn here how we test our seeds and the best way to store seeds.