Learning how to grow weed seeds looks like a large undertaking until you break it into stages, at which point it is just a plant with different needs at different times. This guide walks the full arc: choosing a seed, germination, the seedling weeks, the vegetative growth spurt, the flip to flowering, harvest, and the drying and curing that decides how the final product actually turns out.
Each stage links to a dedicated guide that covers it properly. Think of this page as the map. The detail lives in the guides it points to.
Before you read on
We sell seeds as souvenirs and for genetic preservation. Cultivation is prohibited in most Australian states and territories, with the Australian Capital Territory the main exception for limited personal growing by adults. Treat this guide as educational. The guide to cannabis law in Australia sets out where each jurisdiction currently stands, and it is worth knowing what applies where you live.
With that said, here is what actually happens between a seed and a jar.

Stage 1: Choosing the Seed
The ceiling on the whole grow is set before you start. A seed carries a range of genetic possibilities, and no amount of good technique lifts a plant above what its genetics allow. Everything after this point is about not falling short of that ceiling.
Three decisions matter. Feminised or regular, which determines whether you will be sexing and culling plants partway through. Autoflower or photoperiod, which determines whether you control the timeline or the plant does. And climate fit, which in Australia matters more than most guides admit, since a dense indica bred for arid mountains behaves very differently through a humid subtropical autumn.
The cannabis seeds reference guide covers seed types, viability and what separates good genetics from poor. The beginner strain guide narrows it if this is a first run, and the strain finder matches you to three options in about six questions. Everything we stock is batch-tested before dispatch, which the germination guarantee explains, and the full range sits in the cannabis seeds Australia catalogue.
Stage 2: Germination
A seed needs three things and nothing else: warmth at 22 to 25 °C, steady moisture, and darkness. Every germination method is a different way of delivering those. The paper towel method is the standard because you can see the taproot emerge before the seed goes anywhere near soil, which means you know it has worked rather than hoping.
Most viable seeds show a taproot inside 24 to 72 hours. Use clean water rather than tap, because chlorine and chloramines work against the enzyme systems involved, which the water quality guide explains in full. If nothing happens after a week in correct conditions, the troubleshooting guide works through the causes in diagnostic order.
The complete germination guide covers all three methods, planting depth, the first watering and the first week in detail. It is the right place to be for this stage and the next one.
Stage 3: The Seedling Weeks
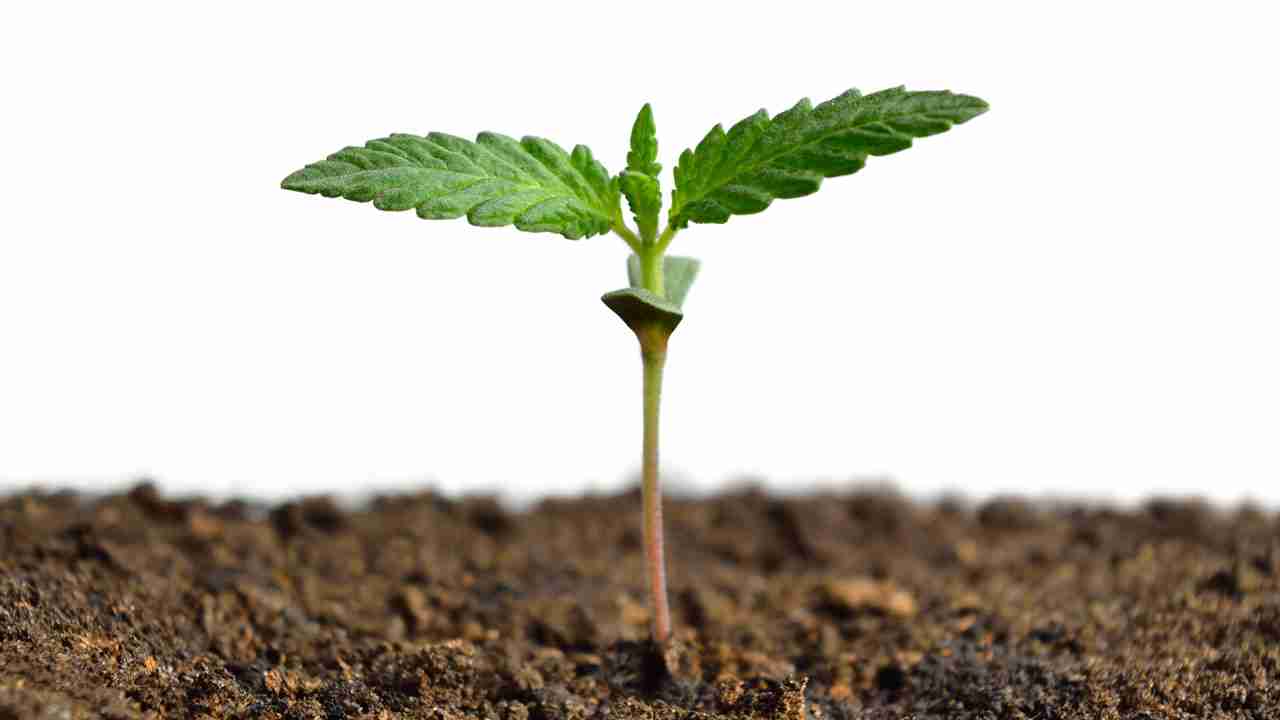
Two to three weeks, and the job is mostly restraint. The plant produces its cotyledons, the two smooth rounded leaves packed inside the seed, then its first true leaves. Growth above the surface looks slow because the plant is building roots, which is exactly what you want.
Hold humidity around 70 percent easing down to 60 as the true leaves come through, keep temperature between 21 and 25 °C, and give it 12 to 16 hours of light that is not too intense. The two things that kill seedlings are overwatering and insufficient light, and overwatering is the more common because it presents as drooping, which reads as thirst.
Plant into a small container rather than a large one, in a light medium rather than a rich one. The seedling medium guide and the container sizing guide cover both. Do not feed yet. If a seedling collapses at the base with a pinched darkened stem, that is damping off, and the damping off guide covers prevention, since treatment after the fact rarely works.
The seedling care guide covers this stage properly.
Stage 4: Vegetative Growth
This is where the plant builds the structure that will carry the harvest, and it is the stage growers have the most control over. A plant does not produce more than its frame can support, so whatever size and shape you finish veg with is the ceiling on what flowering can deliver.
Growth accelerates sharply. The plant puts on height, thickens its main stem, and pushes out branches at each node. Give it 18 hours of light a day indoors, which is the practical standard, and feed nitrogen-heavy, because nitrogen drives leaf and stem production. Airflow matters more than people expect, since moving air strengthens stems and keeps humidity from settling in the canopy.
Feeding starts here rather than earlier. The feeding guide covers the trigger to watch for, which is the third node rather than a date. Build strength gradually, because tip burn from an over-eager first feed is one of the most common setbacks at this stage. If leaves start yellowing or spotting, the nutrient deficiency guide and the yellowing leaves guide will help you separate a real problem from normal senescence.
When roots fill the container, move up a size. Doing it late checks growth, and a root-bound plant in veg costs you final size. The transplanting guide covers timing and technique.
Training, and whether you need it
Training is optional and worth understanding rather than following blindly. Left alone, a cannabis plant grows one dominant central cola with smaller branches beneath, because the top of the plant suppresses the growth of everything below it. Training techniques all work by interrupting that.
Topping means cutting the growing tip, which turns one main cola into two and produces a bushier plant. Low stress training means bending and tying branches down rather than cutting, which spreads the canopy so more sites receive direct light. Both aim at the same outcome: an even canopy where light reaches many bud sites rather than one.
Neither is necessary. A plant left to grow naturally produces a perfectly good harvest, and training carries a recovery cost that a photoperiod plant absorbs easily and an autoflower often does not. If you are running an autoflower, the fixed timeline means recovery time comes directly out of production, so most growers either train very lightly or not at all.
Veg length is entirely your call with a photoperiod, which is the whole advantage of the format. Four to eight weeks is typical. Longer means a bigger plant and a bigger harvest, within whatever space you have. In a small space, ending veg earlier is how you keep the plant manageable, and the small space growing guide covers the tradeoffs.
Stage 5: Pre-Flower and Sexing
Before flowering properly begins, the plant shows its sex at the nodes where branches meet the stem. Females produce a small teardrop-shaped calyx with two wispy white hairs, the pistils, emerging from it. Males produce small round pollen sacs, usually described as looking like a tiny bunch of grapes.
This matters if you are running regular seed, because a male that opens and releases pollen will pollinate every female in the space. A pollinated female redirects its energy into producing seed rather than resin, and the harvest is substantially reduced. Males need removing before they open, which means checking daily once pre-flowers appear.
Feminised seed removes this job entirely, which is why most growers use it. The male and female seeds guide covers identification in detail, and the feminised seeds guide covers how they are produced and what that does and does not change.
Stage 6: Flowering
With a photoperiod plant you trigger flowering by switching to 12 hours of light and 12 hours of genuinely uninterrupted darkness. Uninterrupted is the operative word, because light leaks during the dark period can confuse the plant into reverting or producing pollen sacs on a female, and the guide to photoperiod plants flowering early covers what goes wrong and why. Outdoors the season handles the trigger for you as autumn light drops.
Autoflowers ignore all of this and flower on age regardless of the light schedule, typically starting two to four weeks from germination.
The stretch comes first. In the two to three weeks after the flip a photoperiod plant can double in height, sometimes more with sativa-leaning genetics. Plan for it, because a plant that fits your space at the flip may not fit it a fortnight later.
Bud formation follows. White pistils multiply at the nodes, then bud sites swell and merge into colas. Resin production ramps up, which is when trichomes become visible as a frosted coating and the aroma becomes noticeable.
Ripening is the final phase. Pistils darken from white through orange and brown, buds put on their last density, and trichomes shift from clear to cloudy to amber.
Feeding changes with the stage. Nitrogen demand drops and phosphorus and potassium demand rises, because the plant is producing flower rather than leaf. Humidity should come down, ideally to 40 or 50 percent by late flower, because dense buds and moist air is how bud rot begins. That risk is climate-dependent in Australia and it is the main reason a dense indica is harder work in Queensland than in Tasmania. The outdoor growing guide covers regional timing, and the pest control guide covers what to do when something else finds your plant first.
Flowering runs eight to twelve weeks for most photoperiod genetics, with sativa-dominant plants at the longer end.
Stage 7: Harvest
Harvest timing does more to determine the character of the final product than almost anything else in the grow, and it is the decision most growers rush.
Pistil colour is the rough guide and trichomes are the real one. Under magnification, trichomes progress from clear through cloudy to amber. Clear means immature. Cloudy is peak potency. Amber indicates the beginning of degradation, which produces a heavier, more sedating character. Most growers harvest somewhere between mostly cloudy and around thirty percent amber, and where exactly you land inside that window is a preference rather than a right answer.
The harvest timing guide covers the full set of signals, and the amber trichomes guide covers reading them properly, which needs a jeweller’s loupe or a cheap digital microscope rather than the naked eye.
A flush of plain water in the final week or two is common practice, on the reasoning that it lets the plant use up stored nutrients and improves the smoothness of the finished product. Opinions differ on how much difference it makes, and it is a low-cost step either way.
Stage 8: Drying and Curing
This is the stage that separates a good grow from a disappointing one, and it is where the most work gets undone. Months of careful growing can be spoiled in a week of bad drying, and there is no recovering it afterwards.
Drying takes seven to fourteen days, hung in a dark space at around 18 to 20 °C with humidity near 50 percent and gentle air movement that is not blowing directly on the plant material. Slow is the whole point. Rushed drying traps chlorophyll and produces the harsh, grassy character people describe as tasting like hay. The stems should snap rather than bend when it is done. The drying guide covers the setup and the common mistakes.
Curing follows in sealed glass jars, opened daily at first to release moisture and exchange air, then progressively less often. Two weeks makes a noticeable difference. Four to eight weeks is where most of the improvement in aroma and smoothness happens. The curing guide covers the process and the timeline.
Patience here pays more than patience anywhere else in the grow.
How Long the Whole Thing Takes
The honest answer is that it depends on format and genetics, and the range is wide.
Typical timelines
| Germination | 1 to 5 days |
| Seedling | 2 to 3 weeks |
| Vegetative (photoperiod) | 4 to 8 weeks, your choice |
| Flowering (photoperiod) | 8 to 12 weeks |
| Drying and curing | 3 to 10 weeks |
| Photoperiod, seed to jar | roughly 5 to 8 months |
| Autoflower, seed to jar | roughly 3 to 5 months |
Autoflowers compress the front half of that by removing the vegetative stage you control, which is their appeal and also their constraint. The clock runs whether the plant is thriving or struggling, so a setback in week two comes straight out of the final result with no opportunity to make it up. That is why we do not describe autoflowers as beginner-friendly regardless of what the packaging says, and the autoflower versus photoperiod comparison works through the decision. If you are running one, the week by week autoflower guide maps the whole fixed timeline.
Key takeaways
A cannabis plant moves through clear stages with different needs at each: germination, seedling, vegetative, flowering, then harvest and cure. Treating them as one continuous task is what makes it feel complicated.
Genetics set the ceiling before you start. Vegetative growth sets the frame, and a plant will not produce more than its structure can carry.
Light is the master signal for a photoperiod plant. Eighteen hours keeps it growing, twelve hours of uninterrupted darkness starts it flowering. Autoflowers ignore this entirely and run on age.
Drying and curing decide how the harvest actually turns out, and rushing them undoes months of work with no way back.
How to Grow Weed Seeds: Frequently Asked Questions
How long does it take from seed to harvest?
Roughly five to eight months for a photoperiod plant including drying and curing, and three to five months for an autoflower. The variable you control is vegetative length on a photoperiod, which is four to eight weeks typically and sets the eventual size of the plant.
What are the first signs of a problem?
Leaves. Yellowing, spotting, curling or drooping usually point to watering, feeding or pests, in roughly that order of likelihood. The yellowing leaves guide and the nutrient deficiency guide cover how to tell them apart, since the symptoms overlap more than most charts suggest.
Can I grow on a windowsill?
It is difficult. A windowsill rarely delivers the light intensity needed, particularly through flowering, and the usual result is a tall, weak plant with sparse airy buds. If space is the constraint rather than light, the small space guide covers what does work in a confined area.
How big will the plant get?
It depends on genetics, container size and how long you run vegetative growth. Indica-leaning plants tend to stay short and bushy, sativa-leaning plants can get very tall, and a photoperiod plant will roughly double in height in the weeks after the flip. Plan your space around the post-stretch size rather than the size at the flip.
Do I need to prune or train?
No. A plant left alone produces a perfectly good harvest. Training spreads the canopy so light reaches more bud sites, which usually improves yield, but it costs recovery time. On an autoflower that recovery time comes directly out of the fixed timeline, so light training or none at all is the safer approach there.
My seedling fell over and looks weak.
Usually damping off, a fungal condition that takes hold in medium that has stayed too wet, and it presents as a pinched darkened stem at the base. It can also be a stretched seedling whose stem cannot support it, which points to insufficient light. The damping off guide covers prevention, which is the only reliable approach.
What water should I use?
Not untreated tap water. Filtered, collected rainwater or distilled is better, ideally at pH 6.0 to 6.5. Australian tap supply carries chlorine or chloramines and fluoride, and chloramines in particular do not off-gas by standing the water overnight. The water quality guide covers the detail.
How do I know when to water?
Check rather than follow a schedule. Push a finger a couple of centimetres into the medium, and water if it is dry at that depth. Lifting the container is even more reliable once you have felt the weight difference twice. Overwatering causes more losses than underwatering, particularly early.
When do I switch to 12 hours of light?
When the plant has reached roughly half the final size you want, since it will roughly double during the stretch. That is usually four to eight weeks into vegetative growth. The darkness has to be genuinely uninterrupted, because light leaks during the dark period can cause a plant to revert or to produce pollen sacs.
How do I know when to harvest?
Trichomes, viewed under magnification. Clear means immature, cloudy is peak, and amber signals the start of degradation and a heavier character. Most growers harvest between mostly cloudy and around thirty percent amber. Pistil colour is a rough secondary signal. The harvest timing guide covers the full picture.
Can I skip curing?
You can, and it is the most commonly regretted shortcut. Curing is where harshness drops away and aroma develops, and two weeks already makes a clear difference while four to eight weeks delivers most of the improvement. Nothing later in the process recovers what a rushed dry and cure costs you.
What is the difference between growing autoflowers and photoperiods?
Control. A photoperiod plant stays in vegetative growth until you switch the light schedule, so you decide the size and you have a recovery window if something goes wrong. An autoflower runs on a fixed internal clock, finishes faster, and gives you no opportunity to make up lost ground.
Guides for Each Stage
Cannabis seeds reference guide, seed types, storage, viability and genetics.
How to germinate cannabis seeds, from choosing a seed through to an established seedling.
Cannabis seedling care, the fortnight after germination.
Transplanting cannabis, when and how to move up a container size.
When to harvest, reading the signals properly.
How to dry cannabis and how to cure cannabis, the stage that decides how it all turns out.
Growing outdoors in Australia, regional timing and placement.
Sacred Seeds Australia sells cannabis seeds strictly as souvenirs and for genetic preservation. The Australian Capital Territory permits limited personal cultivation for adults. All other states and territories prohibit it. Nothing here is medical or legal advice. Always check the laws that apply where you live before germinating or cultivating.