


Auto Fat Bastard Feminized Seeds
From Original price was: $80.00.$75.00Current price is: $75.00.
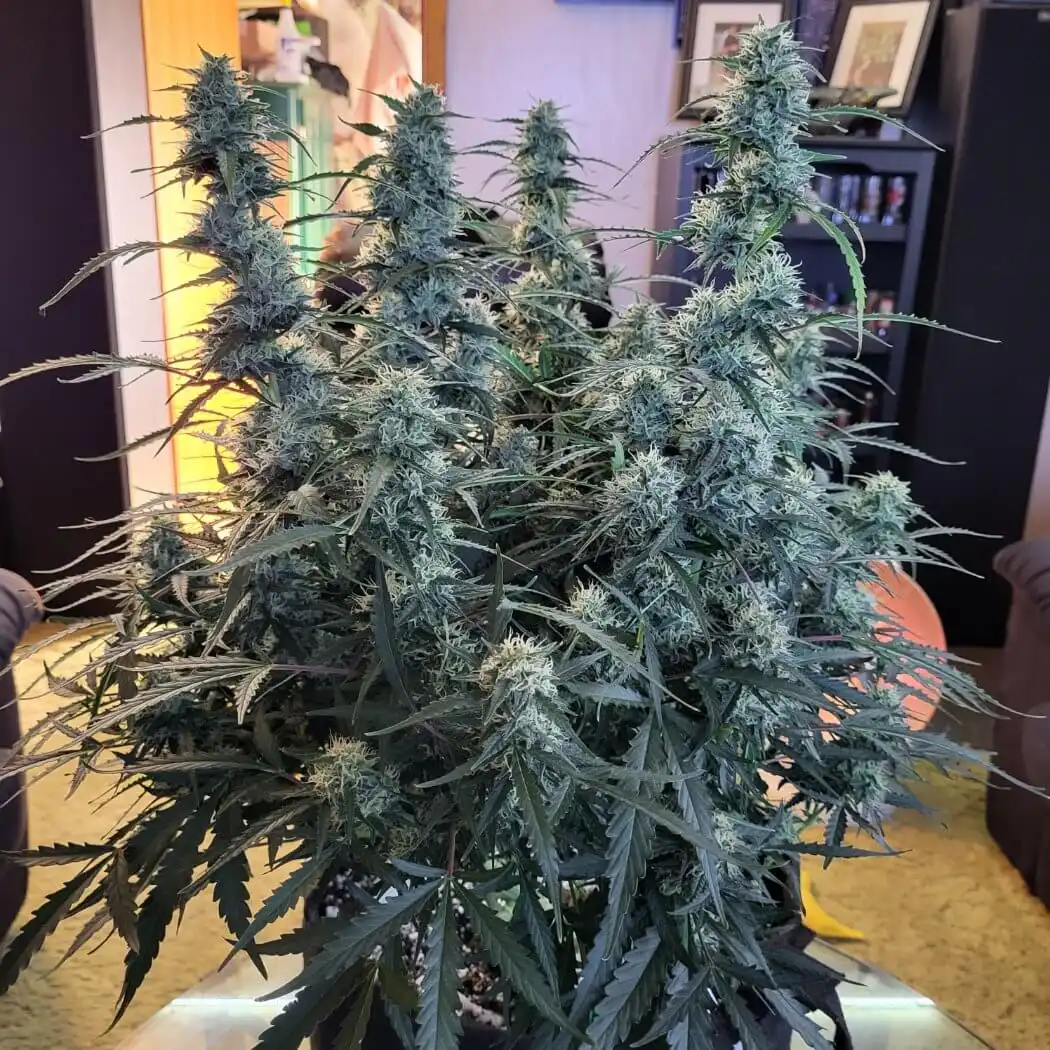
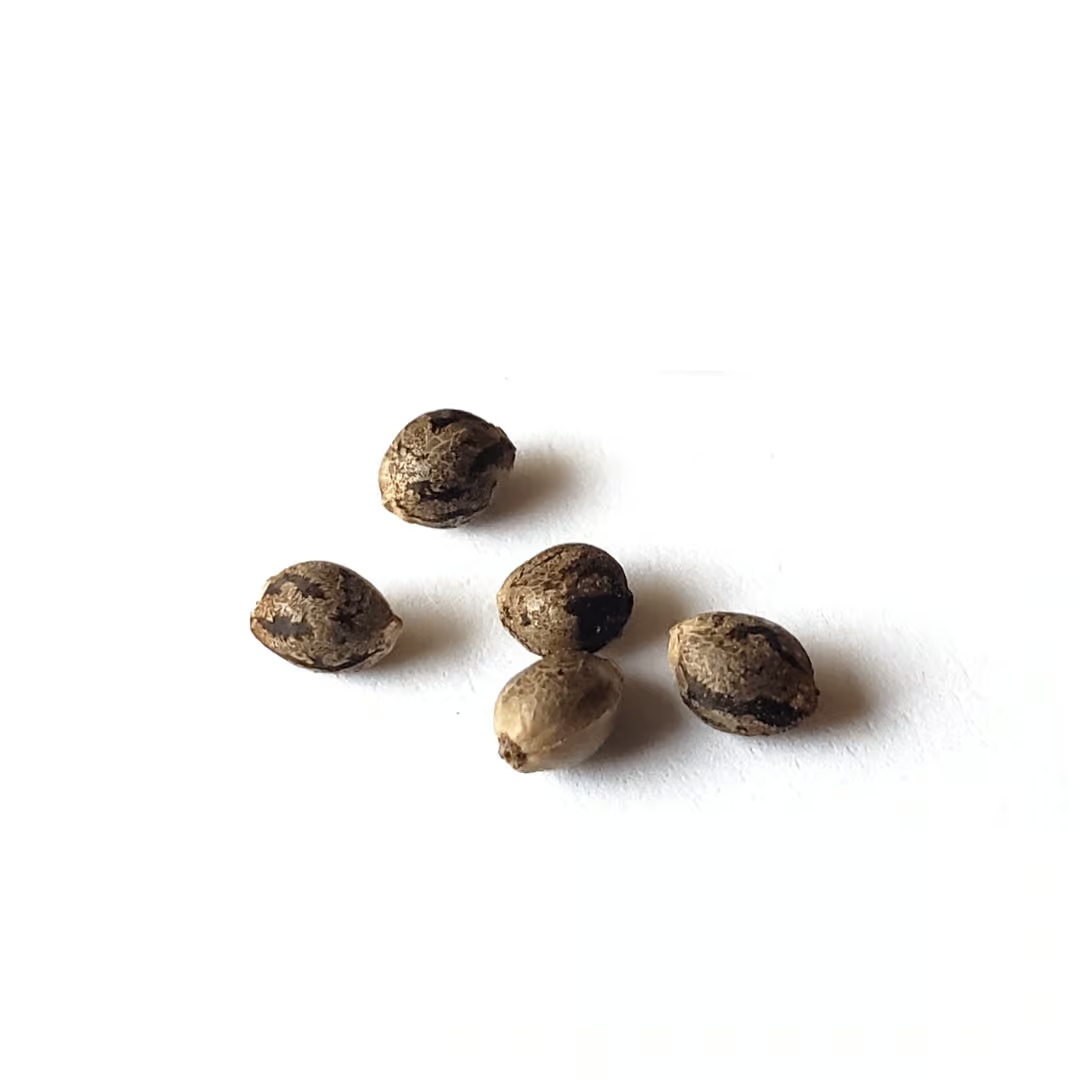
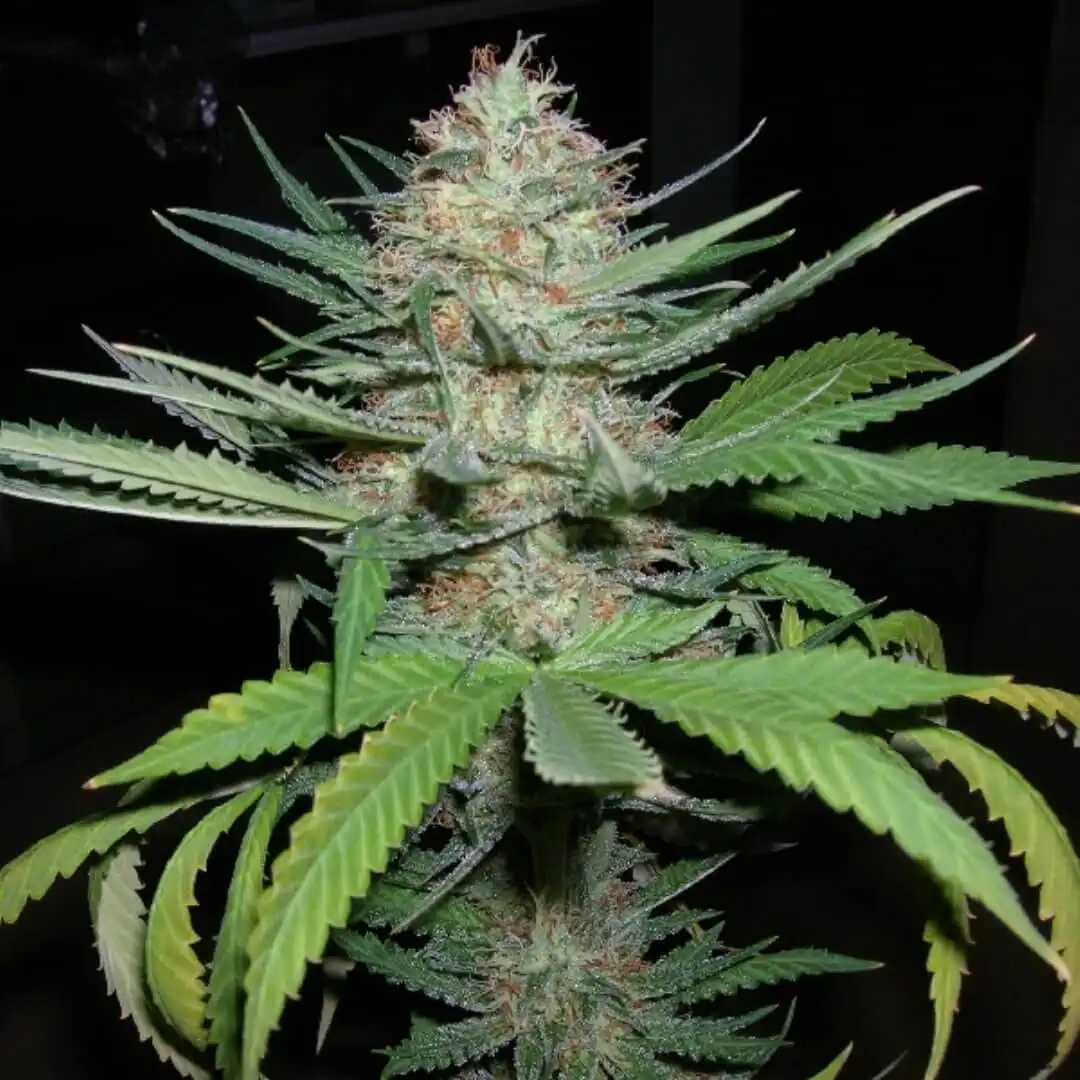
Auto Fat Bastard seeds are Blimburn’s Goldmember × Monkey Spunk cross — OG Kush, Chemdawg 4, and G13 two generations back — in autoflower format. The highest-potency auto in the catalogue at 25–34% THC real-world, on a fixed 56–70 day seed-to-harvest timeline. Dense, resin-loaded buds with skunky-fruit aroma and deep body sedation. Compact at 60–90 cm with no light flip required. Five to six indoor cycles annually. Not the one to run if you have anything left to do with your evening.
Every order ships with bonus seeds. One free seed per five purchased — added automatically, no catch. Contact us for bulk order pricing.

Germination Guarantee
Every batch is tested for quality and backed by our germination guarantee.

Fast, Local Shipping
Tracked Australia Post. Express or Standard. Plain, discreet packaging.

4.9⭐ ProductReview Rating
Independent Australian review platform. Read verified customer experiences.
Auto Fat Bastard Feminized Seeds
From Original price was: $80.00.$75.00Current price is: $75.00.
Auto Fat Bastard seeds are Blimburn’s Goldmember × Monkey Spunk cross — OG Kush, Chemdawg 4, and G13 two generations back — in autoflower format. The highest-potency auto in the catalogue at 25–34% THC real-world, on a fixed 56–70 day seed-to-harvest timeline. Dense, resin-loaded buds with skunky-fruit aroma and deep body sedation. Compact at 60–90 cm with no light flip required. Five to six indoor cycles annually. Not the one to run if you have anything left to do with your evening.
Every order ships with bonus seeds. One free seed per five purchased — added automatically, no catch. Contact us for bulk order pricing.
Germination Guarantee
Every batch is tested for quality and backed by our germination guarantee.
Fast, Local Shipping
Tracked Australia Post. Express or Standard. Plain, discreet packaging.
4.9⭐ ProductReview Rating
Independent Australian review platform. Read verified customer experiences.
💪 Auto Fat Bastard Seeds: High-Potency Genetics on a Fixed Timeline
Auto Fat Bastard seeds are one of the highest-potency autoflowers in the catalogue: Blimburn's Goldmember × Monkey Spunk cross with ruderalis added, running a realistic 25 to 30% THC (the breeder quotes 30 to 38% for optimal phenotypes) on a fixed 56 to 70 day seed-to-harvest timeline.
The photoperiod Fat Bastard is one of the most potent strains Blimburn produce, with OG Kush (through the Goldmember parent) and Gorilla Glue #4 (through Monkey Spunk) sitting deeper in the line. The auto carries those same parents on a timeline that needs no light flip and finishes in 8 to 10 weeks from seed. For the full genetics story and the breeder background, see our Fat Bastard strain review.
Why run the auto rather than the photoperiod? The answer is situation-specific. If you cannot manage a 12/12 light flip, outdoor grows without light control, balcony setups, or perpetual indoor cycles without separate veg and flower spaces, the photoperiod needs seasonal alignment or a controlled light environment. The auto does not. Plant when conditions suit, harvest 56 to 70 days later. It is also one of the faster autos in the range, 56 days at the short end, which makes 5 to 6 complete indoor runs a year achievable for growers wanting repeated fast cycles rather than one large seasonal harvest.
Be clear-eyed about the THC. Blimburn quotes 30 to 38% for both the photoperiod and the auto, a figure that represents optimal phenotypes under ideal conditions. Autos have a shorter veg phase and less time to complete the resin cycle, so real-world auto runs sit below the top breeder figure. Plan around 25 to 30%, which is still exceptional by any standard, and you will be satisfied. Plan around 38% and every harvest will feel like an underperformance.
What Auto Fat Bastard seeds do well:
- Potency class: one of the highest-THC autos in the catalogue, with nothing else in the auto range competing on raw cannabinoid strength
- Bud structure: the Goldmember × Monkey Spunk genetics produce dense, resin-loaded buds even in auto format, not the light airy buds common with weaker auto genetics, and the trichome density is exceptional
- Terpene profile: skunky-fruit with earthy diesel and citrus, the same aromatic character as the photoperiod, present and distinctive even in the shorter window
- Speed: 56 to 70 days is fast for any auto, one of the quickest harvests in the catalogue at the short end
- Multiple runs: 5 to 6 complete indoor cycles a year, ideal for perpetual setups wanting consistent access to high-potency genetics
- Manageable footprint: shorter than the photoperiod, suiting small-to-medium tents and discreet outdoor situations
The outdoor yield trade-off is significant. The photoperiod produces 700 to 900 g per plant outdoors with a full Australian summer veg. The auto produces 125 to 300 g per plant. That is a large gap, so for outdoor growers where total yield per plant matters, the photoperiod is the clear choice. Where the auto wins outdoors is flexibility: plant multiple times per season on a fixed schedule rather than committing to one large harvest.
Auto Fat Bastard Lineage
🌿 Auto Fat Bastard Seeds Effects and Experience
Onset (10–20 minutes): fast and clear. A euphoric lift arrives first, mood elevates, energy rises briefly, a pleasant mental openness before the indica genetics assert themselves. The Goldmember × Monkey Spunk parentage produces an onset that hits with purpose, this is not a gentle build.
Early phase (20–45 minutes): the cerebral euphoria peaks in this window, creative and social, still functional, with physical relaxation just beginning to layer underneath. At moderate doses early on, the balanced 50/50 genetics make this more versatile than its potency reputation suggests, the sativa uplift is genuine before the body effect takes over.
Mid-phase (45–90 minutes): indica dominance establishes itself. Body relaxation deepens progressively, tension eases, the body settles, and the motivation for active tasks drops. The caryophyllene-dominant terpene profile amplifies the physical character through CB2 receptor activity, beyond what the THC alone produces.
Late-phase (90–150+ minutes): full body ease at typical doses, with sleep following naturally for most. At the potency levels this strain produces, the late phase is pronounced. This is not an early-evening wind-down strain, it is an end-of-night one. Plan accordingly.
Duration: 3 to 5 hours at typical doses, longer than most autos at equivalent THC thanks to the depth of the genetics.
Potency note: at ~25 to 30% real-world THC, Auto Fat Bastard sits in a different category to most of the auto catalogue. This is not a strain for new cannabis users or anyone who finds strong high-THC hybrids hard to manage. Experienced users with established tolerance will find the effect powerful and extended. For everyone else, start with significantly less than you think you need and wait the full onset window before reassessing.
Flavour: sweet fruit and skunk on the inhale, the same sour-fruit skunky character as the photoperiod, with earthy diesel and citrus following. The caryophyllene and humulene give the exhale a peppery spice. The full complexity develops with a proper flush and 4-week cure, so do not assess this strain on fresh-dried material.
🍋 Terpene Profile
Auto Fat Bastard is caryophyllene-dominant, the reason its character leans fuel-and-spice rather than purely sweet:
- Caryophyllene (dominant): peppery, fuel-edged spice, and the one terpene that binds directly to CB2 receptors
- Myrcene: the earthy base that underpins the body-leaning side of the effect
- Humulene: a hoppy, woody note that rounds out the skunk
- Limonene: a citrus lift over the sweet-fruit base
For how these compounds shape flavour and effect, see our cannabis terpenes guide.
🌱 Growing Auto Fat Bastard Seeds in Australia
(Strictly for ACT residents with a licence or those overseas where cultivation is legal.)

Experience level: beginner-friendly genetics. Fat Bastard is genuinely forgiving and resistant to small mistakes, which makes it one of the more accessible high-potency autos. Two things to respect, though, regardless of how robust the genetics are: the fixed auto timeline gives no recovery window if something goes badly wrong early, and the dense bud structure needs active airflow in late flower. Get those two right and this is a straightforward grow. Our cannabis seedling care guide covers a strong start.
Critical auto rules, before germination:
- Start in the final container: germinate directly into the finishing pot, 10 to 15 L indoors, 15 to 20 L outdoors. No transplanting
- Feed light in weeks 1 to 3: start at quarter strength. The genetics are robust, but overfeeding a seedling still costs development time
- LST from week 2 to 3: the bushy structure benefits from canopy opening, more productive bud sites exposed and better airflow through the dense mid-flower canopy
- Plan airflow before you start: the dense Goldmember × Monkey Spunk bud structure traps humidity, so set up fans and extraction in advance
Height and structure: compact to medium with dense lateral branching and multiple productive bud sites. LST from week 2 to 3 opens the canopy meaningfully, and because the bushy structure closes up fast, opening it at week 3 is far easier than at week 5.
Training: LST is recommended, and SOG works well for multiple smaller plants. Topping is not recommended on the fixed timeline. Defoliate lightly in early flower only.
Airflow, the key point: the bud density is exceptional for an auto, similar to a compact photoperiod indica, which means still air above 50% RH in weeks 6 to 8 leaves inner bud sites vulnerable. Oscillating fans covering the inner canopy from week 4, humidity below 50% from mid-flower, and light defoliation of the inner canopy at pre-flower are the three actions that prevent the most common Auto Fat Bastard grow failure.
Harvest: flowering initiates at 3 to 4 weeks from germination and finishes around 56 to 70 days from seed. Check trichomes from week 7 but plan for day 60 to 70 as the realistic target, and harvest at 25 to 30% amber, since the full potency develops in the final week. Our amber trichomes guide covers reading them, and the drying and curing guide covers the slow dry these volatile terpenes need.
🏠 Indoor Growing
- Seed to harvest: 56 to 70 days fixed, no light flip required
- Yield: up to 500 g/m² under good lighting with LST
- Container: start and finish in 10 to 15 L, no transplanting
- Light: 18/6 recommended, 20/4 marginally better
- Training: LST from week 2 to 3, SOG effective for yield per square metre
- Airflow: critical, continuous fan movement from week 4, humidity below 50%
- Cycles: 5 to 6 complete indoor runs a year
- Harvest target: 25 to 30% amber, the potency develops in the final week
🌿 Outdoor Growing (Australia)
- Timing: ~56 to 70 days from planting, not season-dependent. Plant September through March for warm-weather runs
- Yield: 125 to 300 g per plant, well below the photoperiod's 700 to 900 g
- Container: 15 to 20 L minimum, started in the final pot, no transplanting
- Site: full sun, 6-plus hours direct light, good drainage, strong airflow around the plant
- Multiple runs: three outdoor runs per season achievable, September, December, and February plantings
- Best climates: warm, drier climates suit the dense bud structure. Coastal QLD and NSW need careful humidity and airflow management from week 4 of flower. Our Australian climate strain guide covers regional fit
- Weather planning: a January planting targets a late-March harvest before autumn rains; a September planting harvests in November before peak summer heat
🧪 Auto Fat Bastard Seeds EC and Feeding Guide: Soil and Coco
The Goldmember × Monkey Spunk genetics are more nutrient-tolerant than most autos, so you can build EC faster and run higher peak EC than with sensitive genetics. The critical input is potassium from week 4 onward: the resin density and trichome production that define this strain's potency are driven by consistent K through flower. Do not taper potassium the way you taper nitrogen.
All EC values assume quality base nutrients. Australian tap water typically runs 0.2 to 0.5 EC, so factor that into your target and measure after mixing.
📊 EC and pH Target Table: Soil vs Coco
| Phase / Week | Soil EC | Coco EC | Soil pH | Coco pH | Notes |
|---|---|---|---|---|---|
| Weeks 1–2 Seedling |
0.4–0.6 | 0.5–0.8 | 6.2–6.5 | 5.8–6.0 | Robust genetics, but the seedling still needs restraint. Plain water or quarter strength. Water in a ring around the seedling. |
| Weeks 3–4 Early veg / pre-flower |
0.8–1.2 | 1.0–1.4 | 6.0–6.5 | 5.8–6.2 | Build to half strength. Nitrogen-forward. Pre-flowers around day 21. Begin LST. Can build EC faster than with sensitive strains. |
| Weeks 4–5 Pre-flower transition |
1.2–1.6 | 1.4–1.8 | 6.0–6.5 | 5.8–6.2 | Reduce nitrogen, introduce bloom nutrients. Begin potassium support, critical for resin density. |
| Weeks 5–7 Peak flower |
1.4–1.8 | 1.6–2.0 | 6.0–6.5 | 5.8–6.2 | Highest EC window. These genetics handle it better than most autos. High P and K. Back off nitrogen firmly from week 5. |
| Weeks 7–8 Late flower |
1.2–1.6 | 1.4–1.8 | 6.0–6.5 | 5.8–6.2 | Taper EC down. The plant draws on reserves. Monitor runoff EC. Check trichomes from day 49. |
| Final 7–10 days Flush |
0.0–0.4 | 0.0–0.5 | 6.2 | 5.8–6.0 | Plain pH water until runoff EC drops below 0.5. The skunky-fruit terpene expression is noticeably cleaner after a proper flush. |
🌱 Soil-Specific Notes
Pre-loaded nutrients: quality potting mix runs 1.0 to 1.5 EC on its own in weeks 1 to 3, so plain water or quarter strength is correct in the seedling phase. Feed only once runoff EC drops below 0.8 or the plant shows it needs more.
Runoff monitoring: water to 10 to 20% runoff and measure it. Runoff EC more than 0.5 above feed-in indicates salt buildup, so flush with twice the pot volume of plain pH water. Fat Bastard's higher EC tolerance means salt can creep in during the peak feed window (weeks 5 to 7) if runoff monitoring is neglected.
Watering frequency: every 2 to 3 days in veg, every 1 to 2 days in peak flower. The bushy dense structure pulls water hard in flower, so lift the pot to judge moisture. Overwatering restricts the root oxygen these dense-rooted genetics need.
🥥 Coco-Specific Notes
Why coco suits these genetics: coco's faster drying and higher EC tolerance align well with Fat Bastard's nutrient demand. It can run the higher end of the coco EC range (peaking at 2.0 in weeks 5 to 7) without the sensitivity issues seen in lighter autos. This is one of the strains where coco genuinely outperforms soil for potency expression at peak flower.
Feeding frequency: once daily in veg, twice daily in peak flower. Never let coco dry out completely, since salt spikes in a dry medium damage resin production. The trichome density peaks in weeks 6 to 8, and consistent hydration at that stage directly supports it.
pH in coco: 5.9 to 6.1 at every feed. Coco has no buffering capacity. Below 5.8, phosphorus and calcium uptake drops, and given the high P requirement in flower, pH drift shows up as slow bud development.
CalMag in coco: 1 to 2 ml/L from week 1 through flush. Coco binds calcium and magnesium, so do not assume your base line covers it.
Runoff monitoring in coco: target runoff EC within 0.3 of feed-in. At the higher EC range Fat Bastard runs in peak flower, this matters more than with lighter-feeding autos. Flush immediately if runoff is more than 0.5 above feed-in.
📋 EC Troubleshooting
| What You're Seeing | Likely Cause | Action |
|---|---|---|
| Tip burn weeks 1 to 2 | EC too high for the seedling despite robust genetics | Drop to plain water for one watering, then resume at lower EC. Even robust genetics need restraint in weeks 1 to 2. |
| Slow trichome development weeks 5 to 6 | Insufficient potassium, or pH drift reducing P uptake | Check pH first. If correct, raise the bloom ratio or add a dedicated PK booster. Consistent K is the most strain-specific feeding requirement here. |
| Dark green leaves, clawing | Nitrogen too high in mid-to-late flower | Back off nitrogen sharply from week 5. Fat Bastard needs P and K in flower, not N. Reduce the nitrogen proportion even if overall EC is correct. |
| Runoff EC well above feed-in during peak flower | Salt buildup, common at the higher EC range run in weeks 5 to 7 | Flush with twice the pot volume of plain pH water. Recheck runoff EC, aiming below 1.2 before resuming feeding. |
| Moisture issues in inner bud sites weeks 6 to 8 | Inadequate airflow, not a feeding issue | Increase fan coverage to the inner canopy and drop RH below 45%. Fix the fans and humidity, do not cut EC in response. |
💡 Feeding Key Principles
- Potassium is the defining input: the trichome density and resin production that make this strain what it is are driven by consistent K from week 4 through week 7. Do not taper K the way you taper N
- Higher EC tolerance than most autos: the Goldmember × Monkey Spunk genetics handle mid-to-high EC in flower better than sensitive varieties, and the resin reward is visible in the final product
- Flush matters more at high potency: the flavour distinction between flushed and unflushed is more noticeable here than with lower-THC strains. A proper 7 to 10 day flush improves terpene expression significantly
- Airflow is separate from feeding: late-flower bud-density issues are airflow problems, not nutrient problems. Fix the fans and humidity, do not reduce EC in response
🗓️ Auto Fat Bastard Seeds Week-by-Week Grow Guide
Auto Fat Bastard runs 56 to 70 days, one of the fastest timelines in the catalogue. The key management challenge is the dense bud structure in late flower, and setup before germination matters more than reactive problem-solving during the grow.
| Phase / Week | What's Happening | Key Actions | Watch Out For |
|---|---|---|---|
| Weeks 1–2 Seedling |
Taproot establishing, first true leaves emerging. The compact bushy structure shows early, denser than most auto seedlings. | Plain water or quarter strength. 18/6. 60 to 70% RH. Final container from day one. | Overwatering and overfeeding. The seedling is still small and sensitive despite robust genetics. Water in a ring, no full-strength nutrients. |
| Weeks 3–4 Early veg / pre-flower |
Rapid bushy growth. Pre-flowers around day 21. Dense lateral branching establishing, the compact structure becoming obvious. | Begin LST from week 2 to 3, open the canopy early. Build to half strength. EC 0.8 to 1.2 soil / 1.0 to 1.4 coco. 50 to 60% RH. | Missing the LST window. The bushy structure closes up fast, so opening the canopy at week 3 is far easier than at week 5. Do not wait. |
| Weeks 5–6 Early-mid flower |
Dense bud sites stacking rapidly. The skunky-fruit aroma builds from week 5. Height gain mostly complete. The defining bud density establishing. | Transition to bloom. EC 1.4 to 1.8 soil / 1.6 to 2.0 coco. Carbon filter essential from week 5. Drop RH to 45 to 50%. Fans continuous. Back off nitrogen from week 5. | Airflow. The dense bud structure is already creating still-air pockets, so fans must cover the inner canopy, not just the perimeter. The single most important point for this strain. |
| Weeks 7–8 Late flower / ripening |
Buds fattening to full density. Trichome production at peak, resin visible on the surface. Pistils darkening, aroma at full intensity. | Check trichomes from day 49. Drop RH to 40 to 45%. Potassium support continues. Begin flush at 15 to 20% amber. Check inner bud sites for moisture. | Harvesting early. The full potency is in the final week and most of the high THC needs the plant to complete its resin cycle. Harvest at 25 to 30% amber. |
| Days 56–70 Flush & harvest |
Final ripening, natural leaf yellowing. Dense resin-loaded colas at maximum trichome density, the most potent auto harvest in the catalogue. | Plain pH water for 7 to 10 days. Harvest at 25 to 30% amber. Slow dry at 15 to 18 °C, 55 to 60% RH for 10 to 14 days. | Rushing the dry. The volatile terpenes carrying the skunky-fruit character are sensitive to high-temperature drying. Slow and cool, non-negotiable. |
| Post-harvest Cure |
The full terpene complexity and effect smoothness develop in the jar. At these potency levels, 2 weeks versus 6 weeks of cure is a real difference. | Jar at 60 to 65% RH, burp daily for two weeks. 4 weeks minimum, 6 weeks for the best terpene expression and a smoother effect. | Opening the jars too early. Fresh material is already potent, but fully cured is smoother, more flavourful, and shows the clean effect the genetics are capable of. |
🧠 Jason's Tip: Growing Auto Fat Bastard
The question I get most with this strain is whether the auto delivers the same potency as the photoperiod. The honest answer is close, but not identical. The Goldmember × Monkey Spunk genetics carry through and the resin density is genuinely exceptional for an auto, but the photoperiod with a proper veg and a full 8 to 10 week flower has more time to complete the resin cycle. Plan around 25 to 30% as your realistic target and you will be satisfied. Plan around 38% and you will always feel like you underperformed.
On airflow, this is the point that separates good Auto Fat Bastard grows from disappointing ones. The bud density in weeks 6 to 8 is exceptional for an auto, which means still air in the canopy becomes a real risk. I have seen growers run this in a tent with a single extraction fan and wonder why they had problems in the final fortnight. Oscillating fans covering the inner canopy from week 4, humidity below 50% from mid-flower, and light defoliation at pre-flower to open the inner canopy, those three things address the main risk consistently.
On harvest timing, do not rush it. The caryophyllene-dominant terpenes and the resin production both peak in the final week. At 56 days the plant looks ready. At 65 to 70 days with 25 to 30% amber trichomes it actually is. That week or ten days of patience produces materially better end product. Check with a loupe, not the calendar.
⚖️ Auto Fat Bastard vs Fat Bastard Feminised: Which Suits You
| Feature | Auto Fat Bastard (this page) |
Fat Bastard Feminised |
|---|---|---|
| Type | Autoflower | Photoperiod |
| Seed to harvest | 56–70 days fixed | Light-cycle dependent |
| Indoor yield | Up to 500 g/m² | 400–600 g/m² |
| Outdoor yield | 125–300 g/plant | 700–900 g/plant |
| THC | ~25–30% typical (breeder 30–38%) | 30–38% breeder (optimal conditions) |
| Height | ~70–110 cm | Medium, larger with veg |
| Light schedule | Any, no flip required | 12/12 to flower |
| Cycles per year | 5–6 indoor | 3–4 indoor |
| Best for | Multiple fast cycles, compact grows, no light flip | Maximum potency expression and outdoor yield |
Choose the auto for multiple fast cycles, compact grows, or outdoor flexibility without light management. Choose the Fat Bastard Feminised for maximum potency expression, outdoor yield up to 900 g per plant, and full control over veg time.
🎯 Is Auto Fat Bastard Right for Your Grow?
✅ Auto Fat Bastard is the right choice if:
- You want one of the highest-potency autos in the catalogue on a fixed timeline
- Multiple fast runs matter, 5 to 6 indoor cycles a year at 56 to 70 days each
- You need a fixed timeline without managing a 12/12 light flip
- Height is a constraint and you want a more compact plant than the photoperiod
- You are growing outdoors without light control and want these genetics on a flexible planting schedule
- You can manage the dense-bud airflow requirement in late flower
❌ Consider Fat Bastard Feminised if:
- Maximum outdoor yield is the priority, 700 to 900 g per plant versus 125 to 300 g is a significant gap
- You want the absolute upper range of potency, since the photoperiod has more time to complete the resin cycle
- You have the setup for a 12/12 flip and want full control over veg time
- You want to run SCROG for the full indoor yield potential of these genetics
- A single large harvest per season suits you better than multiple smaller ones
- You have the outdoor space and a full Australian summer for one large plant
Still comparing options? Our full strain lineup guide covers the range, or browse the autoflower range, the high-THC range, or the complete cannabis seeds catalogue.
🌟 Auto Fat Bastard Customer Experiences
Paraphrased from verified customer reviews and grower communications.
⭐⭐⭐⭐⭐ "Running three Auto Fat Bastard cycles back to back in a perpetual setup. Each comes in around day 65, yield around 420 g/m² with LST. The potency is extraordinary for an auto, nothing else I have grown in this format gets close. Dense, resin-heavy buds every run.", Indoor grower, Melbourne
⭐⭐⭐⭐⭐ "Grew two outdoors in WA in large pots, September planting, harvested day 68, around 240 g each. Dense buds, heavy resin, the skunky-fruit aroma was strong from week 5. After a 6-week cure the flavour and potency were well beyond what I expected from an auto.", Outdoor grower, Western Australia
❓ Frequently Asked Questions: Auto Fat Bastard Seeds
What is Auto Fat Bastard?
Auto Fat Bastard seeds are Blimburn's autoflowering version of their Goldmember × Monkey Spunk cross, with ruderalis added so the plant flowers automatically at 3 to 4 weeks from germination regardless of light cycle. Seed to harvest runs roughly 56 to 70 days on a fixed timeline. OG Kush (through Goldmember) and Gorilla Glue #4 (through Monkey Spunk) sit deeper in the line, making this one of the highest-THC autos in the catalogue. For the full genetics story, see our Fat Bastard strain review.
Does Auto Fat Bastard really produce 38% THC?
38% is the top of Blimburn's breeder-quoted range under optimal phenotypes and ideal conditions, the same figure quoted for the photoperiod. Autos have a shorter veg phase and less time to complete the resin cycle, so real-world auto results tend to fall below the upper breeder figure. A well-grown Auto Fat Bastard producing 25 to 30% is exceptional. Plan around 25 to 30% as your realistic target.
How long does Auto Fat Bastard take from seed to harvest?
56 to 70 days (8 to 10 weeks) from germination, one of the faster timelines in the auto catalogue. Check trichomes from day 49 but plan for day 65 to 70 as the realistic target, and harvest at 25 to 30% amber, since the full potency and terpene expression develop in the final week.
Is Auto Fat Bastard easy to grow?
The genetics are genuinely forgiving and resistant to small mistakes, which makes it one of the more beginner-friendly high-potency autos. Two things to respect regardless: the fixed auto timeline gives no recovery window for early errors, and the dense buds need airflow in late flower, oscillating fans covering the inner canopy from week 4, humidity below 50% from mid-flower, and light defoliation at pre-flower. Beyond that, the standard auto rules apply: final container from day one, no transplanting, light feeding in weeks 1 to 3.
Why is airflow so important with this strain?
The Goldmember × Monkey Spunk genetics produce unusually dense bud for an auto, similar to a compact photoperiod indica. That density in still air above 50% RH in weeks 6 to 8 leaves inner bud sites vulnerable. Continuous airflow from oscillating fans covering the inner canopy, not just perimeter extraction, is the specific practice that prevents the most common Auto Fat Bastard late-harvest failure.
What is the outdoor yield difference from the photoperiod?
Significant. The photoperiod produces 700 to 900 g per plant with a full Australian summer veg. The auto produces 125 to 300 g per plant. For growers where total outdoor yield per plant is the priority, the Fat Bastard Feminised photoperiod is the clear choice. The auto's outdoor advantage is timing flexibility, plant multiple times per season rather than committing to one large harvest.
Do you ship Auto Fat Bastard seeds across Australia?
Yes, with fast domestic shipping and discreet packaging, and most orders arrive within a few business days. All seeds are batch-tested with the paper towel method at ~22 °C and stored cold and dry to preserve viability.
21 reviews for Auto Fat Bastard Feminized Seeds
Not sure this is the right strain for you?
Answer six quick questions and we will give you three strains we feel best for you based on your setup, experience, and goals.
Related products
-

Durban Poison Feminized Seeds
From Original price was: $80.00.$75.00Current price is: $75.00. -
 AUTO
AUTOMedicinal Indica Mix Auto feminised cannabis seeds -20 seeds
Original price was: $320.00.$229.00Current price is: $229.00. -

Classic Mix – Feminised cannabis seeds
Original price was: $320.00.$240.00Current price is: $240.00. -

White Widow Feminised Seeds
From Original price was: $80.00.$75.00Current price is: $75.00. -

Northern Lights Feminized Seeds
From Original price was: $80.00.$75.00Current price is: $75.00. -

Jack Herer Feminized Seeds
From Original price was: $80.00.$75.00Current price is: $75.00. -
 AUTO
AUTOAuto Jack Herer Feminized Seeds
From $75.00 -
 AUTO
AUTOAuto Purple Kush Feminized Seeds
From Original price was: $80.00.$75.00Current price is: $75.00.

thanks to jason and jess for suppyling quality for us aussies
White tips, heavy resin and tricomes.
highly recommend
Couldn’t be happier.
I grow outside, But after 2 weeks nodes are taking off.