The most persistent piece of harvest advice in cannabis is wrong, and it’s costing growers potency every single run.
“Wait for 30% amber trichomes.” You’ve probably read it a dozen times across forums, YouTube comments, and grow guides that all cite each other. The problem is that amber trichomes don’t signal ripeness. They signal that THC has already begun degrading into CBN — a sedative cannabinoid with significantly lower psychoactive potency. By the time you’re at 30% amber across the plant, roughly 30% of your THC is gone. You grew it, you just didn’t keep it.
I spent years watching experienced growers follow this advice and wonder why their harvests felt flat. Once I understood the actual biochemistry — and started harvesting accordingly — the difference was immediate and consistent. That’s what this guide covers: how to read what your plant is actually telling you, not what the forums think it’s saying.
What Trichome Colour Actually Tells You
Trichomes progress through three distinct phases. Only one of them represents peak harvest quality — and it’s not the one most guides tell you to wait for.
Clear or transparent trichomes mean cannabinoids are still developing. Buds harvested here taste weak, feel racy, and often trigger anxiety. You’re not even close.
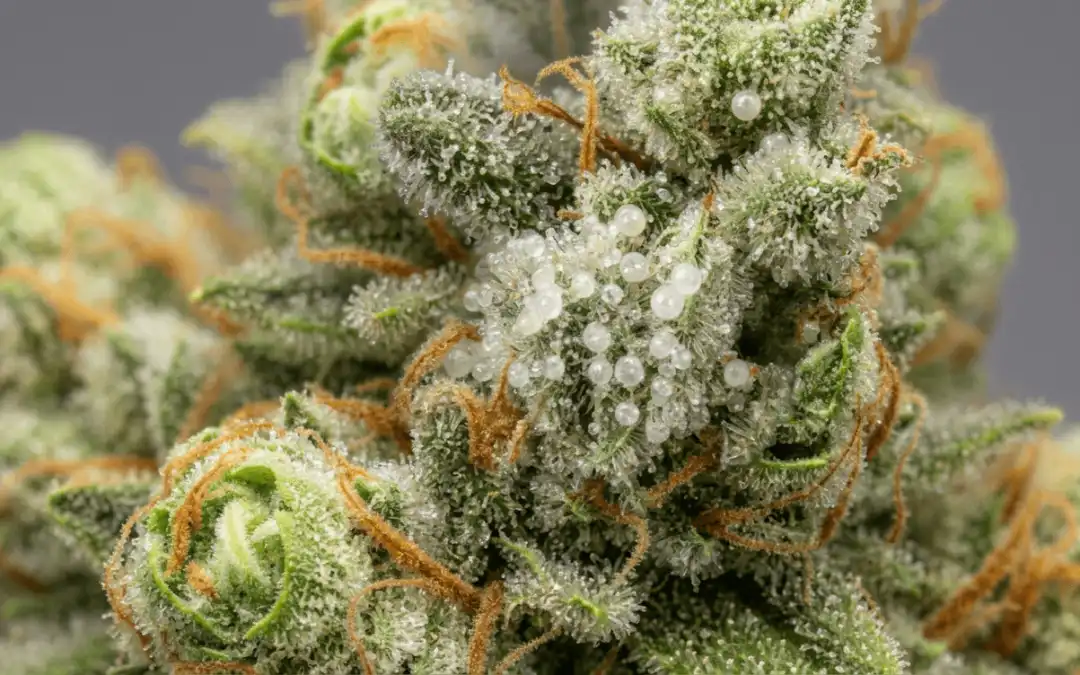
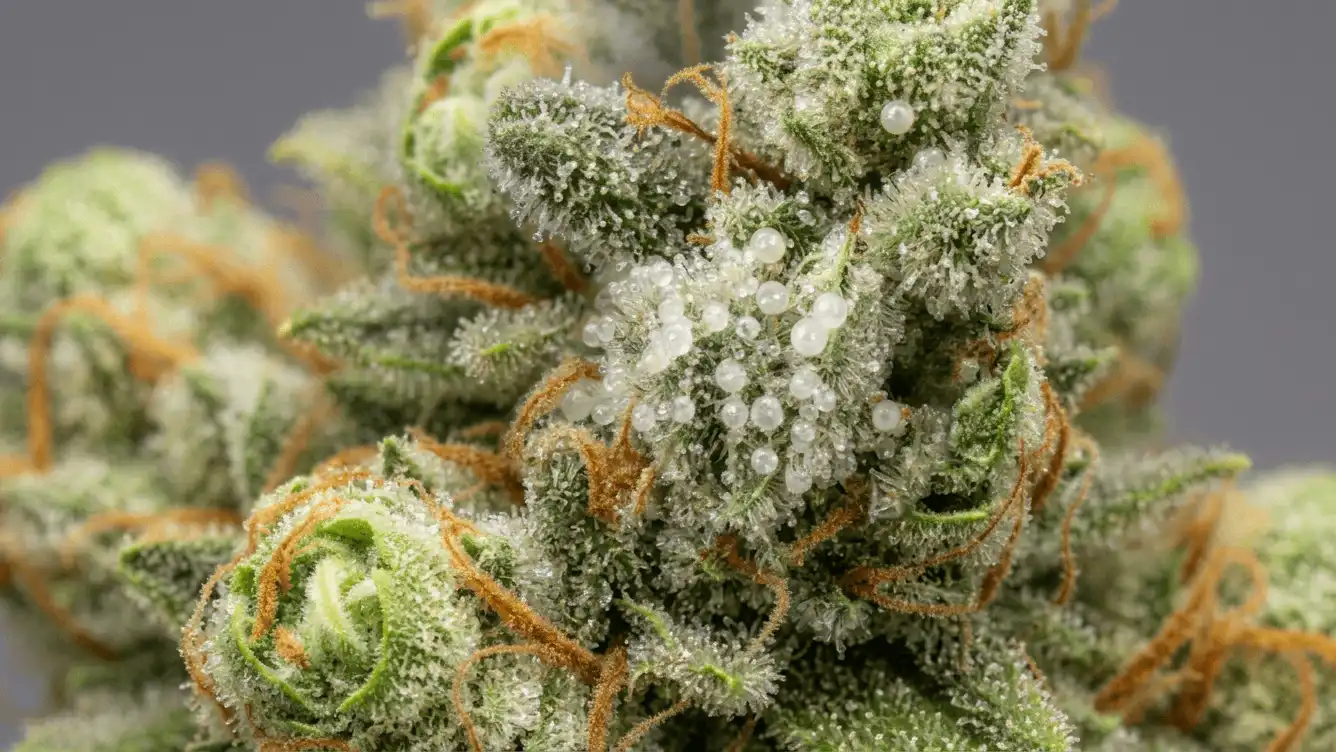
Cloudy or milky white trichomes indicate peak THC. The cannabinoid profile is complete, terpenes are at full expression, and the effect is potent and clear-headed. This is your target window.
Amber trichomes mean THC is actively degrading into CBN. The effect becomes heavier and more sedative — which suits some applications — but past 30% amber you’re not harvesting at peak, you’re harvesting past it. That’s a choice, not a recommendation.
The harvest window: 70–90% cloudy trichomes, with the remainder still clear or just beginning to shift. Check the bud calyxes directly — not the sugar leaves, which mature 5–7 days earlier and will send you to the scissors too soon.
Trichome colour
Cannabinoid status
Effect profile
Harvest call
Clear
Immature
Weak, racy, anxious
Too early — wait
Cloudy/milky (70–90%)
Peak THC
Potent, clear-headed
Optimal window
Amber (10–30%)
THC degrading to CBN
Heavier, more sedative
Personal preference only
Amber (50%+)
Significant THC loss
Heavy sedation, reduced potency
Too late — quality gone
On equipment: a 60x jeweller’s loupe does the job for around $15. A USB digital microscope is worth the $40 if you grow regularly — the image clarity removes all doubt. A phone camera in macro mode can work in good light but struggles with the clear-to-cloudy distinction. You’ll second-guess yourself every time, which usually means waiting too long.
One note on sedative effects: if you’re growing specifically for sleep or pain management, pushing to 20–30% amber is a legitimate call. Just understand the trade-off — you’re exchanging THC potency for CBN sedation. There’s no free lunch in cannabis chemistry.
The Five Signals to Read Together
Trichome colour is the most precise indicator, but reading it in isolation causes mistakes. A plant can show 80% cloudy trichomes and still not be ready. These are the five signals I check simultaneously — and all five need to align before I cut.
1. Trichome colour and density
Covered above, but density matters alongside colour. Trichome heads should be swollen and mushroom-shaped. Flat or deflated heads on an otherwise cloudy plant mean the buds need more time — the structure isn’t there yet even if the colour is. Check multiple bud sites at different heights. Top colas mature faster than lower growth, sometimes by a full week.
2. Pistil colour and recession
Pistils — the hair-like structures covering the buds — shift from white to orange or brown as the plant matures, then pull back into the bud. This is your macro-level read, visible without a loupe.
At 50–60% brown pistils, the plant is still building. At 70–80% brown, start checking trichomes closely — you’re entering the window. At 90% brown, don’t wait much longer.
Colour alone isn’t enough. Pistils should also be receding into the bud. If 80% have turned brown but are still protruding outward, the calyxes are still swelling. Give it a few more days.
3. Bud structure and the final swell
In the last week or two before harvest, buds put on a noticeable final swell — 10–20% additional mass as the calyxes stack and fill in. Mature buds feel dense and firm when gently squeezed, not airy or spongy. If you’re still seeing new white pistils emerging, growth hasn’t finished.
This is where patience directly translates to yield. Harvesting before the final swell completes is one of the most common ways growers leave weight on the plant.
4. Breeder’s flowering time
Breeder estimates tell you when to start looking, not when to harvest. Start checking trichomes about a week before the minimum stated flowering time. Expect the actual harvest to fall somewhere in the middle of the stated range — sativa-dominant strains often run a week or two beyond breeder estimates, while indica-dominant strains are generally more accurate.
For bag seed or unknown genetics, you don’t have this reference point. It’s one of the practical reasons documented genetics from a reputable source are worth the investment.
5. Leaf fade
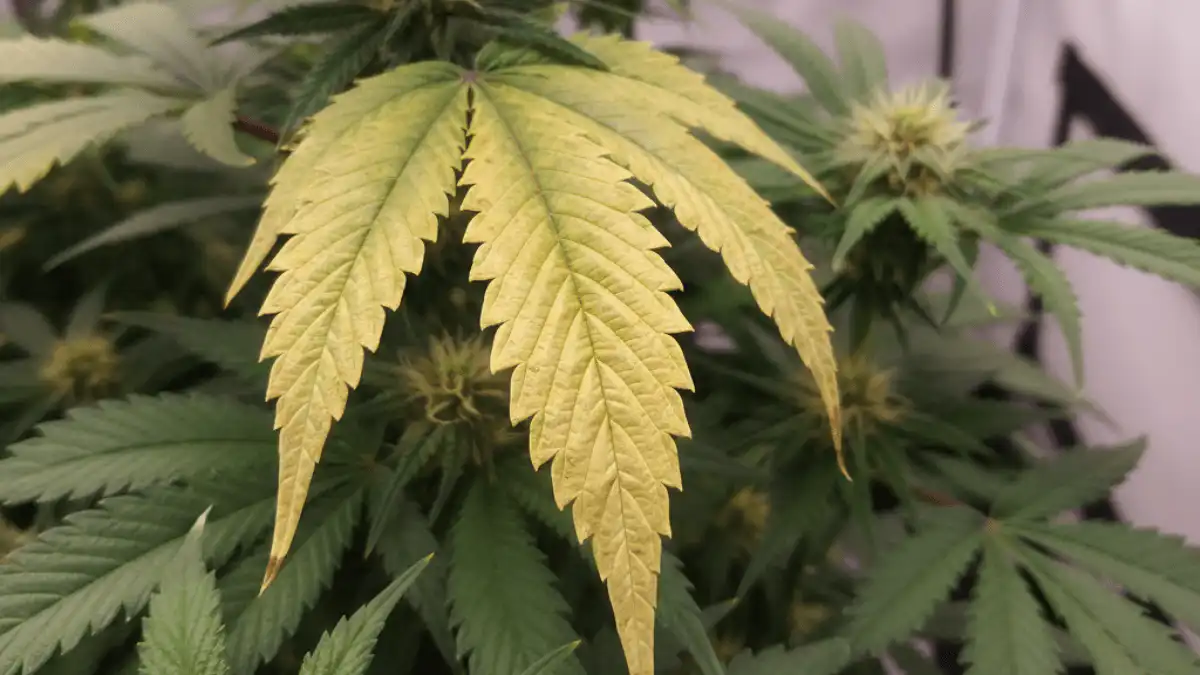
In the final weeks, fan leaves naturally yellow and drop as the plant redirects remaining nutrients into the buds. Lower leaves go first, progressing upward. This is healthy — it means the plant is finishing rather than continuing to grow.
If you’re still running nitrogen-heavy nutrients at this stage, you’ll delay the fade and risk harsh-tasting buds. Stop nitrogen-heavy feeds two to three weeks before expected harvest.
Harvesting in Australia: What Changes
Growing outdoors in Australia adds a variable that most cannabis guides — written for Northern Hemisphere growers — don’t account for: autumn rain arriving before the crop is ready.
Late February through April is when most outdoor harvests happen on the east coast. It’s also when humidity and extended rain events create serious bud rot risk. The decision calculus shifts. A plant at 65% cloudy trichomes with 75% brown pistils and three days of solid rain incoming is a fundamentally different situation to the same plant with a clear fortnight ahead.
My general rule: if sustained rain — three or more consecutive days — is forecast and the plant is past 60% cloudy with pistils mostly brown, harvest before it arrives. You’ll sacrifice some potency relative to peak harvest, but that’s recoverable through careful drying and curing. Bud rot at harvest is not.
Regional timing to plan around
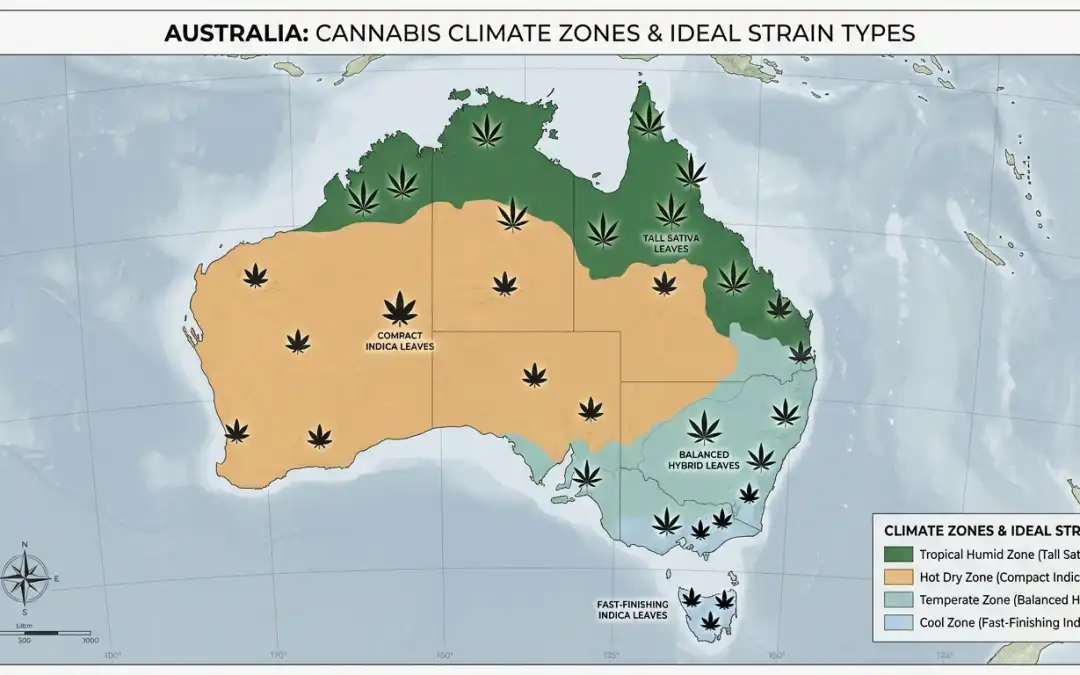
Queensland and northern NSW growers should treat mid-April as a hard deadline for outdoor harvests — earlier in wet years. Victoria and Tasmania growers often need to be done by late March to stay ahead of the weather. WA’s drier climate gives more flexibility, but coastal humidity in the southwest still requires attention in late autumn.
Strain selection for outdoor Australian grows
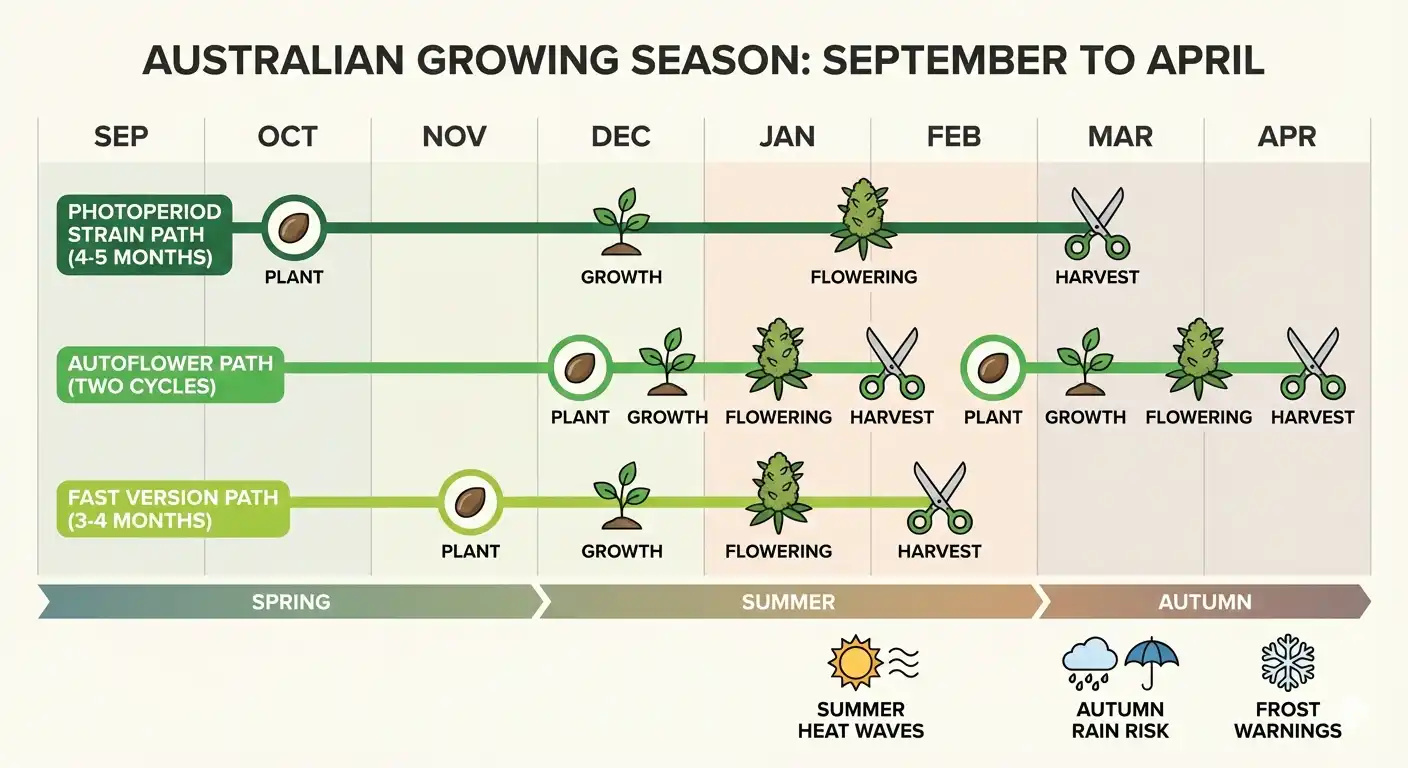
You’re best off reading this full guide to growing in Australia. But Autoflowering indica strains (7–8 week flower time) and Fast Version strains are great outdoor choices if you have a limited grow window — they’re done before the worst of the autumn rain window. Sativa-dominant strains with 10–12 week flowering times are a genuine gamble outdoors in most of Australia and are best reserved for greenhouse or indoor grows. Autoflowers offer a clean solution: planted in October or November, they finish well before the high-humidity period arrives.
Australian summer heat and false amber
Temperatures above 35°C can cause premature trichome ambering on exposed top colas. This is heat stress, not ripeness. If top colas are showing heavy amber while mid-plant buds still look cloudy and white, read the middle of the plant. That’s your actual harvest indicator.
The Decision Framework
When I’m standing in front of a plant making the call, this is the sequence I run through. Work through it in order — if a step says wait, wait.
Flowering time check. Are we within the breeder’s stated range? If we’re more than a week short of the minimum, put the loupe away and come back.
Pistil check. Are 70% or more brown and pulling back into the bud? If not, wait.
Bud structure. Dense, firm, swollen calyxes with no new white pistils? If buds still feel light or airy, they’re not done.
Trichome check across three to five bud sites at different heights. Are 70–90% cloudy on the actual bud calyxes? If yes, the window is open.
Weather and preference. Rain incoming? Do you want maximum potency or more sedative effects? That determines whether you harvest today or push a few more days.
If all five align, harvest in the morning. Terpene content is highest before heat and light exposure build through the day — the difference is measurable even if it’s subtle.
The Most Costly Mistakes
Checking sugar leaves instead of buds. Worth repeating because it’s endemic. Sugar leaves mature 5–7 days ahead of bud material. Reading them sends you to harvest too soon, every time.
Harvesting the whole plant at once. Top colas and lower buds often differ by a week in maturity. Cut the tops when they’re ready, leave the lower buds for another five to seven days. Better quality across the whole plant.
The “one more week” loop. Indecision is its own mistake. Once you’re past 50% amber across the plant, THC is declining. Check your indicators, make the call, commit to it.
Misreading weather risk. A brief shower is not three days of humidity. Don’t harvest at 40% cloudy trichomes because light rain is forecast. Read the actual forecast and make a proportionate decision.
After the Harvest
Everything you’ve done to reach peak harvest quality can unravel in the first 24 hours if the transition isn’t handled carefully.
Handle branches gently — trichome heads shear off easily and don’t grow back. Get plants into a dark, temperature-controlled drying environment immediately. Don’t leave harvested material sitting in warmth or light while you finish cutting. Aim for 15–18°C and 55–60% relative humidity with steady airflow, targeting a 10–14 day dry. The slow dry is not optional — it’s where terpene complexity develops and chlorophyll breaks down. Rushing it is how months of careful growing produces a mediocre smoke.
The full drying and curing process has its own guide. Read it before you hang your first branch.
Growing next season? Start with genetics you can time.
Documented flowering times, stable genetics, discreet shipping across Australia.
Can I harvest different parts of the plant at different times?
Yes, and for most plants it produces better results than a single harvest. Top colas receive more light and mature faster. Cut them when trichomes are 80% cloudy, then give lower buds another five to seven days. Keep watering the plant until the final cut.
What if trichomes look ready but pistils are still 50% white?
Wait. This usually means the plant experienced some stress — heat, nutrients, or water — that accelerated trichome development while bud growth stalled. Check again in five to seven days. Pistils should catch up.
Do autoflowers follow the same harvest indicators?
The same indicators apply but the timeline is compressed. Start checking at week seven from seed. The harvest window on autos is narrower — three to five days rather than a week or more — so once you’re close, check daily.
What if I’m forced to harvest early due to weather?
At 60–70% cloudy trichomes you’re looking at roughly 10–15% less potency than peak, and the effect will be slightly more cerebral and less full-bodied. It’s not ideal, but it’s far better than losing the crop to bud rot. Prioritise a slow, careful dry to preserve what’s there.
When is the best time of day to harvest?
Early morning — just after lights on indoors, or just after sunrise outdoors. Terpenes are volatile and evaporate through the day with heat and light exposure. The difference is subtle but consistent.
Should I flush before harvest and does it affect timing?
Start flushing with plain pH-balanced water when trichomes are 50–60% cloudy. That gives you one to two weeks to flush while the plant finishes. Waiting until trichomes are 90% cloudy before you start means you’ll be forced to harvest before the flush is complete.
How do I know which strains finish fastest outdoors in Australia?
Documented genetics with verified flowering times are the most reliable guide. Indica-dominant strains in the 7–9 week range are your safest outdoor bet for beating the autumn rain window. Browse our range of cannabis seeds Australia — all strains include breeder-verified flowering time data.
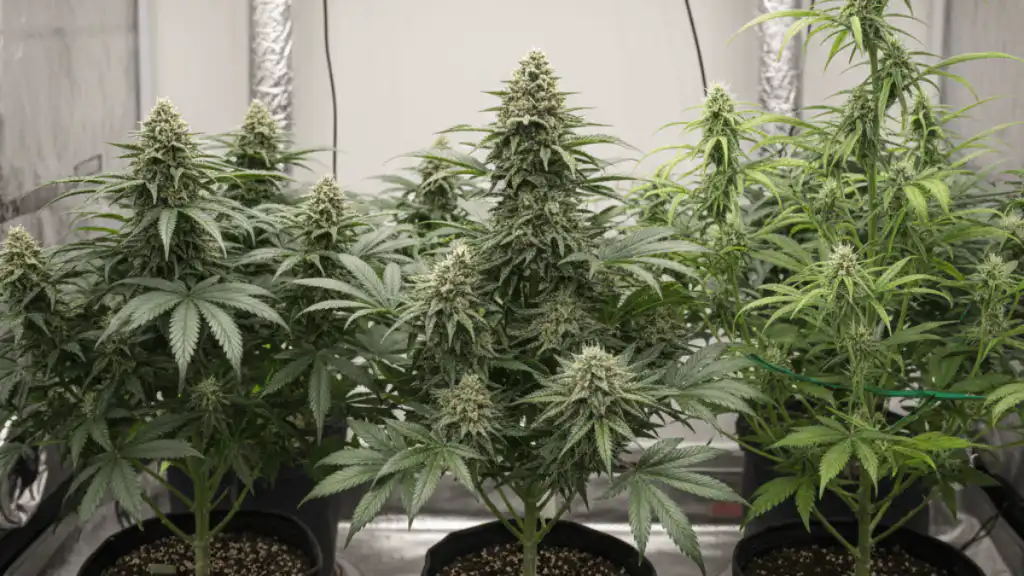
Growing cannabis in small spaces is not about squeezing a normal grow into a smaller box. It is a different problem with a different answer, and almost everyone gets the first decision wrong.
The myth is that you need room. You do not. People pull respectable harvests out of a wardrobe, a cupboard, a 60cm tent, even a modified computer tower. What you need is to understand what is actually limiting you, and it is not the floor space. Here is how small-space growing really works, what the standard advice gets wrong, and what changes when you are doing it through an Australian summer.
Growing Cannabis in Small Spaces: Height Is the Real Constraint
This is the thing nobody tells you, and it is the reason most first small grows go wrong. You look at a 60 by 60 by 120cm tent and think about the footprint. The footprint is almost never the problem. The ceiling is.
Do the arithmetic honestly. Take that 120cm of height. Your pot and saucer eat roughly 25cm off the bottom. Your light, its hanging gear and ratchets take 20 to 30cm off the top. Then you need to leave sensible clearance between the light and the canopy, call it another 30cm for a decent LED. Add it up and you are left with something like 35 to 45cm of actual plant.
Forty centimetres. That is your real grow space, and it is a fraction of what the tent’s dimensions suggested. Now factor in that a photoperiod plant roughly doubles in height after you flip it to 12/12, and sometimes more, and you can see how a plant that looked perfectly manageable at week four ends up pressed against the light with the top colas cooking.
So the whole discipline of growing cannabis in small spaces is vertical budgeting. Every decision below, the strain, the pot, the training, the light distance, is really a decision about height. Work out your actual usable height first, before you buy a seed, and everything else follows from that number.
Strain Choice: Where the Standard Advice Is Half Right
Every guide you read says the same thing: small space, grow autoflowers. That advice is half right, and the half it gets wrong matters.
What is true is that autos are simple and predictable. They flower on age rather than light, so there is no timer to change, no flip to get wrong, no light leak quietly ruining your bloom, and they finish the whole job in eight to twelve weeks. Most stay under a metre. If you want the least complicated path from seed to jar, that is a real advantage, and it is why the advice exists.
Here is the half nobody says out loud. An auto’s final size is decided by its genetics and its clock, not by you. That cuts both ways. Yes, it will probably stay small. But if that seedling has a rough fortnight, gets overwatered, gets shocked by a transplant, or sits under a light hung too close, it does not wait for you to fix it. It flowers on schedule at whatever size it happens to have reached, and you harvest a disappointment. There is no pause button and no recovery window.
A photoperiod is the opposite. Its size is decided by you, because you choose when to flip. Ask experienced growers in tight cupboards and you will hear the same thing repeatedly: if you are short on height, train it low and flip it early, because a photoperiod is easier to control than an auto. Want a 40cm plant? Flip at 20cm and let the stretch take it where it is going. If a young plant gets sick or stressed, you simply keep it in veg longer and let it recover before you flip. That recovery window is the whole difference between a ruined run and a good one.
So the honest answer is that it depends what kind of mistake you are more likely to make. If you want maximum simplicity and you will commit to babying the seedling through its first fortnight, an autoflower is a fine choice and it will get you there fast. If you want the most control over final height and room to make errors and recover from them, a compact feminised photoperiod flipped early is genuinely the better tool for a tight space, whatever the internet tells you.
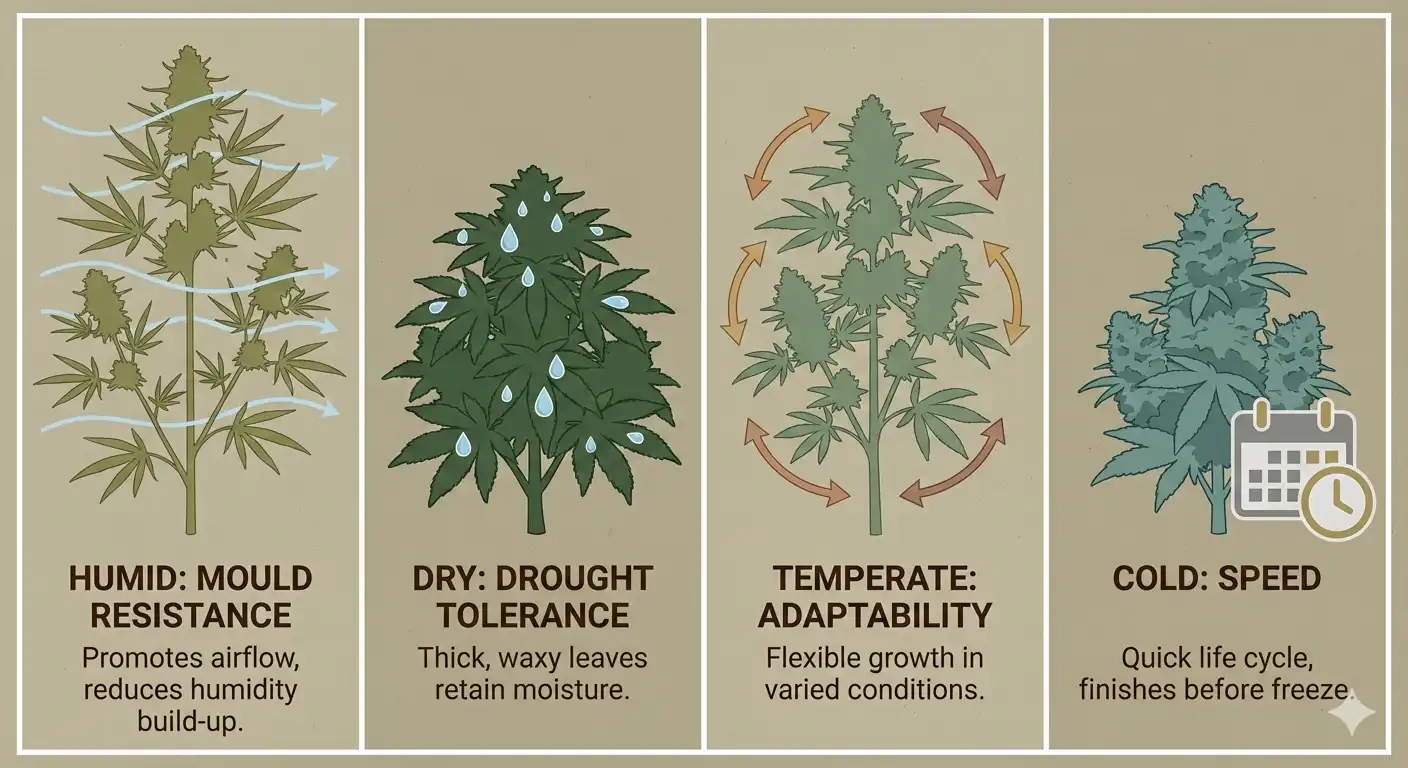
Either way, genetics set the ceiling on what training can fix. Look for indica-dominant plants, which are naturally shorter and bushier, and Afghani or Kush lineage in particular runs short and dense. Northern Lights is the textbook example: compact, genuinely forgiving of mistakes, and quick to finish. What you should not do is take a stretchy sativa into a cupboard and expect to win. A pure haze can double or triple after the flip and will run out of room no matter how well you train it. That is not a training problem, it is a genetics problem, and when you are growing cannabis in small spaces you cannot train your way out of the wrong seed.
Pot Size, and the Australian Catch
Pot size is a height tool. Root volume caps plant size, so restricting the root zone deliberately keeps the plant in your budget. Five to ten litres is the usual sweet spot for a small space: enough to grow a healthy plant, small enough to stop it getting away from you. Fabric pots are the standard recommendation because they air-prune the roots, which builds a denser root mass, and they are much harder to overwater than a plastic pot.
Now the part the overseas guides do not mention, because they are not writing for our climate. A 5 litre fabric pot in an Australian summer dries out fast. Fabric breathes, which is exactly why it resists overwatering, and that same property will have a small pot bone dry in a matter of hours when it is 35 degrees. On a hot week you can be watering twice a day, and if you go away for a weekend without a plan you will come home to a dead plant. That is the trade. The small pot that protects you from overwatering exposes you to drying out, and in this country drying out is the more likely way to lose a plant.
The practical answer is to size up slightly if you are somewhere genuinely hot, take the ten litres rather than the five, and lean on training rather than root restriction to control the height. You get the same size control with a lot more margin for error on a scorching day.
Training: The Whole Game
When you are growing cannabis in small spaces, training is not a refinement. It is the technique that makes the whole thing work, and low-stress training is the one to learn.
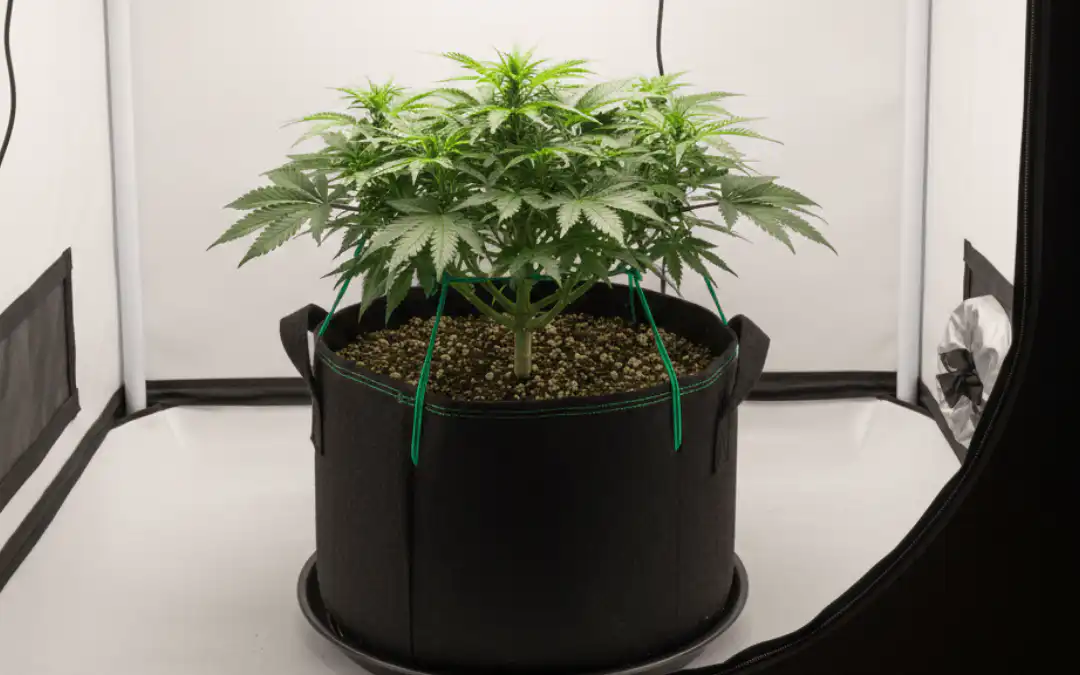
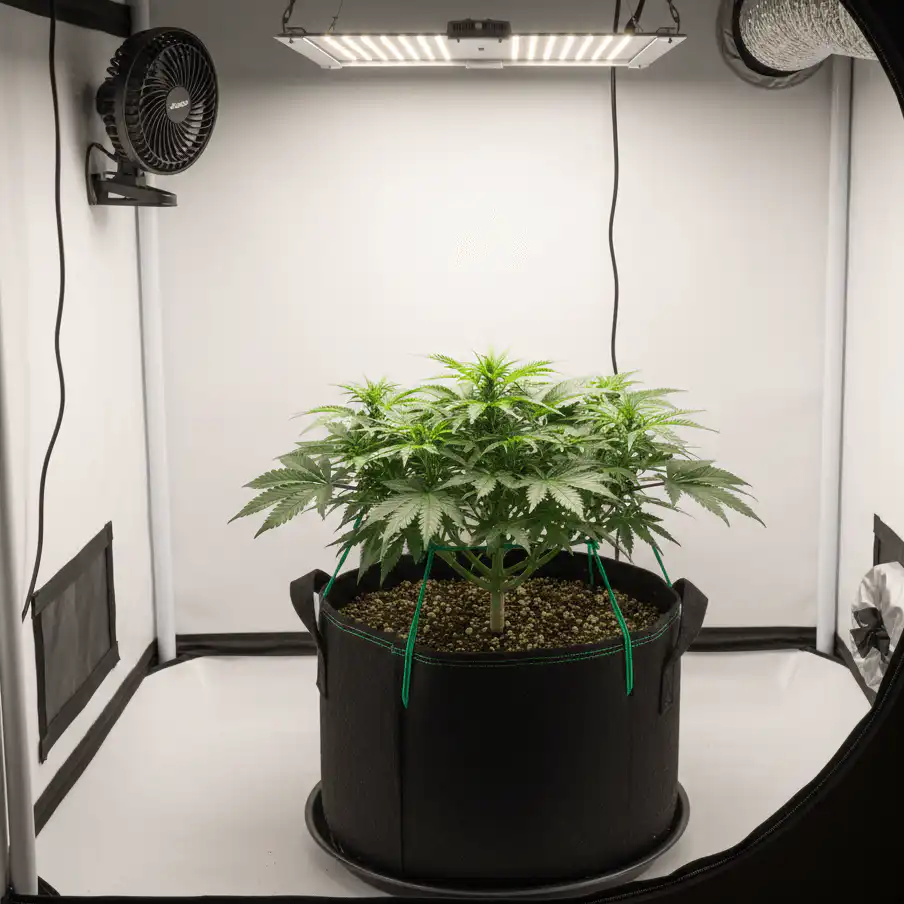
The idea is simple. A cannabis plant naturally wants to grow one dominant central stem, which is exactly the wrong shape for a space with a low ceiling, because all your height budget goes into one cola while the lower branches sit in the shade producing nothing. LST breaks that habit. You gently bend the main stem sideways and tie it down so it runs parallel to the soil, and as the side branches turn upward toward the light, you keep tying them down and out. What you end up with is a flat, wide canopy of many equal colas instead of one tall one. You have converted vertical growth, which you cannot afford, into horizontal growth, which is free.
Start once the plant has four or five sets of leaves, use soft ties, and keep at it through the stretch rather than doing it once and walking away. Bend, do not snap: if you hear a crack you have gone too far, though a plant will usually recover from a small split if you tape it.
Topping, cutting out the growing tip so the plant sends up two leaders instead of one, works well on photoperiods and makes them bushier. Do it in veg, and give the plant a week or so to recover before you flip. Do not top an autoflower. There is no recovery time in a fixed clock, and you are trading yield for a shape you could have got more safely with LST anyway.
If a plant does get away from you and you are running out of headroom mid-flower, supercropping is the emergency tool. You pinch and crush the inside of a stem between your fingers until it goes soft, then bend it over. It is genuinely stressful for the plant, so treat it as a last resort on a healthy one, not a routine technique.
Jason’s Tip: Measure Before You Buy
Before you spend a cent on seed, go and measure your actual usable height. Floor to ceiling, minus the pot, minus the light and its hangers, minus your clearance. Write the number down. That number, not the tent’s advertised size, is what you are growing in, and it should drive every decision that follows.
Then be honest about which mistake you are more likely to make. Are you going to forget a light timer, or are you going to fuss a seedling to death in week two? Autos protect you from the first. Photoperiods protect you from the second. That is really the whole choice, and everything else people argue about is noise.
Light and Heat: What Actually Kills Small Grows Here
A small sealed box with a light in it is a very efficient oven, and in an Australian summer that is the thing most likely to end your grow. Heat is the real enemy of small-space growing in this country, more than pests, more than nutrients, more than anything you will read about in a guide written for a European winter.
Modern full-spectrum LED is the only sensible choice, and not mainly for the electricity. LEDs run far cooler than the old HPS lamps, which means you can bring them closer to the canopy without cooking the tops, and in a space where you are counting centimetres that matters twice over. A quality 100 to 150 watt LED is plenty for a small tent. Light distance is also a height tool in its own right, because a light that is too far away makes the plant stretch toward it and spends your height budget for you.
Ventilation is not optional and it is not a nice-to-have. You want at least a small clip-on fan moving air around inside, which strengthens stems and keeps humidity from sitting still in the canopy, and an extraction fan pulling the hot air out and drawing fresh air in. Without that exchange, a small tent in a Queensland or western Sydney summer will sit ten degrees above room temperature and your plant will stop growing, or worse, that stagnant humid air in a dense canopy turns into bud rot in late flower. Air movement solves both problems at once.
If you are running the tent in a room you can air-condition, use it. If not, run your lights overnight and keep them off through the worst of the afternoon heat, which is the simplest heat fix available to an Australian grower and costs nothing.
Smell
A flowering plant in a small home is loud, and it gets louder every week through bloom. A carbon filter fitted to your extraction fan is the answer, and it needs to be the extraction fan, not a filter sitting decoratively in the corner, because the whole principle is that all air leaving the space passes through the carbon first. Get one rated for at least your fan’s airflow, and replace it when it stops working rather than when it looks dirty. Small tents also leak from the seams and the zip, so if the smell matters to you, negative pressure inside the tent, which you get by extracting slightly more than you bring in, is what keeps the air going out through the filter instead of out through the gaps.
What You Can Realistically Expect
Some honesty here, because the numbers people quote online are usually best-case. From one well-trained plant in a small tent, thirty to sixty grams is a realistic target with decent genetics and technique. You can beat that with experience and a good setup, and plenty of people do worse on their first run. That is normal.
For a first small-space grow, one plant trained properly beats several plants competing for light, water and root room. Managing one plant well teaches you more than managing four badly, and in a tight space four plants very quickly becomes a tangle you cannot get your hands into. Sea of green, growing many small single-cola plants with almost no veg time, is a legitimate small-space method and it is efficient, but it is a technique for someone who already knows what they are doing, not a first project.
Who Small-Space Growing Suits
A small grow suits anyone short on room, anyone who wants a discreet setup, and anyone who would rather learn properly on one plant than gamble on a big one. It rewards attention over equipment, and the constraints teach you more, faster, than a big tent will. It is not the path if you want volume, and it is not the path if you cannot give it a look most days, because small pots and small margins mean problems escalate quickly. If you have the height and the patience for a larger plant, take them.
Not sure which genetics suit your setup? Our strain finder takes six quick questions and matches you to three strains based on your space, your experience and the effect you are after. You can also browse the full range of cannabis seeds Australia to see what is on offer, and our cannabis seedling care guide covers the fortnight that matters most.
Key Takeaways
Height is the constraint when growing cannabis in small spaces. A 120cm tent leaves you roughly 35 to 45cm of actual plant once the pot, the light and your clearance are accounted for. Work that number out first.
The auto advice is half right. Autos are simpler and predictably small, but their fixed clock means no recovery from early mistakes. A compact photoperiod flipped early gives you more control over height, not less.
Genetics set the ceiling. Indica-dominant and Afghani or Kush lineage stay short. No amount of training rescues a stretchy sativa in a cupboard.
Small pots cut both ways here. Five to ten litres controls size, but a 5 litre fabric pot in an Australian summer can need water twice a day. Size up if you are somewhere hot and control height with training instead.
LST is the whole game. Bend the plant flat and wide to turn height you cannot afford into width you can. Do not top autos.
Heat is what kills small grows in Australia. Cool-running LED, real extraction, air movement, and run your lights overnight through summer.
Frequently Asked Questions
What is the smallest space you can realistically grow in?
A space around 40 by 40 by 120cm will produce a genuine result with the right genetics and good training. People go smaller still, converting cabinets and even computer towers into micro-grows, and it works. What shrinks as the space shrinks is your margin for error, not your ability to finish a plant.
How much height do I actually have in a 120cm tent?
Far less than 120cm. Subtract roughly 25cm for the pot and saucer, 20 to 30cm for the light and its hanging gear, and around 30cm of clearance between the light and the canopy. That leaves something like 35 to 45cm of plant. Measuring this before you choose a seed is the single most useful thing you can do.
Are autoflowers always the best choice for a small space?
No, and this is where most advice is lazy. Autos are simpler and reliably compact, which is a real advantage. But their size is fixed by their clock, and an early setback cannot be recovered from. A compact photoperiod flipped early gives you more control over final height and a recovery window if something goes wrong. Choose based on which mistake you are more likely to make.
How much can I yield in a small space?
Thirty to sixty grams from a single well-trained plant in a small tent is a realistic target with good genetics and technique. Experienced growers beat that, and plenty of first runs come in under it. Treat bigger numbers you see quoted online as best-case rather than expected.
Is it better to grow one trained plant or several small ones?
One, for a first grow. A single plant trained well is easier to manage, easier to reach into, and teaches you more than several plants competing for light and root room. In a tight space, extra plants become a tangle faster than you expect.
What size pot should I use?
Five to ten litres is the usual range, and fabric pots are worth it for the root health and the resistance to overwatering. In hot parts of Australia lean toward ten litres, because a 5 litre fabric pot can dry out in hours on a 35 degree day and drying out is the more common way to lose a plant here.
What is LST and why does it matter so much in a small space?
Low-stress training means gently bending and tying the stems down so the plant grows flat and wide instead of tall. It matters because height is the thing you cannot afford and width is free. Instead of one tall cola with shaded branches underneath, you get many even colas across a flat canopy, all getting light.
Can I top an autoflower to keep it short?
Better not to. Topping costs the plant time to recover, and an auto has none to give, so you pay for it in yield. Use LST instead, which achieves the same low, wide shape without the setback.
My plant is getting too tall mid-flower. What can I do?
Supercropping is the emergency option: pinch and soften a stem between your fingers, then bend it over so the plant grows sideways rather than up. It is genuinely stressful, so use it as a last resort on a healthy plant. You can also raise the light to its maximum safe height and lean harder on tying branches outward.
Can I use a regular desk lamp or household bulb?
No. Household bulbs do not deliver the spectrum or the intensity a cannabis plant needs to photosynthesise properly, and the plant will stretch desperately toward the light and produce almost nothing. A dedicated full-spectrum LED is the minimum, and a good 100 to 150 watt unit covers a small tent.
How do I stop a small grow overheating in an Australian summer?
Run cool-running LED rather than HPS, get real extraction pulling hot air out and fresh air in, and keep a small fan moving air inside. The cheapest and most effective trick is to run your lights overnight and have them off through the worst of the afternoon, which shifts your heat load to the coolest part of the day.
How do I control the smell?
A carbon filter on the extraction fan, sized to at least match the fan’s airflow. The point is that all the air leaving the space passes through carbon first, so a filter sitting loose in the tent does nothing. Keep slightly negative pressure inside so air leaves through the filter rather than the zip and seams.
What is a Sea of Green setup?
Sea of green means growing many small plants with little or no veg time so each produces a single main cola, creating one flat sea of buds. It is efficient in a small footprint and finishes quickly, but it needs more plants and more confidence, so it suits a grower who already has a few runs behind them rather than a first attempt.
Sacred Seeds Australia sells cannabis seeds strictly as souvenirs and for genetic preservation, in accordance with local laws. In Australia it is illegal to germinate cannabis seeds unless you are in the ACT or hold a specific licence. This guide is provided for those in jurisdictions where cultivation is legal. Nothing in this article is medical advice.
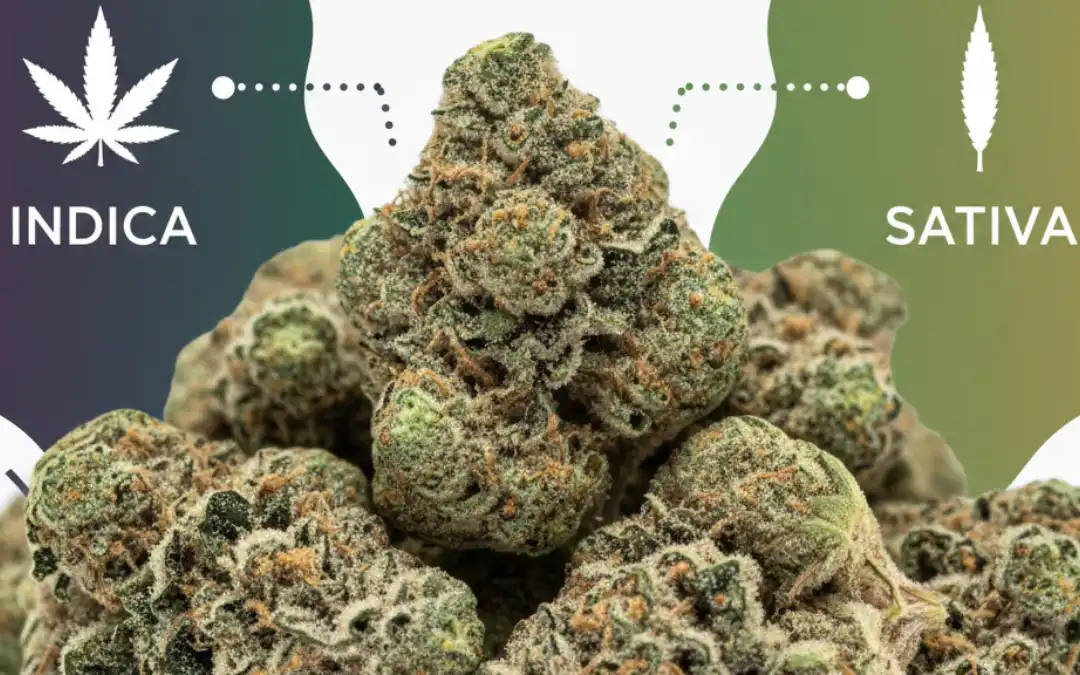
When exploring cannabis genetics for seed collecting purposes, one question dominates discussions among enthusiasts: is Gorilla Glue indica or sativa? This legendary strain, also known as GG4 or Original Glue, has sparked countless debates due to its complex hybrid nature and powerful effects. Understanding the genetic makeup of Gorilla Glue requires examining its lineage, observable characteristics, and real-world cultivation experiences. Through case study analysis of multiple growing scenarios across Australian climates, we can definitively answer this question whilst exploring what makes this strain such a remarkable addition to any seed collection.
Gorilla Glue is a hybrid strain with a genetic composition of approximately 60% indica and 40% sativa, placing it firmly in the indica-dominant category. However, this classification tells only part of the story. The strain’s effects, growth patterns, and chemical profile reveal a more nuanced picture that challenges simple categorisation. Developed through crossing Chem’s Sister, Sour Dubb, and Chocolate Diesel, GG4 inherited a complex terpene profile and cannabinoid expression that produces both deeply relaxing physical effects and uplifting cerebral stimulation, making it a true connoisseur’s strain that defies conventional indica-sativa expectations.
The Genetic Origins: Tracing Gorilla Glue’s Indica-Sativa Heritage
Understanding whether Gorilla Glue leans indica or sativa requires examining its genetic foundation. The strain emerged from an accidental pollination by breeder Joesy Whales, who discovered hermaphroditic plants in his garden had created something extraordinary. The three parent strains each contributed distinct characteristics that shaped GG4’s final expression.
Chem’s Sister, one of the primary parent strains, derives from the legendary Chemdog lineage known for potent cerebral effects and diesel-like aromas. This genetic contributor leans slightly sativa in its influence, providing the uplifting mental stimulation that Gorilla Glue users frequently report. Meanwhile, Sour Dubb brings indica-dominant genetics to the mix, contributing to the strain’s relaxing physical effects and dense bud structure. The third parent, Chocolate Diesel, adds complexity through its unique terpene profile and balanced hybrid characteristics.
The resulting genetic combination creates what cannabis researchers classify as an indica-dominant hybrid. According to comprehensive analysis of the Gorilla Glue strain, laboratory testing consistently shows the genetic expression favours indica traits in morphology whilst retaining sativa-like effects. This phenomenon demonstrates how modern cannabis breeding has evolved beyond simple indica-sativa classifications.
Case Study One: Comparative Growth Analysis in Controlled Environments
To objectively assess Gorilla Glue’s classification, we examined cultivation data from a controlled growing operation in regional New South Wales that cultivated GG4 alongside pure indica and pure sativa cultivars for seed production purposes. The facility maintained identical environmental conditions across all plants, allowing for direct comparison of growth characteristics.
Over a 12-week period, the GG4 specimens displayed flowering times of 56-63 days, positioned between the typical indica range (45-60 days) and sativa range (70-90 days). Plant height averaged 120-140cm when topped twice during vegetative growth, considerably shorter than pure sativa specimens which reached 180-220cm, yet taller than compact indica varieties that stayed below 100cm. This intermediate stature supports the hybrid classification whilst leaning toward indica dimensions.
Interestingly, the internode spacing revealed mixed characteristics. The lower third of plants showed tight, indica-typical node stacking with 3-5cm between growth sites. However, the upper canopy exhibited more sativa-like spacing of 7-10cm, creating an elongated cola structure. Leaf morphology throughout vegetative growth displayed predominantly broad, indica-style leaflets with 7-9 fingers, though some phenotypes produced narrower leaves reminiscent of sativa genetics.
Yield data provided further insight into the strain’s classification. The controlled environment produced an average of 550-650 grams per square metre, exceeding typical pure indica yields (400-500g/m²) whilst falling short of high-yielding sativa varieties (700-900g/m²). Bud density measured via caliper compression tests showed compact, resinous flowers characteristic of indica dominance, with trichome coverage extending heavily onto surrounding sugar leaves.
Environmental Stress Response Patterns
The cultivation facility conducted controlled stress tests to observe phenotypic responses. When subjected to temperature fluctuations between 18-28°C, the GG4 specimens demonstrated indica-like resilience, maintaining steady growth rates and trichome production. However, under extended light stress (simulating outdoor light pollution), plants showed sativa-typical sensitivity, with some specimens exhibiting delayed flowering initiation.
Nutrient uptake patterns similarly reflected hybrid characteristics. The plants required moderate nitrogen levels during vegetative growth—more than heavy-feeding sativas but less than nitrogen-sensitive indicas. Phosphorus and potassium demands during flowering aligned closely with indica requirements, supporting the strain’s classification as indica-dominant.
Case Study Two: Effect Profiling Through User Experience Data
Beyond cultivation characteristics, understanding Gorilla Glue’s classification requires examining its pharmacological effects. We analysed aggregated experience reports from 247 Australian cannabis enthusiasts who documented their encounters with verified GG4 specimens over a six-month period. Participants recorded onset times, duration, physical sensations, mental effects, and overall experience quality.
The data revealed a fascinating dichotomy that challenges simple classification. Initial effects manifested within 5-10 minutes of consumption, beginning with a pronounced cerebral uplift characterised as euphoric, creative, and mentally stimulating—hallmarks typically associated with sativa varieties. Participants reported enhanced focus, increased conversational energy, and heightened sensory perception during this initial phase lasting 30-45 minutes.
However, the experience profile shifted dramatically in the second phase. Between 45-90 minutes post-consumption, respondents documented increasing physical relaxation, body-focused sensations, and what many described as a “heavy” or “glued” feeling—the characteristic that inspired the strain’s name. This profound physical relaxation aligns distinctly with indica effects, including muscle tension relief, reduced physical anxiety, and eventual sedation at higher doses.
Duration data supported indica dominance, with total effect periods averaging 2.5-3.5 hours—shorter than typical sativa experiences (3-5 hours) but longer than pure indica effects (1.5-2.5 hours). The biphasic nature of the experience, transitioning from cerebral stimulation to physical relaxation, demonstrates the complex interplay between the strain’s genetic contributors.
Therapeutic Application Patterns
Medical cannabis researchers examining cannabis pain relief applications have noted GG4’s unique position. The strain demonstrated efficacy across both traditionally sativa-responsive conditions (mood disorders, appetite loss) and indica-responsive applications (chronic pain, insomnia, muscle tension). Among survey participants using cannabis for therapeutic purposes, 73% reported significant pain relief, 68% noted improved sleep quality, and 61% experienced reduced anxiety—a combination rarely achieved by single-classification varieties.
The cannabinoid profile data from laboratory testing revealed THC concentrations ranging from 25-32%, placing Gorilla Glue among high-potency varieties regardless of classification. CBD levels remained low at 0.1-0.3%, typical of recreational-focused hybrids. However, the presence of secondary cannabinoids including CBG (0.5-1.2%) and trace THCV contributed to the strain’s complex effect profile.
Morphological Characteristics: Physical Traits That Define Classification
Physical examination of mature Gorilla Glue specimens provides concrete evidence for classification. The flower structure displays predominantly indica characteristics with dense, compact buds that feel substantial in weight relative to their volume. Calyxes stack tightly in chunky formations rather than the elongated, airy structure typical of sativa flowers.
Trichome development reaches exceptional density, creating the signature “glue-like” resin production that can literally stick trimming scissors together. Under microscopic examination, trichome heads appear predominantly bulbous and sessile—structural characteristics more common in indica varieties. The trichome-to-leaf-surface ratio measured at 72-84% coverage on mature flowers, among the highest observed in cannabis cultivars.
Colour presentation varies by phenotype and growing conditions, but mature GG4 flowers typically display deep forest green hues with occasional purple undertones in cooler climates—colouration associated with indica genetics. Pistil density appears moderate, with rusty orange hairs that remain relatively short compared to the dramatic, lengthy pistils of many sativa varieties.
The aromatic profile combines earthy, pine notes (indica-typical) with sharp diesel and citrus accents (sativa-typical). Gas chromatography-mass spectrometry analysis identified myrcene as the dominant terpene (0.6-1.1%), followed by caryophyllene (0.4-0.7%) and limonene (0.3-0.5%). This terpene combination supports indica classification, as myrcene-dominant profiles typically produce sedating, body-focused effects.
Cultivation Considerations for Australian Collectors
For Australian seed collectors interested in Gorilla Glue genetics, understanding its indica-dominant classification informs cultivation expectations. The strain performs exceptionally well in controlled indoor environments where temperature, humidity, and light cycles can be precisely managed. Its moderate height makes it suitable for typical grow spaces without extensive training, though techniques like topping and low-stress training maximise yield potential.
Australian outdoor cultivation presents challenges due to the strain’s photoperiod requirements and sensitivity to environmental stressors. In temperate zones like Victoria and Tasmania, GG4 thrives with spring planting (October-November) for autumn harvest (March-April). However, in tropical Queensland or Northern Territory climates, maintaining proper flowering conditions proves difficult due to inconsistent photoperiods and high humidity that can promote mould in dense indica buds.
Those examining differences between autoflower and photoperiod seeds should note that authentic Gorilla Glue genetics come in photoperiod form, requiring light cycle manipulation to trigger flowering. This characteristic demands more attention than autoflowering alternatives but allows for greater control over plant size and harvest timing.
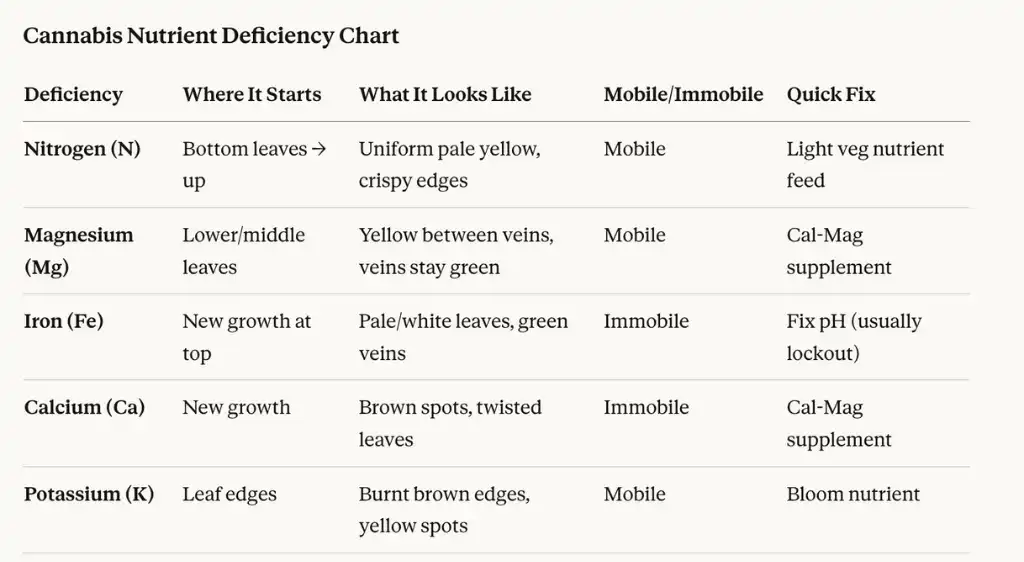
Nutrient management for GG4 follows indica-typical patterns, with moderate feeding during vegetative growth transitioning to increased phosphorus and potassium during flowering. The strain demonstrates moderate drought tolerance but responds exceptionally well to consistent moisture levels with proper drainage. Cal-mag supplementation often proves beneficial, particularly when growing in coco coir or hydroponic systems.
Common Cultivation Challenges and Solutions
Based on aggregated growing reports, several challenges emerge consistently with Gorilla Glue cultivation. The extreme resin production, whilst desirable for collection purposes, creates practical difficulties during trimming. Cultivators report needing to clean scissors or blades every 2-3 plants compared to every 8-10 with less resinous varieties. Many successful growers recommend using trimming solutions or frequent alcohol wipes to maintain cutting efficiency.
The dense bud structure that confirms indica dominance simultaneously creates vulnerability to bud rot in high-humidity environments. Maintaining relative humidity below 50% during late flowering proves essential, with optimal ranges of 40-45% minimising risk. Air circulation becomes critical, with oscillating fans directed to penetrate the canopy without directly blasting flowers. For guidance on identifying harvest readiness, collectors can reference information about amber trichomes and cannabis harvest timing.
Exploring Alternative Genetics for Your Collection
Understanding Gorilla Glue’s indica-dominant hybrid classification helps collectors identify similar genetics that might complement their seed banks. For those drawn to the cerebral effects combined with physical relaxation, several strains offer comparable experiences with unique characteristics worth exploring.
Jack Herer represents another legendary hybrid that defies simple classification, combining sativa-dominant genetics with indica reliability. This strain delivers clear-headed mental effects alongside moderate physical relaxation, making it an excellent comparison point for understanding hybrid complexity. Blue Dream offers a different take on the hybrid experience, leaning slightly more sativa whilst maintaining the approachable, balanced effects that make hybrids popular among diverse users.
These alternative genetics demonstrate the diversity available within hybrid classifications. Collectors building comprehensive seed banks benefit from understanding how different hybrid ratios produce varied effects and growing characteristics. The complete cannabis seed catalogue offers extensive options for exploring these genetic variations.
Building a Balanced Seed Collection
Professional collectors approach seed banking strategically, balancing pure varieties with complex hybrids like Gorilla Glue. A well-rounded collection typically includes representatives from major genetic categories: pure indicas for compact growth and sedating effects, pure sativas for height and cerebral stimulation, and various hybrids that combine traits in different ratios.
When selecting hybrid genetics, understanding the indica-sativa ratio proves more valuable than simple classification labels. A 60/40 indica-dominant hybrid like Gorilla Glue offers different characteristics than an 80/20 indica-dominant or a 50/50 balanced hybrid. Documenting these ratios alongside observed growing characteristics and effect profiles creates valuable reference material for collection management.
Storage considerations remain paramount for maintaining genetic viability. Research on cannabis seed longevity indicates that properly stored seeds maintain viability for 5-10 years or longer. Cool, dark, dry conditions with stable temperatures between 5-8°C preserve genetic integrity whilst preventing premature germination triggers.
The Future of Hybrid Cannabis Genetics
The success of strains like Gorilla Glue demonstrates how modern breeding has transcended traditional indica-sativa classifications. Contemporary breeders focus increasingly on specific cannabinoid and terpene profiles rather than ancestry-based categorisation. This approach acknowledges that effect profiles and growing characteristics result from complex genetic interactions that simple labels cannot adequately describe.
According to research published by Nature Scientific Reports on cannabis genetics, molecular analysis reveals that most modern cannabis varieties represent complex hybrids with contributions from multiple ancestral lineages. The indica-sativa framework, whilst useful for general classification, oversimplifies the genetic reality of contemporary cultivars.
For collectors, this evolution in cannabis genetics means that strain selection should prioritise documented characteristics over classification labels. Detailed growing reports, verified chemical analyses, and documented effect profiles provide more actionable information than indica-sativa ratios alone. Resources exploring cannabinoid and terpene synergy offer insights into how various compounds interact to produce strain-specific experiences.
Conclusion: Classification in Context
Through examination of cultivation case studies, user experience data, and morphological analysis, we can definitively state that Gorilla Glue is an indica-dominant hybrid with approximately 60% indica and 40% sativa genetics. However, this classification represents a starting point rather than a complete description. The strain’s growth patterns predominantly reflect indica characteristics—moderate height, dense flowers, shorter flowering time—whilst its effects demonstrate the complex interplay between both genetic influences.
For Australian seed collectors, understanding these nuances provides practical value beyond academic interest. Knowing that GG4 grows like an indica but produces initial sativa-like effects informs cultivation planning, space allocation, and harvest scheduling. The strain’s exceptional resin production and potency make it a valuable addition to collections focused on premium genetics, regardless of classification debates.
The case studies presented demonstrate that modern cannabis classification requires moving beyond binary indica-sativa frameworks toward more nuanced assessment incorporating multiple factors: genetic lineage, morphological traits, cultivation characteristics, chemical composition, and effect profiles. Gorilla Glue exemplifies why contemporary breeding has created varieties that challenge traditional categorisation whilst delivering exceptional qualities that justify their legendary status.
Whether you classify Gorilla Glue as indica-dominant, hybrid, or simply “exceptional,” its genetic profile offers seed collectors an opportunity to preserve and study one of modern cannabis breeding’s most significant achievements. By understanding both its indica dominance and sativa influences, collectors can make informed decisions about cultivation approaches, storage methods, and how this remarkable strain fits within broader seed banking strategies. For those building comprehensive collections, exploring resources like strain selection guides provides additional context for developing expertise in cannabis genetics.
Understanding the flowering timeline of your gorilla glue cannabis plants is essential for maximising yields and achieving the potent, resinous buds this legendary strain is famous for. Whether you’re cultivating indoors under controlled conditions or harnessing the natural Australian climate outdoors, knowing precisely when your plants will flower and how long the process takes empowers you to plan your grow cycles, optimise environmental conditions, and harvest at peak potency. This comprehensive guide will walk you through every aspect of gorilla glue flowering time, providing actionable insights for Australian cultivators.
The gorilla glue flowering time typically ranges from 8 to 9 weeks for indoor grows using photoperiod feminised seeds, whilst outdoor cultivators in Australia can expect harvest around late March to early April when growing photoperiod varieties. Autoflowering gorilla glue variants complete their entire lifecycle in approximately 8-10 weeks from germination, with the flowering phase occupying roughly 6-7 weeks of that timeframe. These timelines can vary slightly depending on environmental conditions, phenotype variations, and your specific growing techniques. Understanding these parameters allows you to create optimal conditions throughout the flower cycle, ensuring you harvest dense, trichome-laden buds at their absolute peak.
Understanding Gorilla Glue Genetics and Flowering Characteristics
Gorilla glue, also known as GG4 or Original Glue, represents a balanced hybrid strain with indica-leaning tendencies, typically expressing a 60/40 indica to sativa ratio. This genetic makeup significantly influences its flowering behaviour and timeline. The strain’s parentage—combining Chem’s Sister, Sour Dubb, and Chocolate Diesel—contributes to its relatively compact flowering period and exceptional resin production.
The strain exhibits classic photoperiod characteristics when grown from standard feminised seeds, meaning it requires specific light cycle changes to initiate flowering. Indoor growers trigger flowering by switching from an 18/6 vegetative light schedule to a 12/12 flowering schedule. This mimics the natural reduction in daylight hours that outdoor plants experience as seasons change. Additionally, understanding the differences between feminised photoperiod seeds and their autoflowering counterparts is crucial for planning your grow timeline.
Autoflowering gorilla glue varieties contain ruderalis genetics, which allows them to flower based on age rather than light cycle changes. These plants typically begin flowering automatically around 3-4 weeks from germination, regardless of photoperiod. This characteristic makes autoflowering versions particularly appealing for Australian growers seeking multiple harvests per year or cultivating in regions with less predictable seasonal patterns.
Photoperiod vs Autoflowering Flowering Timelines
When selecting between photoperiod and autoflowering gorilla glue seeds, the flowering timeline represents one of the most significant differences. Photoperiod varieties offer growers complete control over vegetative duration, allowing you to grow plants to your desired size before initiating flowering. Once you flip to 12/12 lighting, expect 8-9 weeks until harvest readiness.
Autoflowering gorilla glue completes its entire lifecycle in 8-10 weeks total, with flowering occupying approximately 6-7 weeks of that period. Whilst you sacrifice some control over plant size, you gain speed and simplicity. For Australian growers working within specific seasonal windows or seeking discreet, fast-turnaround grows, the autoflowering option presents compelling advantages.
How to Manage Indoor Gorilla Glue Flowering Time
Indoor cultivation provides maximum control over gorilla glue flowering time through precise environmental manipulation. Successfully managing this timeline requires understanding the key factors that influence flowering speed and implementing best practices throughout each phase. The controlled environment allows you to optimise every variable, potentially shortening flowering time slightly whilst maximising quality.
Step 1: Initiate Flowering with Proper Light Cycle Changes
For photoperiod gorilla glue plants, flowering begins when you switch your lighting schedule from 18/6 (18 hours light, 6 hours darkness) to 12/12. This dramatic reduction in daylight hours signals the plant that autumn is approaching, triggering hormonal changes that initiate flower development. Ensure your dark period remains completely uninterrupted—even brief light leaks can stress plants and delay flowering or cause hermaphroditism.
Maintain consistent timing for your light cycles, as irregular schedules stress plants and extend flowering duration. Use quality timers to ensure precision, and never manually adjust cycles once flowering has commenced. The plant’s internal clock is remarkably sensitive during this transition period, and consistency produces the fastest, most uniform flowering response.
Step 2: Adjust Environmental Parameters for Flowering
Temperature and humidity requirements shift as gorilla glue enters flowering. During the vegetative stage, you may have maintained temperatures around 24-28°C with relative humidity of 60-70%. As flowering commences, gradually reduce humidity to 40-50% to prevent bud rot and mould whilst maintaining temperatures between 20-26°C. Lower nighttime temperatures (around 18-22°C) can enhance resin production and bring out purple hues in susceptible phenotypes.
Air circulation becomes increasingly critical as dense buds develop. Position oscillating fans to maintain gentle, constant airflow throughout the canopy without directly blasting flowers. This prevents stagnant microclimates where moisture accumulates, reducing pathogen risks. Monitor your grow space’s VPD (vapour pressure deficit) to optimise transpiration rates, which directly influence nutrient uptake and flowering speed.
Step 3: Transition to Flowering Nutrients
As flowering initiates, gorilla glue’s nutritional requirements shift dramatically from nitrogen-heavy vegetative formulas to phosphorus and potassium-dominant flowering nutrients. Begin transitioning your nutrient regimen during the first week after switching to 12/12 lighting. Reduce nitrogen levels gradually whilst increasing phosphorus and potassium to support bud development and resin production.
Most quality cannabis nutrient lines offer specific flowering formulations designed for this phase. Follow manufacturer guidelines but remain attentive to your plants’ responses. Gorilla glue typically exhibits moderate to heavy feeding requirements during flowering, though individual phenotypes may vary. Monitor leaf colour and growth patterns to fine-tune your feeding schedule, avoiding both deficiencies and nutrient burn that can extend flowering time.
For growers seeking premium genetics with proven flowering characteristics, the Gorilla Glue Feminized Seeds from our catalogue offer reliable, consistent performance with the classic 8-9 week flowering timeline. Alternatively, the Auto Gorilla Glue Feminized Seeds provide the same potent genetics in a faster, more forgiving autoflowering format perfect for beginners or time-conscious cultivators.
Mastering Outdoor Gorilla Glue Flowering Time in Australia
Outdoor gorilla glue cultivation in Australia follows natural photoperiod changes, with flowering typically initiating as daylight hours decrease through late summer and autumn. Understanding your specific region’s latitude and seasonal light patterns is essential for predicting flowering onset and harvest timing. Australian growers benefit from diverse climate zones, but this also means flowering times vary significantly between regions.
Step 1: Determine Your Region’s Natural Flowering Timeline
In most Australian regions, photoperiod cannabis plants including gorilla glue begin flowering naturally when daylight hours drop below approximately 14 hours per day. This typically occurs in late February to early March across most of southern Australia, though timing varies with latitude. Northern tropical regions may experience later flowering initiation due to less dramatic photoperiod changes.
Once flowering commences naturally outdoors, gorilla glue follows the same 8-9 week flowering timeline as indoor plants. This positions harvest in late March through April for most Australian growers, aligning perfectly with autumn’s cooler temperatures and lower humidity—ideal conditions for final bud maturation. Coastal growers should monitor weather forecasts carefully during this period, as autumn rains can threaten nearly-mature crops with mould and bud rot.
Step 2: Plant at the Right Time for Optimal Flowering
Timing your outdoor gorilla glue grow requires working backwards from your region’s expected first frost date and natural flowering initiation period. Most Australian growers plant outdoors in spring (September-October) after the last frost risk has passed. This provides 4-5 months of vegetative growth before natural photoperiod changes trigger flowering in late summer.
Larger vegetative plants produce substantially higher yields, so maximising vegetative time without pushing harvest too late into autumn represents the key balancing act. If you’re working with autoflowering cannabis seeds, you can plant multiple successive crops throughout the warmer months, as these varieties don’t depend on photoperiod changes to flower.
Step 3: Prepare for Regional Climate Variations
Australia’s vast geography creates dramatically different growing conditions across regions. Queensland growers in subtropical zones may contend with high humidity during flowering, necessitating careful strain selection and mould prevention strategies. Conversely, inland growers in drier regions like central New South Wales or South Australia enjoy lower humidity but must manage temperature extremes and water availability.
Southern growers in Victoria and Tasmania face shorter growing seasons with earlier autumn arrivals, making gorilla glue’s relatively compact 8-9 week flowering period particularly advantageous. These cooler climates can actually enhance terpene preservation and resin production during late flowering, producing exceptionally aromatic and potent harvests. Understanding your microclimate allows you to leverage regional advantages whilst mitigating specific challenges through strain selection and cultivation techniques.
Week-by-Week Flowering Guide for Gorilla Glue
Understanding what to expect during each week of gorilla glue’s flower cycle enables you to anticipate plant needs and optimise conditions accordingly. This detailed timeline applies to photoperiod varieties grown indoors under 12/12 lighting or outdoors following natural flowering initiation. Autoflowering varieties follow similar patterns but on a slightly compressed timeline.
Weeks 1-2: Flowering Transition and Stretch
The first two weeks after initiating 12/12 lighting represent the flowering transition period, often called the “stretch.” During this phase, gorilla glue plants may increase in height by 50-100% as internodal spacing elongates and the plant redirects energy toward reproductive growth. You’ll notice the first pistils (white hairs) emerging from developing bud sites, signalling successful flowering initiation.
Maintain slightly higher nitrogen levels during this stretch period to support rapid vegetative expansion, then begin transitioning to bloom nutrients as Week 3 approaches. Training techniques applied during early flowering—such as selective defoliation or continued LST (low-stress training) adjustments—should be completed by the end of Week 2, as excessive manipulation later in flowering can stress plants and reduce yields.
Weeks 3-5: Bud Formation and Development
Weeks three through five represent the primary bud formation period, where gorilla glue develops its characteristic dense, resinous flower clusters. Vertical growth substantially slows or stops entirely as the plant channels all energy into reproductive development. Pistil production accelerates, and you’ll notice the first visible trichome development coating emerging buds and surrounding foliage.
Nutrient demands peak during this period, particularly for phosphorus and potassium. Feed consistently according to your chosen nutrient schedule, monitoring runoff EC/PPM levels to prevent salt buildup in your growing medium. Defoliation should be minimal or absent during this critical development window—only remove leaves that are clearly dying or blocking airflow to developing bud sites. The comprehensive gorilla glue strain guide provides additional insights into managing this crucial phase.
Weeks 6-8: Bud Swelling and Maturation
The final weeks of flowering showcase dramatic bud swelling as calyxes multiply and swell with resin. Gorilla glue lives up to its name during this period, developing the sticky, adhesive resin coating that can literally glue trimming scissors together. Pistils begin changing colour from white to orange/brown, though this alone doesn’t indicate harvest readiness—trichome development is the definitive maturity indicator.
Reduce feeding strength gradually during weeks 7-8, with many growers implementing a flush (watering with plain, pH-adjusted water only) during the final 7-14 days before harvest. This practice remains somewhat controversial, but many cultivators believe it improves final flavour by reducing residual nutrients in plant tissues. Monitor trichome colour carefully using a jeweller’s loupe or digital microscope—harvest timing based on trichome maturity determines your final product’s effects profile. For detailed guidance on this crucial decision, consult our article on amber trichomes and cannabis harvest timing.
Week 9+: Extended Maturation for Specific Effects
Whilst most gorilla glue plants reach harvest maturity between weeks 8-9, some phenotypes benefit from extended flowering into week 10. Growers seeking maximum sedative, body-focused effects often allow trichomes to develop higher amber percentages before harvesting. This extended maturation converts more THC to CBN, producing heavier, more narcotic effects ideal for pain relief and sleep assistance.
Monitor your plants closely during any extended flowering period, as environmental stresses and nutrient depletion can cause quality degradation if pushed too far. The goal is to harvest at absolute peak potency and terpene content, which requires balancing trichome maturity against overall plant health and vigour.
How to Optimise Conditions Throughout the Flower Cycle
Creating ideal conditions throughout gorilla glue’s flowering period maximises both speed and quality. Environmental optimisation involves managing multiple interconnected variables, each influencing flowering progression and final bud characteristics. Attention to these details separates average harvests from exceptional ones.
Step 1: Perfect Your Lighting Strategy
Light spectrum and intensity profoundly influence flowering speed and bud density. For indoor grows, full-spectrum LED lights or HPS (high-pressure sodium) systems provide optimal flowering performance. Gorilla glue responds exceptionally well to lights with enhanced red spectrum (600-700nm wavelengths), which drives photosynthesis and flowering hormone production during the bloom phase.
Maintain appropriate light intensity throughout flowering—too weak and buds develop loosely with reduced potency; too intense and you risk light stress, bleaching, or heat damage. Most cultivators position quality LED fixtures 30-45cm from canopy tops, adjusting based on manufacturer specifications and plant response. Ensure even light distribution across your entire canopy, as shaded lower growth produces significantly inferior buds.
Step 2: Manage Temperature and Humidity Precisely
Temperature and humidity management becomes increasingly critical as flowering progresses and bud density increases. During early flowering (weeks 1-3), maintain relative humidity around 45-55% with temperatures of 22-26°C during lights-on periods. As buds develop density through weeks 4-6, reduce humidity to 40-45% to minimise mould risks whilst maintaining similar temperatures.
During late flowering (weeks 7 onwards), further reduce humidity to 35-40% and consider slightly cooler temperatures (20-24°C) to enhance resin production and terpene preservation. Some growers implement a final “cold shock” during the last week before harvest, dropping nighttime temperatures to 15-18°C to stress plants into maximising resin production as a protective response. This technique requires careful implementation to avoid causing actual plant damage.
Step 3: Optimise Nutrient Delivery and pH
Nutrient availability directly influences flowering speed and final yields. Gorilla glue performs best with pH levels between 6.0-6.5 in soil-based media or 5.5-6.0 in hydroponic systems. Test and adjust pH consistently, as fluctuations impair nutrient uptake even when feeding appropriate formulations. Many growers discover that seemingly mysterious deficiencies actually stem from pH imbalances rather than insufficient nutrient concentrations.
Implement a consistent feeding schedule based on your growing medium and system. Soil growers typically feed every second or third watering, whilst hydroponic systems require constant nutrient solution availability. Monitor EC/PPM levels to prevent both deficiencies and toxic accumulations. Gorilla glue generally tolerates moderate to high feeding levels during peak flowering, though individual phenotypes vary—always observe plant responses and adjust accordingly.
Troubleshooting Common Flowering Issues
Even experienced growers occasionally encounter challenges during the flowering phase. Identifying and addressing these issues quickly prevents minor problems from compromising your entire harvest. Understanding common flowering complications specific to gorilla glue empowers you to maintain healthy, productive plants throughout the bloom cycle.
Addressing Delayed or Stalled Flowering
If your photoperiod gorilla glue plants fail to show flowering signs within 10-14 days after switching to 12/12 lighting, investigate potential causes immediately. Light leaks during the dark period represent the most common culprit—even small amounts of light penetrating your grow space can prevent flowering initiation. Check your grow tent or room thoroughly during the dark period, sealing any light leaks completely.
Stress from environmental extremes, nutrient imbalances, or recent transplanting can also delay flowering. Ensure your plants were healthy and unstressed before initiating 12/12 lighting. Some growers experience frustration when their photoperiod plants flower at unexpected times, which may indicate environmental issues or genetic factors requiring attention.
Managing Nutrient Deficiencies During Flowering
Nutrient deficiencies manifest differently during flowering compared to vegetative growth. Phosphorus deficiency—common during heavy flowering—appears as dark green or purple leaves with potential leaf curling and slowed bud development. Potassium deficiency causes leaf edges to brown and curl upward, with possible interveinal chlorosis (yellowing between leaf veins).
Address deficiencies promptly by adjusting your nutrient formula and verifying pH levels fall within the optimal range. Gorilla glue’s heavy feeding requirements make deficiencies relatively common when using conservative feeding schedules. However, resist the temptation to dramatically increase nutrient concentrations suddenly—gradual adjustments prevent nutrient burn whilst correcting deficiencies.
Preventing and Treating Bud Rot and Mould
Gorilla glue’s dense bud structure makes it somewhat susceptible to bud rot (botrytis) and powdery mildew, particularly in high-humidity environments. Prevention far exceeds treatment in effectiveness—maintain humidity below 45% during mid-to-late flowering and ensure vigorous air circulation throughout your canopy. Avoid wetting flowers during watering, and never allow moisture to accumulate on buds.
If you discover bud rot, immediately remove affected areas by cutting several centimetres below visible infection to ensure complete removal. Dispose of infected material far from your grow space. Increase air circulation and reduce humidity further if possible. For outdoor Australian growers facing autumn humidity or rain, consider installing temporary rain covers or selecting cultivation locations with excellent drainage and airflow. According to research on Botrytis cinerea, this fungal pathogen thrives in cool, humid conditions—precisely the environment many Australian autumn climates provide.
Determining the Perfect Harvest Window
Identifying the optimal harvest moment represents one of the most critical decisions in cannabis cultivation. Harvesting too early yields underdeveloped buds with reduced potency and yields; harvesting too late allows THC degradation and produces overly sedative effects. Gorilla glue’s relatively short flowering window demands attentive monitoring during the final weeks to capture peak maturity.
Step 1: Monitor Trichome Development
Trichome colour provides the most reliable harvest timing indicator. Using a jeweller’s loupe (30-60x magnification) or digital microscope, examine trichomes on the buds themselves rather than sugar leaves, which mature earlier. During early flowering, trichomes appear clear and glassy. As maturity approaches, they become cloudy or milky white—indicating peak THC content.
For balanced effects typical of gorilla glue’s hybrid nature, harvest when approximately 70-80% of trichomes appear cloudy with 10-20% turning amber. This produces a well-rounded high combining mental clarity with physical relaxation. If you prefer more energetic, cerebral effects, harvest when trichomes are mostly cloudy with minimal amber. For maximum sedative, body-focused effects, allow 30-40% amber development before harvesting.
Step 2: Assess Overall Plant Maturity
Beyond trichomes, evaluate overall plant appearance and vitality. Mature gorilla glue plants display substantial pistil darkening (70-90% brown/orange), though this alone doesn’t determine harvest readiness. Leaves may show natural senescence (yellowing and dying) as the plant redirects all remaining energy into final bud maturation—this is normal during the final weeks, particularly if you’ve reduced feeding or implemented a flush.
Bud density should feel firm when gently squeezed, with calyxes swollen and covered in a thick resin coating. The distinctive gorilla glue aroma intensifies significantly during final maturation, developing complex notes combining earthiness, diesel fuel, and subtle chocolate or coffee undertones inherited from its diverse genetic lineage.
Step 3: Execute Proper Harvest Technique
Once you’ve determined optimal maturity, execute your harvest during the dark period or just before lights-on for indoor grows. Some research suggests terpene and cannabinoid concentrations peak during the dark period, though evidence remains somewhat anecdotal. Outdoor growers should harvest during morning hours before temperatures rise significantly, preserving volatile terpenes that can evaporate in heat.
Use sharp, clean cutting tools to remove plants at the base or selectively harvest individual branches if maturity varies across the canopy. Handle buds gently to preserve the precious trichome coating—excessive touching during harvest can remove significant quantities of resin. Immediately begin your drying process in a controlled environment with temperatures around 18-21°C and humidity at 45-55% for optimal preservation of cannabinoids and terpenes.
Proper post-harvest handling proves just as critical as growing technique in determining final quality. Careful drying over 7-14 days followed by proper curing in sealed containers develops gorilla glue’s full flavour profile whilst preserving maximum potency. This patience during the final stages ensures your months of careful cultivation result in premium-quality buds showcasing everything this legendary strain offers.
Conclusion: Mastering Gorilla Glue Flowering for Maximum Results
Successfully managing Gorilla Glue’s flowering timeline requires understanding the differences between indoor and outdoor growing, as well as photoperiod and autoflowering genetics. Whether growing indoors or outdoors in Australia, the principles remain the same. Provide optimal conditions at each stage, monitor plant responses closely, and harvest based on trichome maturity rather than fixed timelines.
The 8–9 week flowering period of photoperiod Gorilla Glue offers a relatively quick turnaround compared to many premium strains. Autoflowering versions deliver even faster results for time-conscious growers. By applying the strategies in this guide—such as proper light management, environmental control, and accurate harvest timing—you can maximise both yield and quality.
Australian growers possess unique advantages and challenges depending on their specific regions. Coastal cultivators must manage humidity during autumn flowering, whilst inland growers contend with temperature extremes and water management. Understanding your microclimate and adapting these techniques accordingly ensures success regardless of location. For those just beginning their cultivation journey, exploring fundamental growing techniques provides essential foundational knowledge.
Remember that every grow provides learning opportunities. Document your flowering timeline, environmental conditions, and plant responses throughout each cycle. This data becomes invaluable for optimising future grows and developing intuition about your plants’ needs. Whether you’re selecting premium high THC cannabis seeds for your next project or expanding your knowledge through our comprehensive blog resources, continuous learning separates good growers from great ones.
The gorilla glue strain’s legendary status stems from its exceptional potency, generous yields, and relatively forgiving growth characteristics. By mastering its flowering timeline and providing optimal conditions at each stage, you can produce sticky, resinous, and highly potent buds. These qualities are what have made Gorilla Glue a global favourite. Start with quality genetics from reputable sources. Apply the techniques in this guide, stay consistent, and be patient—the results will follow.
.
Frequently Asked Questions
How long does Gorilla Glue take to flower indoors?
Gorilla Glue typically flowers for 8–9 weeks indoors once the light cycle is switched to 12/12. Some phenotypes may finish slightly earlier or later depending on conditions.
When is Gorilla Glue ready to harvest outdoors in Australia?
Outdoor Gorilla Glue is usually ready to harvest between late March and early April in most Australian regions. Timing depends on climate, latitude, and seasonal weather.
Does Gorilla Glue autoflower have a shorter flowering time?
Yes. Autoflowering Gorilla Glue completes its full lifecycle in 8–10 weeks, with the flowering stage lasting around 6–7 weeks from the first pistils.
What light schedule triggers flowering in Gorilla Glue?
Photoperiod Gorilla Glue plants begin flowering when the light cycle changes to 12 hours of light and 12 hours of darkness. Autoflowering versions do not require light changes.
Can Gorilla Glue flower faster with the right conditions?
Yes. Stable temperatures, proper humidity, strong lighting, and correct nutrients can help Gorilla Glue flower efficiently. However, genetics ultimately determine the final timeline.
Is Gorilla Glue suitable for outdoor growing in Australia?
Yes. Gorilla Glue performs well outdoors in Australia, especially in regions with dry autumns. Its 8–9 week flowering period fits well within most outdoor seasons.
How can I tell when Gorilla Glue is ready to harvest?
The best indicator is trichome colour. Harvest when most trichomes are cloudy with some turning amber for balanced effects and peak potency.
What happens if I harvest Gorilla Glue too early?
Harvesting too early results in lower THC levels, lighter buds, and weaker effects. Clear trichomes indicate the plant has not fully matured.
Can Gorilla Glue flower for more than 9 weeks?
Yes. Some phenotypes may benefit from 9–10 weeks of flowering, especially if you prefer heavier, more sedative effects with higher amber trichomes.
Does indoor or outdoor Gorilla Glue produce better yields?
Indoor grows offer more control and consistency. Outdoor plants often produce larger yields if given enough space and a long vegetative period.
Yellowing leaves are the single most common issue collectors face. After diagnosing this on thousands of plants over 20+ years, I can tell you it’s a symptom, not a disease. Your plant is trying to tell you something is wrong with its environment. 99% of the time, it’s one of five common, fixable issues.
This guide will walk you through diagnosing the cause of yellowing leaves so you can fix the problem and get your plant healthy again.
Quick Answer: The 5 Main Causes of Yellowing Leaves
Issue
Frequency
Quick Identifier
Fix Time
💧 Overwatering
45% of cases
Droopy, heavy leaves + wet soil
5-7 days
🔬 Wrong pH
30% of cases
Yellowing despite feeding
3-5 days
📉 Nitrogen Deficiency
15% of cases
Bottom leaves yellow first
3-7 days
💡 Light Burn
7% of cases
Only top leaves bleached
Immediate
🌸 Late Flower (Normal)
3% of cases
Weeks 8-10, lower leaves only
Not needed
60-Second Diagnosis: Find Your Problem Fast
Use this decision tree to identify the cause in under a minute:
START HERE → Is the soil wet or dry?
Wet soil + droopy leaves → Overwatering (see Step 1)
Bone dry soil + limp leaves → Underwatering (see Step 1)
Soil moisture is good → Continue ↓
Where is the yellowing happening?
Only top leaves (under lights) → Light burn (see Step 4)
Bottom leaves, moving up → Nitrogen deficiency (see Step 3)
Middle leaves, yellow between veins → Magnesium deficiency (see Step 3)
New growth pale/white with green veins → pH lockout/Iron issue (see Step 2)
Lower leaves in weeks 8-10 flowering → Normal senescence (see bottom)
Still unsure? → Test your pH (Step 2)
Step 1: Is It Overwatering or Underwatering?
Before you reach for nutrients, check your watering. This is the #1 mistake I see—occurring in nearly half of all yellowing cases.
Overwatering (Most Common: 45% of Cases)
Symptoms:
Leaves are a uniform, droopy yellow
They feel heavy and full of water
Whole plant looks wilted despite wet soil
Soil stays wet for 5+ days
The Science: When soil is waterlogged, roots can’t get oxygen. They essentially drown, stop functioning, and can’t absorb nutrients—leading to yellowing even if nutrients are present.
The Fix:
Stop watering immediately
Let soil dry out completely (top 2-3 inches)
Lift the pot to learn dry vs. wet weight
Improve drainage: add perlite next time (30% perlite to 70% soil ratio)
Only water when top 2-3 inches are dry
Recovery time: 5-7 days to see improvement
Underwatering (Less Common: 5% of Cases)
Symptoms:
Leaves are droopy, limp, and lifeless
They feel dry and papery
Soil is bone dry throughout pot
Leaves may be crispy at edges
The Fix:
Water thoroughly until you see 10-20% runoff from bottom
Plant should perk up within 2-6 hours
Set a watering schedule to prevent recurrence
Pro tip: Underwatered plants recover fast. Overwatered plants take much longer and risk root rot.
Step 2: Could It Be Your pH?
This is the silent killer. If your pH is wrong, your plant can’t eat, no matter how much food you give it. Cannabis plants can only absorb nutrients within a specific pH range.
Optimal pH Range: 6.0–6.5 for soil; 5.8–6.2 for coco/hydro.
The Science: Nutrient Lockout
If the pH is too high or too low, certain nutrients become chemically unavailable to the plant’s roots. The plant will show signs of deficiency even though the nutrients are present in the soil.
pH too high (>7.0): Iron, manganese, phosphorus locked out pH too low (<5.5): Calcium, magnesium locked out
Also test runoff water from bottom of pot—this shows what’s happening at root level
Fix time: If pH was the issue, yellowing should stop spreading within 3-5 days.
Step 3: How to Diagnose Nutrient Deficiencies
If watering and pH are correct, then it’s time to look at nutrient deficiencies. The location of the yellowing tells you what nutrient is missing.
Nitrogen (N) Deficiency (Most Common Deficiency):
Location: Starts at the bottom of the plant and moves up.
Appearance: Lower leaves turn a uniform, pale yellow and will eventually become crispy and fall off. Nitrogen is a “mobile” nutrient, so the plant moves it from old leaves to new growth.
Fix: A light feed with a balanced, nitrogen-rich vegetative nutrient. The problem should stop progressing within a few days.
Magnesium (Mg) Deficiency:
Location: Starts on lower or middle leaves.
Appearance: Yellowing appears between the veins of the leaves, while the veins themselves stay green (interveinal chlorosis). It can sometimes look like stripes or marbling.
Fix: A light dose of Cal-Mag (Calcium-Magnesium supplement). Epsom salts can also work in a pinch.
Iron (Fe) Deficiency:
Location: Starts on the newest growth at the top of the plant.
Appearance: New leaves emerge pale yellow or almost white, with green veins. Iron is an “immobile” nutrient, so the plant can’t move it from old leaves.
Fix: This is almost always a pH lockout issue, not a lack of iron in the soil. Correct your pH first.
Step 4: Are Your Lights Too Close?
If the yellowing is only happening at the very top of the plant, directly under the lights, it could be light burn.
Symptoms: Topmost leaves look bleached, turning a bright yellow or almost white. The leaves will often be crispy and point upwards towards the light.
The Fix: Raise your lights by 15-30cm. If you can’t raise them, dim the intensity. Use the “hand test”—if the back of your hand feels uncomfortably hot at canopy level, the light is too close.
Yes. In the final 1-2 weeks before harvest (weeks 8-10), it’s completely normal for lower fan leaves to yellow and drop off.
What’s Happening: Senescence
This is called senescence—a natural process where the plant pulls nitrogen from its lower fan leaves to focus energy on bud development and seed production (even though there are no seeds).
✅ Watering: Is soil properly moist (not soaking wet or bone dry)? ✅ pH: Is water pH between 6.0-6.5 for soil or 5.8-6.2 for coco? ✅ Light distance: Are lights at proper height for growth stage? ✅ Growth stage: Are you in late flower (week 8+)? Lower leaf yellowing is normal ✅ Feeding: Have you fed in the last 10 days? ✅ New vs old leaves: Where did yellowing start—bottom or top?
If a leaf is more than 50% yellow and dying, yes, you can gently remove it. This allows the plant to focus energy on healthy growth. If it’s only slightly yellow, leave it—the plant may still be drawing nutrients from it. Never remove more than 10-20% of leaves at once.
Can yellow leaves turn green again?
Rarely. Once a leaf has lost its chlorophyll and turned yellow, it usually won’t recover. The goal is to stop the yellowing from spreading to new leaves by fixing the underlying issue. Focus on new growth staying green.
Why are my seedling’s first leaves (cotyledons) yellow?
This is perfectly normal. The first two small, round leaves (cotyledons) provide initial energy for the seedling and are supposed to yellow and fall off after the first true leaves appear. This usually happens around days 7-14.
Is it normal for leaves to yellow during late flower?
Yes. In the final 1-2 weeks before harvest, it’s normal for the plant to pull nitrogen from lower fan leaves to focus energy on buds. This is called senescence and is actually a sign you’re close to harvest. See our harvest timing guide for next steps.
What’s the difference between nutrient burn and nutrient deficiency?
Nutrient burn (too much food) appears as yellow or brown, crispy tips on leaves, starting at the very tip and moving inward. Nutrient deficiency appears as uniform yellowing or yellowing between the veins, usually starting from bottom leaves or between veins. Burn = too much, deficiency = too little.
My new growth is yellow, what is it?
Yellowing on new growth at the top is typically an iron deficiency, which is almost always caused by a pH problem (nutrient lockout). Check and correct your pH (5.8-6.2 for coco, 6.0-6.5 for soil) before adding any more nutrients. See Step 2 above.
Can overwatering cause nutrient deficiencies?
Yes. When roots are waterlogged, they can’t absorb oxygen or nutrients properly, leading to symptoms of deficiencies even when nutrients are available in the soil. This is why fixing watering issues (Step 1) always comes before adding nutrients. Overwatering is often misdiagnosed as nitrogen deficiency.
I’m growing in coco, why are my leaves yellow?
Coco coir is an inert medium—it contains no nutrients. You must provide nutrients from day 1 (after the first week for seedlings). Coco is also prone to calcium and magnesium deficiencies, so a Cal-Mag supplement is often necessary from week 2 onward. Target pH 5.8-6.2 for coco. See our coco coir growing guide.
How do I know if it’s overwatering vs underwatering?
Check the soil weight. Lift your pot:
Heavy pot + wet soil + droopy leaves = Overwatering
Light pot + dry soil + droopy leaves = Underwatering
Overwatered leaves feel swollen and heavy. Underwatered leaves feel dry and papery. When in doubt, let soil dry out—it’s safer to underwater than overwater.
Can I prevent yellowing entirely?
Not entirely—some yellowing in late flower is natural. But you can minimize issues by:
Watering only when top 2-3″ of soil is dry
Maintaining pH 6.0-6.5 (soil) or 5.8-6.2 (coco)
Feeding at 1/4 to 1/2 strength for autoflowers, full strength for photoperiods
Keeping lights at proper distances
Starting with quality genetics like our beginner-friendly strains
This guide is for outdoor collectors. If you’re growing indoors with controlled environments, climate doesn’t matter, since you can grow any strain. But outdoors? Australia throws everything at you.
From Far North Queensland’s stifling 90% humidity and monsoon rains, to Perth’s relentless 45°C summer days with months of drought, to Tasmania’s short growing season that ends with March frosts. Getting outdoor strain selection wrong means watching months of work rot from bud mould, shrivel from heat stress, or get killed by early cold snaps.
This guide covers over 40 strains from our range, each matched to specific Australian outdoor climate zones. Whether you’re battling tropical humidity, desert heat, unpredictable coastal weather, or racing against frost, you’ll find genetics that actually survive and thrive in your outdoor conditions.
Why Australia Isn’t One Climate
Most strain advice you’ll read online was written for the northern hemisphere, where a country is usually one growing region with a bit of variation at the edges. Australia does not work like that. A grower in Cairns and a grower in Hobart are not doing the same activity in different weather. They are solving completely different problems, and a strain that solves one will fail at the other.
The distance is the easy part to grasp. Darwin sits closer to the equator than Havana. Hobart sits at the same latitude as Barcelona. Between them you have wet tropics, dry tropics, subtropics, Mediterranean, temperate, and cool temperate, and every one of those has a different relationship between when a plant wants to finish and what the sky is doing at the time.
What that means practically is that the question “what’s the best strain to grow outdoors in Australia” has no answer. There is only the best strain for your specific finish window, and everything below is about working out what yours is.
The One Variable That Decides Everything: Your Rain Date
Growers new to outdoor work tend to fixate on heat. Will it get too hot, will it get cold enough at night, what’s my average summer temperature. Those matter at the margins, but they are almost never what loses a crop in this country.
What loses crops is moisture arriving while the buds are still on the plant. Dense flowers plus sustained humidity plus poor airflow equals botrytis, and botrytis can take a cola from perfect to compost inside three days. Heat stress stunts a plant. Cold slows it. Rot ends it.
So the single most useful thing you can know before you choose a strain is roughly when your area gets consistently wet in autumn, and then count backwards. A strain that finishes two weeks before your rain typically arrives is a strain you will probably harvest. A strain that finishes two weeks after it is a strain you will probably be cutting down early and disappointed with. That relationship, between flowering length and rain date, decides more outcomes than genetics quality ever will.
It also explains a pattern that confuses people: why a strain can be perfect in Perth and a disaster in Coffs Harbour at the same latitude. Perth’s autumn is dry. The Northern Rivers autumn is not. Same sun, same length of season, completely different answer. Jason’s guide to growing cannabis outdoors in Australia works through the planting calendar and the regional harvest deadlines that come out of this, and it’s the companion piece to everything below.
The Trade-Off Every Outdoor Grower Is Actually Making
Once you understand the rain date, the real decision becomes obvious, and it is not which strain is best. It is how much risk you are willing to carry for extra weight.
Longer-flowering genetics generally produce more. They have more time to stack, more time to build resin, and more time to develop the terpene complexity that makes a plant worth growing rather than just worth harvesting. They also spend that extra time exposed. Every additional week in flower is another week of weather you do not control.
Shorter-flowering genetics give up some of that ceiling and buy you certainty in exchange. You take less off the plant, and you take it off cleanly, in dry weather, at the moment you chose rather than the moment the forecast forced.
Neither is the right answer in the abstract. In Queensland, where the season is long and the autumn is forgiving, running a twelve-week plant is a reasonable bet. In Tasmania it is not a bet, it is a donation. The growers who consistently do well outdoors in this country are not the ones with the best genetics. They are the ones who matched the flowering window to their own weather and then stopped being greedy about it.
🧠 Jason: The Mistake I See Every Autumn
Every year around March I get the same message. Plant looks incredible, trichomes aren’t there yet, and there’s a week of rain coming. What do I do. And by the time someone is asking that question the decision has already been made for them months earlier, when they picked a strain that finishes later than their weather allows.
If you take one thing from this page, take this: choose your strain backwards from your rain, not forwards from your wishlist. Work out when your area reliably turns wet, subtract the flowering time, and that tells you your latest safe planting date and your longest safe flower. Then pick from what fits. It is a less exciting way to choose a strain and it is the reason some people harvest every year and others tell you the weather beat them again.
Your Microclimate Beats Your State
The tables below sort by region because that is the only practical way to organise it, but state lines are a rough instrument and you should treat them as a starting point rather than a verdict.
The Adelaide Hills and the Adelaide plains are forty minutes apart and are not the same growing environment. The Hills are cooler and wetter and behave more like temperate Victoria. Perth and Margaret River are both Western Australia, and one is Mediterranean while the other is genuinely wet in autumn. The Sydney basin holds warm sheltered pockets and cold damp gullies within the same suburb.
Elevation, aspect, and shelter all move you around inside your zone. A north-facing slope with morning sun and afternoon shelter can gain you a fortnight over a low, still, south-facing yard in the same postcode. Cold air pools in hollows, so the bottom of a gully frosts before the slope above it. A wall or a fence that holds heat overnight changes what your plant experiences regardless of what the regional average says.
The practical version: find the table row that matches your region, then adjust for what you can see out your own window. If you are damper, cooler, or more shaded than your region’s description, treat yourself as the zone south of you. If you are drier, warmer, and better exposed, you have more room than the table gives you.
What To Do If You’re On The Boundary
Plenty of growers sit right on the edge, where the strain they want finishes just slightly later than the weather comfortably allows. There are four honest ways out of that, and only one of them is giving up on the strain.
Run a fast version. These finish meaningfully quicker than the standard photoperiod while keeping the same genetics behind them, which is often exactly the buffer a marginal season needs. Our guide to fast version cannabis seeds explains how they differ from both photoperiods and autos, and the fast version range is where to browse.
Switch to an autoflower. Autos run on a fixed clock from germination and ignore day length entirely, which takes the seasonal calendar out of the decision. You give up some yield ceiling and you get certainty, plus the option of multiple runs in a season. Our autoflower versus photoperiod comparison covers the trade-off properly, and the autoflower range has the options.
Plant earlier and accept a smaller plant. Getting in the ground a few weeks sooner shortens your veg and costs you size, but it moves the whole finish window forward into safer weather. A smaller plant you actually harvest beats a bigger one you lose.
Cover it. A greenhouse, a poly tunnel, or even a temporary rain cover over the canopy for the final fortnight changes the calculation more than most growers expect. You are not trying to control the climate, only to keep water off dense flowers during the window where water is the enemy.
What Actually Makes Genetics Climate-Resilient
Strain descriptions throw around “mould resistant” and “hardy” without explaining what produces those traits, which makes them impossible to judge. Three things actually do the work.
Bud structure. This matters more than any other single factor in a humid finish. Open, airy flower structure lets moisture move through and dry out. Dense, tightly packed colas hold it against the plant, and that trapped moisture is where rot starts. Landrace sativas tend to be open. Modern high-yield indica-dominant hybrids tend to be dense. That structural difference is why Durban Poison handles a wet Northern Rivers autumn better than plants with twice its bag appeal.
Where the genetics evolved. A landrace carries its home climate in it. Afghani-descended genetics were selected in dry mountains and handle heat and low humidity well. South African and Mexican landraces evolved under intense sun with a dry finish. Dutch-bred hybrids were optimised for cool, short northern European seasons, which is why several of them hold up in Tasmania where warmer-climate genetics stall.
Flowering length. The least glamorous factor and the most decisive. A nine-week plant simply has fewer opportunities to meet bad weather than a fourteen-week plant. Much of what gets marketed as resilience is really just a shorter exposure window, and that is worth knowing when you’re comparing two strains that both claim to be tough. Skunk #1 Feminised is a useful middle-ground example: stable, relatively fast-flowering photoperiod genetics without the extended finish of a long-season sativa.
Yield sits slightly apart from those three. The heaviest producers in the range, Moby Dick being the clearest example, tend to want dry heat and plenty of room rather than resilience in the usual sense. Give it Perth or the Adelaide plains and full sun and it will out-produce anything else on the list. Put the same plant in a humid coastal autumn and the size that makes it impressive becomes the thing that works against it.
Using the Tables Below
What follows is the strain-by-strain breakdown by climate zone. Read it with the framework above in mind rather than as a shopping list, because the right choice is the one that fits your finish window, your microclimate, and how much risk you want to carry.
One last thing worth saying plainly: humidity brings pests as well as rot, and the two often arrive together in a wet autumn. Our organic pest control guide covers identification and treatment without reaching for anything harsh, and getting the cure right afterwards is what turns a crop you saved into one you’re glad you grew.
Quick Reference: Match Your Climate to the Right Strain
Pro tip: In Far North QLD, harvest before November wet season. Plant July-August for October harvest. Autoflower versions finish even faster (9-11 weeks total).
What are the best trending strains for Australian conditions?
Runtz, Gorilla Zkittlez, and Gelato (Fast version) all handle Australian conditions well while offering modern genetics that collectors want.
What’s the most mould-resistant strain?
Durban Poison and Amnesia Haze are consistently rated highest (9/10) by Queensland/NT collectors.
What’s the most underrated strain for Australian conditions?
Black Domina. It’s a 95% Indica with elite drought tolerance, fast finish (7-8 weeks), and works across multiple climates.
Can I grow Sativas in Melbourne or Hobart?
Melbourne: Yes—choose fast Sativa hybrids under 10 weeks (Jack Herer, Blue Dream, Bruce Banner). Hobart: Risky. Pure Sativas take 12-14 weeks. Use Auto Amnesia Haze for Sativa effects with Tasmania timing.
Should I choose photoperiod, autoflower, or fast version?
Photoperiods: Maximum control and yields (need 4+ months good weather) Autoflowers: Short seasons, simplicity, multiple crops per year Fast Versions: Photoperiod quality with 1-2 weeks faster finish (best for marginal climates)
How do I protect plants during extreme heat?
Use 30-50% shade cloth (12pm-4pm), water early morning, mulch heavily (10cm), and use large pots (45-60L minimum). Plant heat-tolerant strains: Blue Dream, White Widow, Black Domina.
What strains work across multiple climates?
These “all-rounders” adapt to varied conditions: Blue Dream, Gorilla Glue, Northern Lights, White Widow.
Does pot size matter in hot climates?
Absolutely. Larger pots provide more water reservoir and better insulation. Minimum 30L, better 45-60L. Fabric pots are best for hot climates—they allow root air-pruning and temperature regulation.
Final Thoughts
Strain selection is the most important factor for Australian outdoor success. Match genetics to your specific challenge:
Disclaimer: This guide is for educational purposes. Sacred Seeds sells cannabis seeds as collectible souvenirs. Germination and cultivation may not be legal in your jurisdiction. Always check local laws.
We offer top-quality heirloom, herb and cannabis seeds for souvenir purchases. We offer genuine domestic Australia shipping and support, and ship our seeds using 100% Earth-friendly and compostable packaging.
Get fresh Australia cannabis seeds delivered to your door in less than a week from payment.