Drying is where months of careful growing either pays off or gets quietly ruined. You’ve harvested your cannabis — now the question is whether the terpenes, the flavour, and the potency you’ve spent that time building will make it through to the jar. Get the drying right and they will. Rush it, and the best genetics in the world won’t save the result.
This guide covers everything you need: the right environment, the three drying methods and when to use each, a step-by-step process, how to handle the specific challenges Australian conditions throw at you, and what to do when things go wrong. Slow is the theme throughout.

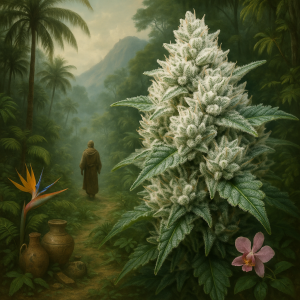
Why Drying Matters More Than Most Growers Realise
When Jason and I started Sacred Seeds, one of the first things we noticed was how many growers would do everything right during the grow — proper nutrition, good training, knowing when to harvest — and then lose the quality in the dry. It broke our hearts, because we knew how much work they’d put in. The buds looked fine. They just smelled like grass clippings and tasted harsh. Between us, we did more harvesting and drying in California in our younger days than we’d care to count — enough to last three lifetimes, as Jason likes to say. We learned what a bad dry costs the hard way, long before we brought those lessons back to Australia.
The terpenes responsible for a strain’s aroma and flavour are volatile compounds. They evaporate readily under heat and dry out quickly without adequate humidity. Dry too fast and they’re gone — permanently. Dry too slow and mould takes over. The window is real and it rewards patience and attention, not speed.
The other thing happening during a slow dry is chlorophyll breakdown. Fresh-cut cannabis contains high levels of chlorophyll that contribute to the harsh, green taste of uncured material. A 10–14 day dry at the right temperature and humidity allows those compounds to break down naturally. Rush to 4–5 days and they don’t. The cure can help but it can’t fully fix what a bad dry destroys.
The Biggest Mistake: Drying Too Fast
If there’s one thing I’d change about how most Australian growers approach the dry, it’s the timeline. The excitement of harvest, the anxiety about mould, the lack of a dedicated space — all of it pushes people toward a 4–5 day dry in a warm room. The result is always the same: buds that smell like hay, smoke that catches in the throat, and a flavour profile that doesn’t come close to what the genetics can produce.
A 3–5 day dry produces buds where terpenes have largely evaporated, chlorophyll hasn’t broken down, the outer surface feels crispy while moisture is still trapped in the centre — a false dry that causes problems when the jar goes on — and the characteristic hay smell that no amount of curing will fully reverse. The terpenes that left during a fast dry do not come back.
The fix is straightforward: aim for 10–14 days. It requires patience and some environment management, but the difference in the final product is not subtle. Strains bred for complex terpene expression in Australian conditions particularly reward a slow dry — the full profile only comes through if the dry preserves what the plant produced.
The Ideal Drying Environment
The standard reference point is 15°C and 60% RH — the so-called 60/60 rule. In practice, achieving 15°C in an Australian summer is difficult without air conditioning, and coastal humidity can push well above 60% without intervention. The table below gives the ideal targets alongside what’s acceptable and what starts causing problems.
| Factor | Ideal | Acceptable | Danger Zone |
|---|---|---|---|
| Temperature | 15–18°C | 13–21°C | Below 10°C or above 24°C |
| Humidity | 55–60% RH | 50–65% RH | Below 45% or above 70% |
| Airflow | Gentle, indirect circulation | Light movement, not directly on buds | No airflow or direct fan on buds |
| Light | Complete darkness | Minimal ambient light | Direct sunlight or bright light |
Temperature: Cooler preserves terpenes. Every 10°C increase roughly doubles the rate of terpene evaporation. If 15°C isn’t achievable, aim for 18–20°C. Above 24°C the losses accelerate quickly.
Humidity: This is the harder variable to manage in Australia. Summer humidity on the coast can sit at 70%+ RH; inland areas in winter can drop to 30% RH. Both extremes require intervention — a dehumidifier for high humidity, a humidifier or wet towels in an enclosed space for low humidity. A $15 digital hygrometer placed at bud height is the most useful piece of equipment you can add to a drying setup.
Airflow: The goal is gentle circulation — air moving through the space, not wind across the buds. Point a small oscillating fan at the wall or ceiling, not at the branches. This prevents stagnant pockets where mould develops without accelerating the dry unevenly.
Light: Complete darkness. Light degrades THC and terpenes during drying. Cover windows with blackout curtains or cardboard if your drying space has natural light.

Drying Methods — Whole Plant, Branch Hang, Wet Trim
There are three main approaches and the right one depends on your space, your climate, and your priorities.
Whole Plant Hang
Cut the entire plant at the base and hang it upside down intact. This is the slowest method — 12–16 days — and produces the best terpene preservation because moisture moves gradually from the thick stems through to the buds rather than evaporating directly from bud surfaces. Minimal handling means minimal trichome damage. The downside is the space requirement — you need significant vertical clearance and horizontal spread. In high humidity environments, the slower dry also increases mould risk. This is the method to use when you have the space, can control the environment, and want maximum quality.
Branch Hang
Cut the plant into individual branches and hang each one separately. Moderate dry time — 10–14 days — with more flexibility than the whole plant method. Easier to check individual branches for readiness and remove them as they finish rather than waiting for the entire plant. Slightly more handling means marginally more trichome exposure, but in practice the difference is minor. This is the practical default for most home growers — the balance between quality and manageability is right.
Wet Trim and Hang
Trim all leaves immediately after harvest, then hang individual buds or small sections. Faster dry — 7–10 days — because the moisture-holding leaf material is removed upfront. Trimming is easier when the plant is fresh. The trade-off is more terpene loss from the faster dry and significantly more handling. In high-humidity coastal environments where the slower whole-plant and branch methods raise mould risk, wet trimming is often the right call despite the quality trade-off. Mould on finished buds is worse than some terpene loss.
Jess: My default is branch hang when conditions allow. If I’m harvesting in coastal Queensland in February and the humidity is sitting at 75% RH, I wet trim — the mould risk isn’t worth the terpene difference. For autumn harvests in more controlled conditions, branch hang every time.
Step-by-Step: How to Dry Cannabis
Step 1 — Prepare the Drying Space Before Harvest
Have the space ready before you cut anything. Setting up after harvest while holding freshly cut plants is avoidable stress. You need: a dark room or closet, string or wire for hanging, a thermometer and hygrometer at bud height, a small oscillating fan, and a dehumidifier or humidifier depending on your ambient conditions. Run the setup for 24 hours before harvest to confirm you can hold your target temperature and humidity range.
Step 2 — Harvest and Initial Prep
Harvest in the early morning before heat and light exposure — terpene content is at its highest then. If you’re unsure whether your plants are ready, the trichome harvest guide covers exactly what to look for. Cut and remove large fan leaves immediately; they hold moisture and slow drying without adding value. Leave sugar leaves on for now — they protect trichomes during the dry and are easier to trim once the plant has dried. Inspect everything for mould or pest damage and discard affected material before it goes into the drying space. Handle gently throughout — trichomes break off with rough treatment.
Step 3 — Hang and Monitor
Hang branches upside down with space between them — branches touching each other restricts airflow and creates mould conditions. Check temperature and humidity twice daily for the first week. Smell the space each time: fresh cannabis throughout is correct; hay smell means drying too fast; musty smell means humidity is too high. Rotate branches if some areas of the room are drying faster than others. Resist the urge to handle buds more than necessary.
Step 4 — The Stem Snap Test
From day seven onwards, check readiness daily using the stem snap test. Small stems — pencil thickness or less — should snap with a clean crisp sound when bent. Larger stems will bend but start to crack rather than flex smoothly. If stems bend without resistance and feel rubbery, keep drying. If all stems snap easily and buds feel brittle and crumbly, you’ve gone slightly too far — but this is recoverable in the cure with humidity packs.
Additional readiness indicators: buds feel dry on the outside with slight give when gently squeezed; smaller buds are fully dry while larger ones retain slight moisture; aroma is strong and characteristic of the strain, not hay-like. When in doubt, err slightly moist — jars can continue the process, but you can’t reverse over-drying.
Step 5 — Trim and Move to Cure
Once the stem snap test is positive, trim remaining sugar leaves — save them for edibles or hash — and move buds to glass jars filled 70–80% full with a small hygrometer if you have one. If you’ve been running a flush in the final week (which makes a noticeable difference to flavour — the nutrients guide covers flush timing in detail), your buds should be clean and ready for the jar. Seal and begin curing. Jason covers the curing process in detail in his complete guide to curing cannabis.

Drying in Australian Conditions — Common Challenges
High humidity — coastal areas and summer
70–80% RH slows drying and raises mould risk significantly. A dehumidifier is the effective solution — desiccant packs around the space help but won’t manage coastal summer humidity on their own. Increase airflow, consider wet trimming to remove moisture-holding leaf material, check buds twice daily for mould, and dry in smaller batches to reduce the moisture load in the space.
Low humidity — inland areas and winter
30–40% RH causes a 5–7 day dry that destroys terpenes. Use a humidifier to bring RH up to 55–60%. Reduce airflow to the minimum needed for circulation. Dry whole plant rather than branches to slow the process. Wet towels in an enclosed space provide a low-cost humidity boost — bowls of water help but require close monitoring.
High temperature — summer heat
Above 24°C terpene loss accelerates. Dry in the coolest room available — interior rooms and bathrooms tend to be cooler than rooms with external walls. Air conditioning is worth running for the 10–14 day dry if it’s available. Avoid drying in sheds, garages, or any outdoor structure in summer. If no air conditioning: dry at night when temperatures drop and keep the space closed during the warmest part of the day.
Limited space
A wardrobe or closet works well — hang clothes elsewhere temporarily and set up string for branches. A 60×60 cm grow tent is a practical dedicated drying space for small to medium harvests with full environment control. Drying racks are more space-efficient than hanging for very limited spaces. Dry in batches if necessary rather than crowding the space and restricting airflow.
Common Drying Mistakes
Pointing the fan directly at buds. Causes uneven drying — buds closest to the fan over-dry while others are still moist. Point the fan at the wall or ceiling for indirect circulation.
Drying in light. Light degrades THC and terpenes during the dry. Complete darkness is the target. Cover windows, use a dark room or tent.
Handling buds too often. Every time you open the drying space you disrupt temperature and humidity. Every time you touch buds you knock off trichomes. Check once in the morning and once in the evening — no more.
Using the feel test instead of the stem snap test. Buds feel dry on the outside after 5–7 days but moisture is still in the stems and centre. The stem snap test is the reliable indicator, not surface texture. Jarring too early redistributes internal moisture back to the outer bud and creates mould conditions.
Ignoring the smell. Your nose is the most useful early warning system in the drying space. Hay smell means drying too fast — increase humidity, lower temperature, reduce airflow. Musty smell means mould is developing — increase airflow, decrease humidity, inspect all buds immediately.
When Things Go Wrong
Dried too fast — hay smell
The terpenes that evaporated during a fast dry are gone and won’t return. The situation is partially recoverable: place buds in jars with 62% Boveda or Integra humidity packs, seal for 24 hours to rehydrate slightly, then proceed with a long cure of six to eight weeks minimum. The hay smell will fade somewhat and the smoke will smooth out, but the full terpene profile the genetics were capable of is not coming back. The cure is the best tool available at this point — use it thoroughly.
Mould found during drying
Remove affected buds immediately and discard them — don’t try to salvage mouldy material. Inspect all remaining buds carefully under bright light, checking inside dense colas where mould typically starts. If mould is isolated to one or two buds the rest can usually be saved. Immediately increase airflow, decrease humidity, and space out remaining branches. Consider wet trimming remaining buds to remove the moisture-holding leaf material that contributed to the problem. Monitor twice daily until dry.
Over-dried — crispy buds
Partially recoverable. Place buds in jars with 62% Boveda packs, seal for 48–72 hours. Buds will reabsorb moisture from the pack and become less brittle. Proceed with normal curing. The texture improves and the smoke becomes less harsh, but terpenes lost to over-drying don’t return. The cure will still improve what’s there — don’t skip it.
Planning your next grow?
Answer six questions and Jess will match you to three strains based on your setup, experience, and goals.
Cannabis Drying — Frequently Asked Questions
Can I speed up drying with a dehydrator or oven?
No. Heat destroys terpenes and degrades THC — you’ll end up with harsh, flat-tasting buds regardless of how good the genetics were. If you need a quick sample, the paper bag method (a small bud in a paper bag for 3–4 days) is the least-damaging fast option. For your main harvest, the 10–14 day dry is not optional if quality matters to you.
Should I trim before or after drying?
Both methods work and the right choice depends on your conditions. Wet trimming before drying is easier — leaves are pliable and the work is faster — but it speeds up the dry and reduces terpene preservation. Dry trimming after drying is more tedious because leaves are brittle, but it slows the dry and preserves terpenes better. In high humidity where mould risk is real, wet trimming is often the safer call despite the quality trade-off.
How do I know if my buds have mould?
Mould appears as white, grey, or black fuzzy growth, usually starting inside dense colas where moisture is trapped. The smell is musty or like mildew — distinctly different from cannabis. If you suspect mould, break open the densest buds and check inside under bright light. Any fuzzy growth means discard that bud immediately and inspect everything else.
Can I dry in a cardboard box?
It works for a small harvest in a pinch — punch holes for airflow, place in a cool dark space, and monitor closely. The limitation is environment control: you’re at the mercy of ambient conditions. A dedicated closet or small tent is significantly better, but a cardboard box beats drying in a warm bright room.
What if I don’t have a hygrometer?
A digital hygrometer costs $10–15 and is the most useful piece of kit for drying and curing — worth getting. Without one, rely on the stem snap test and your nose. Stems should snap cleanly, buds should feel dry on the outside but not crumbly, and the smell should be strong and pleasant throughout the dry. It’s less precise but experienced growers managed without hygrometers for decades.
How long can I leave buds hanging before they over-dry?
In ideal conditions (15–18°C, 55–60% RH), you can safely dry for 14–16 days. In drier conditions (50% RH or lower), over-drying can happen by day 10–12. Check daily from day seven using the stem snap test. Once smaller stems snap cleanly, move to jars.
Can I dry different strains together?
Yes, but different strains — and different plants of the same strain — dry at different rates. Denser buds take longer than airy ones. Check each branch individually and remove as they finish rather than waiting for everything to be done at the same time. Label branches if you’re drying multiple strains.
What should I do with trim and sugar leaves?
Keep them. Sugar leaves covered in trichomes are valuable for edibles, cannabutter, hash, or concentrates. Dry them alongside your buds and store separately. Even fan leaves can go into low-potency edibles or compost — nothing from a good harvest needs to go in the bin.
Is it normal for buds to smell different during drying?
Yes. Fresh-cut plants have a strong green smell. From days 3–5 the smell may soften or develop a mild hay note — this is normal if it’s mild and temporary. By days 7–10 the characteristic strain aroma should reassert itself and strengthen. A persistent strong hay smell or any musty note indicates a problem that needs to be addressed.
Can I dry in a grow tent?
A grow tent is an ideal drying space — remove lights, set up hanging lines, add a small fan and hygrometer, and you have a controllable dark environment. Clean the tent before use to remove any pests or mould spores from the growing cycle. Many growers use the same tent for both growing and drying, cycling between them.
What if buds feel dry outside but stems won’t snap?
Keep drying. Moisture is still in the stems and the centre of the buds — the outer material dries first. Jarring now will redistribute that internal moisture back to the bud surface, which leads to mould in the jar. The stem snap test is the correct indicator, not surface feel.
Should I remove stems before curing?
Remove large stems and cure buds on smaller stems — they fit better in jars and are easier to handle. Some growers cure with all stems intact, which slightly slows moisture loss during the cure. Either approach works as long as the dry is complete before anything goes in the jar. Never jar wet stems.
Can I use a non-oscillating fan?
Yes — point it at the wall or ceiling rather than at the buds. The goal is air movement through the space, not airflow across bud surfaces. A stationary fan aimed at the wall keeps air circulating and prevents the stagnant pockets where mould develops.
A proper dry takes 10–14 days and rewards patience with buds that smell, taste, and smoke the way the genetics are capable of. The environment management isn’t complicated — temperature, humidity, darkness, and gentle airflow — but it does require daily attention. Get those conditions right and hold them, and the cure that follows has something worth working with.
Jason covers the curing process in the next guide — how to dial in the cure for maximum quality, the science behind what’s happening in the jar, and why most growers stop the cure too early.
— Jess
Related Reading
When to harvest cannabis in Australia — reading trichomes, regional timing, and harvest indicators beyond pistil colour.
Autoflowering cannabis seeds — if you’re planning your next grow, the auto range suits multiple harvests per season.
How to grow autoflowers week by week — the full grow guide from seed to harvest, covering everything before the dry.
Browse all cannabis seeds — over 50 feminised, autoflower, and photoperiod strains shipped from Australia.
Seeds are sold strictly as novelty collector’s items. They contain no THC or CBD. This page does not constitute medical or legal advice. By purchasing you agree to our terms and conditions. Always check local laws before germinating or cultivating cannabis.